What should cookies look like when done? It’s the eternal question that haunts both novice bakers and seasoned cookie enthusiasts alike. That perfect moment when you should pull your cookies from the oven can make the difference between cookie perfection and disappointment.
Identifying when cookies are done requires understanding the visual cues that signal perfection. Whether you’re baking chocolate chip classics, sugar cookies, or something more adventurous, knowing what to look for will transform your baking game. The edges should be set and slightly golden, while the centers might still appear slightly underdone—don’t worry, they’ll continue cooking after you remove them from the oven.
The Perfect Cookie: Visual Indicators of Doneness
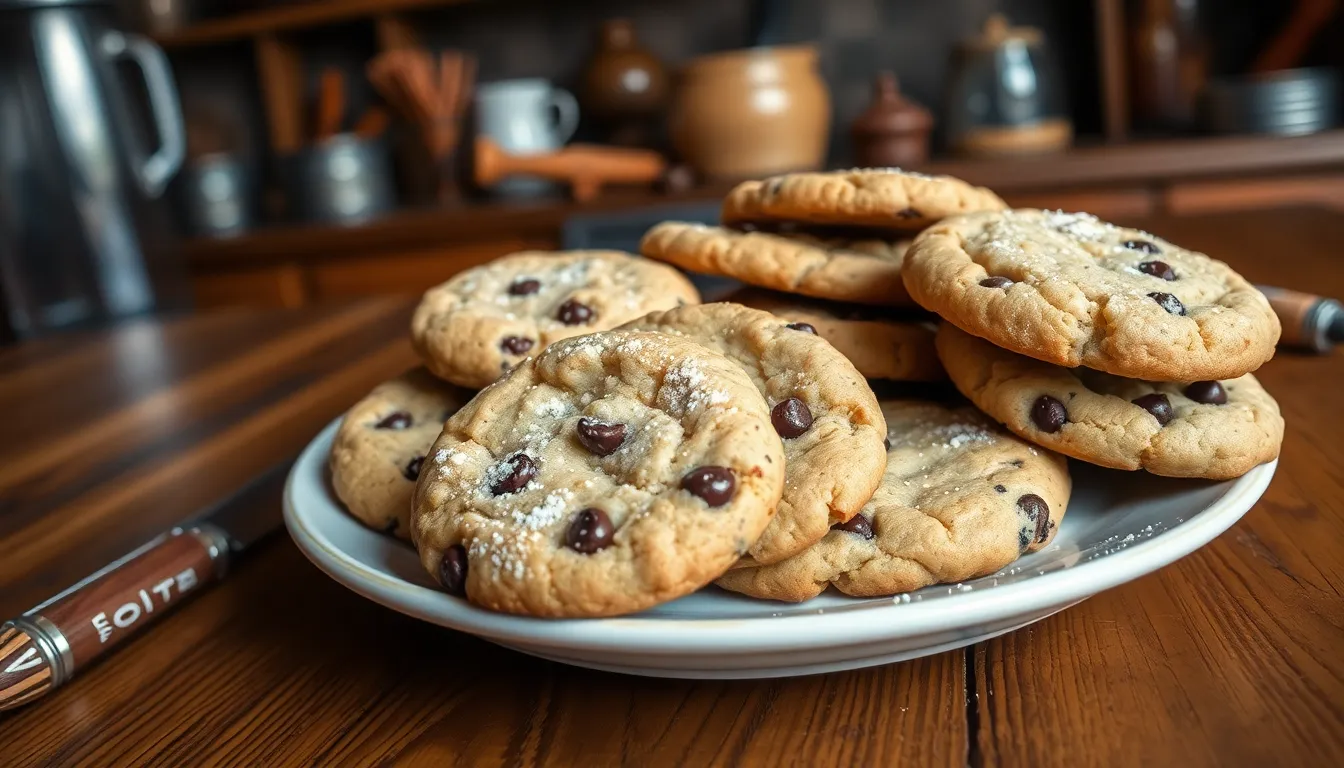
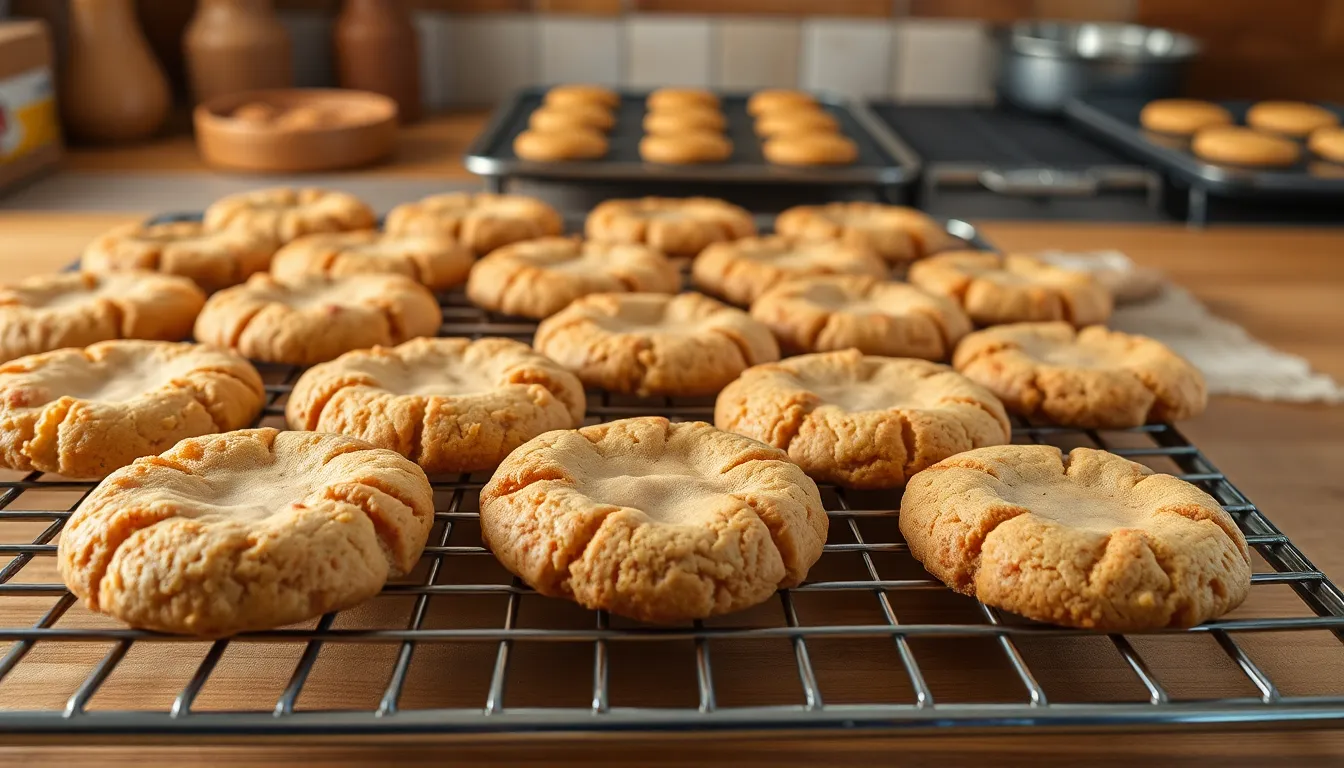
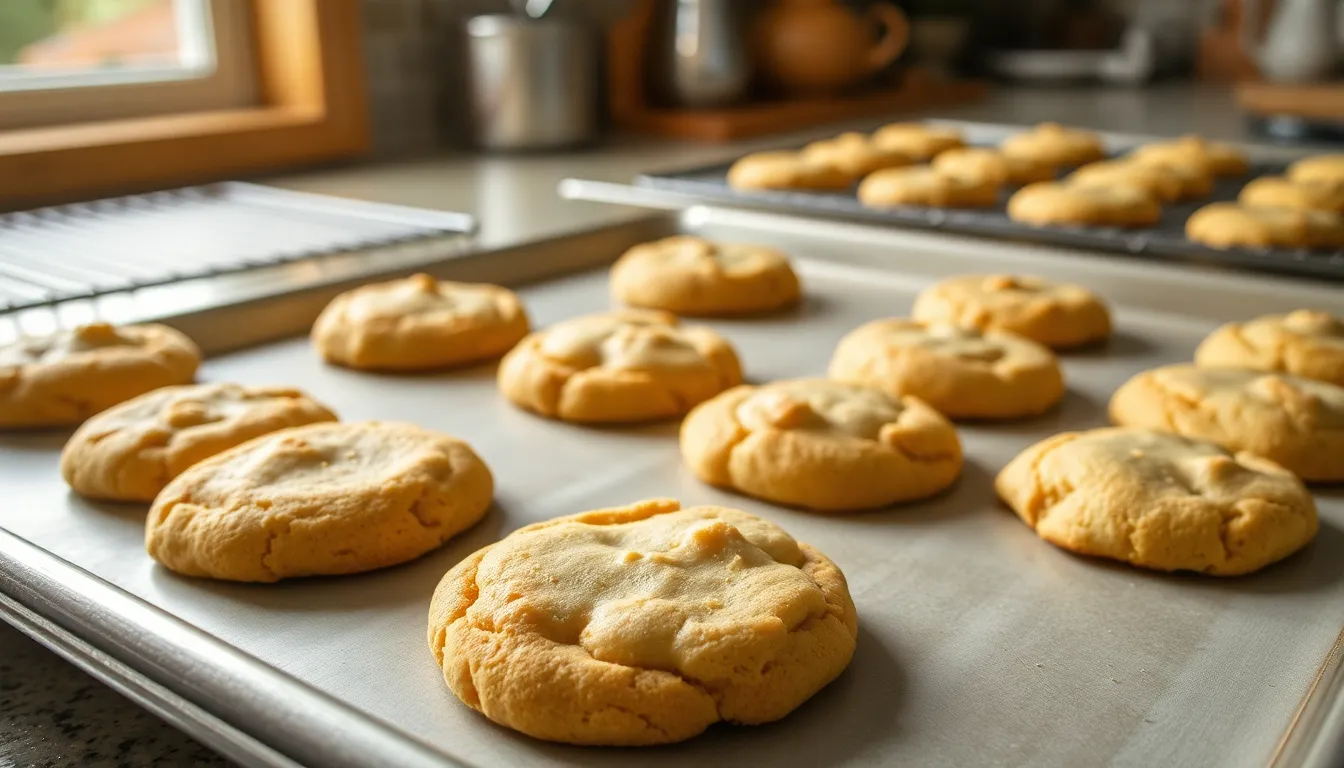
Recognizing when cookies are perfectly baked relies on several visual cues that signal ideal doneness. Cookie edges should display a golden-brown color while the centers remain slightly lighter, creating an appealing color gradient. Texture changes become apparent as the cookie surface transforms from shiny and wet to matte and set.
Surface characteristics provide reliable indicators of cookie perfection. Look for slight cracking on top, which signals that the exterior has set while allowing the interior to remain soft and chewy. Cookies should appear set around the edges but maintain a slightly soft-looking center that will firm up during cooling.
Color variations differ among cookie types, with chocolate chip cookies exhibiting golden-brown edges and lighter centers. Sugar cookies display a pale golden hue with minimal browning, while gingerbread cookies show a deeper amber tone when properly baked. Oatmeal cookies develop a rich golden-brown appearance throughout with slightly darker edges.
Size and thickness changes happen during baking, with cookies typically spreading outward and settling downward as they approach doneness. Cookies should maintain their general shape while slightly puffing up during baking, then settling back slightly when perfectly done. Checking for a slight lift at the edges with a flatter center confirms the cookie has reached the ideal baking point.
Recommended Products

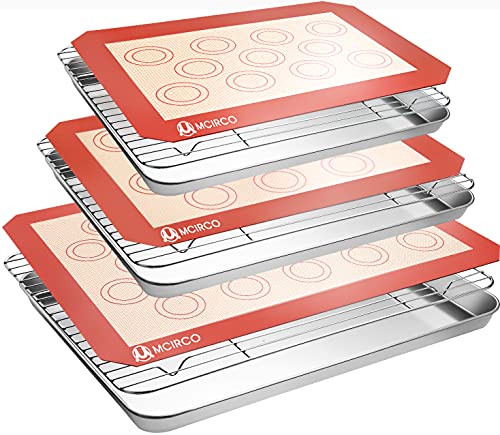
HEAVY DUTY STAINLESS STEEL STURDY DESIGN: Set of 2 cooling racks for half sheet baking pans are food-safe, professional grade 304 (18/8) stainless steel with strong, heavy duty wire grids, small holes, smooth no-snag edges, and a full 1 inch height resulting in greater all around airflow for even cooking, cooling and roasting every time

【Healthy Material】 The baking sheet with wire rack are made of high quality stainless steel without any chemical coating, wouldn't create chemicals at high-temperature baking, great replacement to aluminum pan, rust free and healthy for your daily use.

HEAVY DUTY STAINLESS STEEL, STURDY DESIGN: Set of 2 cooling racks for quarter sheet baking pans are food-safe, professional grade 304 (18/8) stainless steel with strong, heavy duty wire grids, small holes, smooth no-snag edges, and a full 1 inch height resulting in greater all around airflow for even cooking, cooling and roasting every time
Cookie Edges: Golden Brown Is the Goal
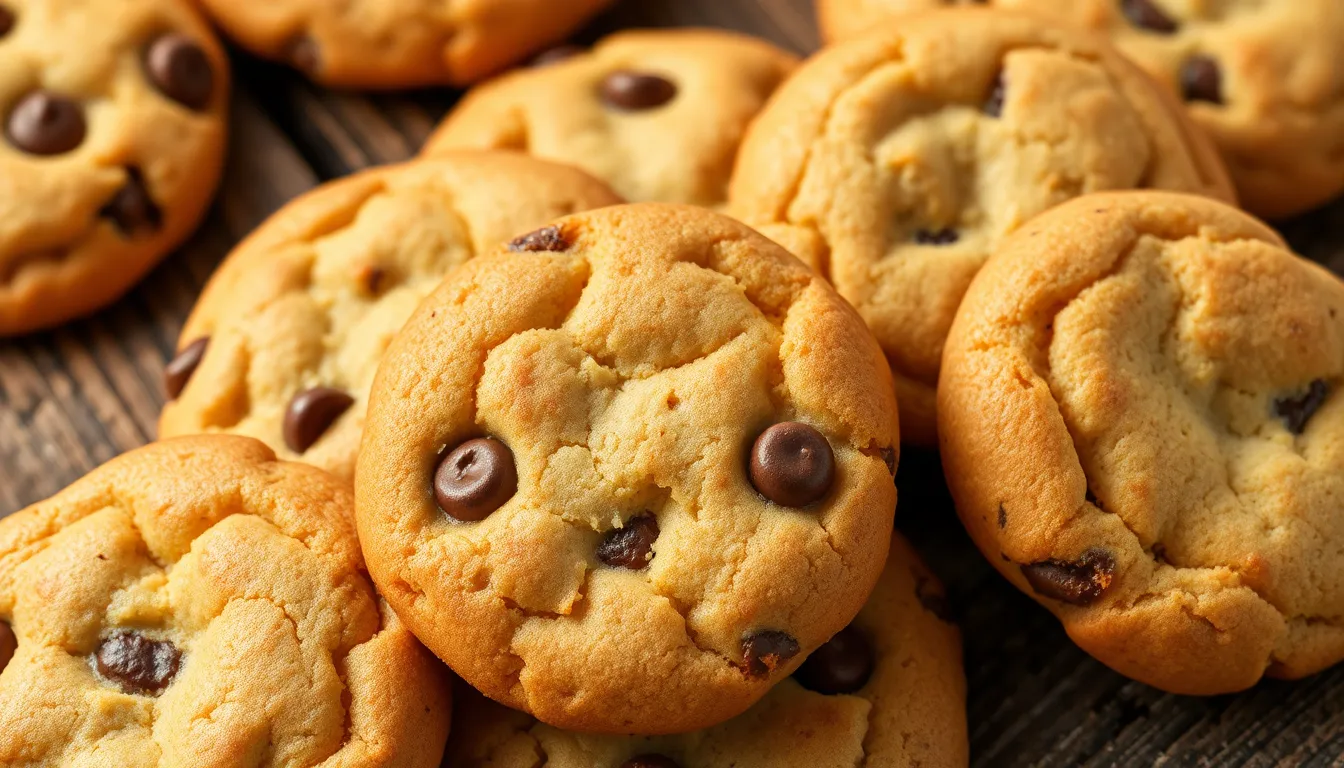
Golden brown edges serve as the primary visual indicator that your cookies are perfectly baked. These crisp, caramelized perimeters create a delicious contrast with softer centers and signal that the cookies have reached optimal doneness.
Recommended Products

Oven and grill safe for leave-in use while cooking
FOOD SAFETY: Thermometer displays true oven temperature instantly to ensure safe food preparation

Reliably precise oven temperature in one handy little tool
When to Pull Cookies with Golden Edges
Perfect cookies display distinctly golden brown edges while maintaining lighter centers. Look for a color gradient that transitions from deeper golden at the perimeter to a lighter shade in the middle. For chocolate chip cookies, these edges take on a rich, amber hue that indicates proper caramelization of sugars. Sugar cookies require more subtle observation, as their golden edges appear more delicate and pale. Dark-ingredient cookies like gingerbread might show slightly darker brown edges compared to their centers.
Timing your cookie removal is crucial—cookies with evenly golden edges and slightly underdone centers are ready to come out. They’ll continue cooking on the hot baking sheet for 2-3 minutes after removal from the oven. Touch the edge gently; it should feel firm while the center remains slightly soft. Properly baked cookies develop a slight crispness around the edges that provides textural contrast with chewier middles.
Remember that cookie edges darken quickly in the final minutes of baking. Checking your cookies 2 minutes before the recipe’s suggested baking time helps prevent over-browning. Pale or white edges indicate underbaking, while dark brown or black edges mean you’ve left them in too long.
The Center of Your Cookies
The center of your cookie reveals its true character and doneness. While edges offer initial visual cues, examining the center confirms whether you’ve achieved your desired texture and taste profile.
Recommended Products

Baking mat (2-pack) for easy and convenient baking, roasting, or food prep
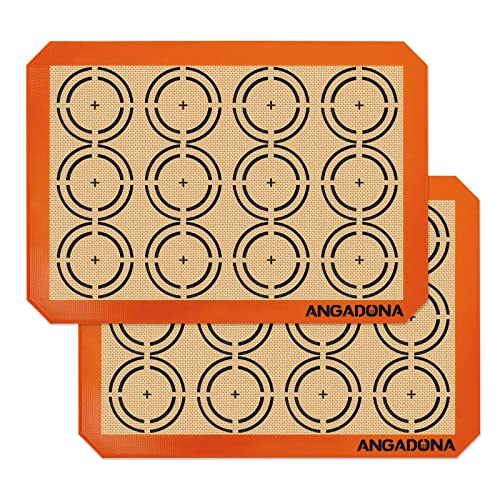
【NON-STICK & EASY TO CLEAN】-- Angadona Baking mats silicone for baking sheets are no stick surface for all foods, Easy clean by hand or dishwasher(top rack only)

Easy Cleanup: The surface helps reduce baked-on residue, and the mats can go in the dishwasher once cool for convenient cleanup between batches
Soft vs. Crispy Centers: What to Look For
Soft centers create that perfect chewy cookie experience many bakers aim for. When baking cookies with soft centers, look for a slightly puffy middle that appears set but not completely firm to the touch. These centers will be lighter in color compared to the golden-brown edges, creating an appealing visual contrast. Adding more brown sugar and an extra egg yolk in your recipe enhances this chewy texture, giving your cookies that melt-in-your-mouth quality.
Crispy centers deliver a completely different cookie experience. For cookies intended to be crisp throughout, expect a more uniform color from edge to center. These cookies typically appear lighter overall and produce a satisfying snap when broken in half. Crispy-centered cookies won’t show much difference between edge and center textures – they’re thoroughly baked to create that consistent crunch.
The toothpick test provides a reliable way to check your cookie centers. Insert a toothpick into the middle of a cookie – if it comes out with a few moist crumbs clinging to it, your cookies have reached that perfect stage of doneness. For even more precision, use a food thermometer to check the internal temperature, which should register between 190-205°F (88-96°C) for fully cooked cookies.
Your personal preference eventually determines what constitutes the perfect cookie center. Some cookie lovers prefer a slightly underdone, gooey center, while others enjoy a more thoroughly baked interior. The true test comes down to taste and texture – the cookie should feel soft and crumbly rather than raw or doughy (unless you’re specifically aiming for an ultra-gooey center).
Cookie Texture and Rise
Cookie texture and rise are crucial indicators of whether your cookies are perfectly baked. These elements work together to create that ideal balance between crispy exteriors and soft, tender interiors that make cookies so irresistible.
Recommended Products
King Arthur Baking Company Offset Spatula: extra flexible 4-inch blade with rounded tip and perfect flex decorates cakes and baked goods with controlled, comfortable precision; ideal for cakes, cookies, cupcakes, entertaining desserts, and everyday baking

Two Professional Cake Decorating Spatulas: PUCKWAY offset spatula set comes in two different sizes: 6 inch and 8 inch blade. This is your best choice to decorate a cake perfectly.

Small Offset spatula by Ateco
Texture
The texture of properly baked cookies features a crispy exterior paired with a soft interior. This textural contrast is what gives cookies their distinctive mouthfeel and appeal. Cookies that spend too much time in the oven become hard and unpalatable, losing their desirable chewiness. On the other hand, undercooked cookies remain overly doughy and may have an unpleasant raw flour taste. The perfect cookie offers resistance when bitten into but yields to a tender center that melts in your mouth.
Rise
Cookie rise varies significantly depending on the type of cookie and leavening agents in your recipe. Some varieties, like traditional sugar cookies, don’t rise dramatically by design, maintaining their cut shapes with minimal puffing. Others, such as chocolate chip cookies, should rise moderately in the oven before settling as they cool. Leavening agents like baking powder and baking soda create this rise by releasing gases when heated, causing the dough to expand. Proper rise indicates that your leavening agents are fresh and working effectively, resulting in cookies with the right thickness and texture.
The Importance of Cookie Spread
Cookie spread dramatically affects both the texture and appearance of your finished treats. Excessive spread transforms cookies into thin, overly crispy discs that often burn at the edges before the centers are fully baked. This uneven baking creates inconsistency throughout the batch, with some cookies perfectly done while others remain underbaked or overdone. Cookies that spread too much also lose their distinctive shape and can result in concentrated flavors that overwhelm rather than delight.
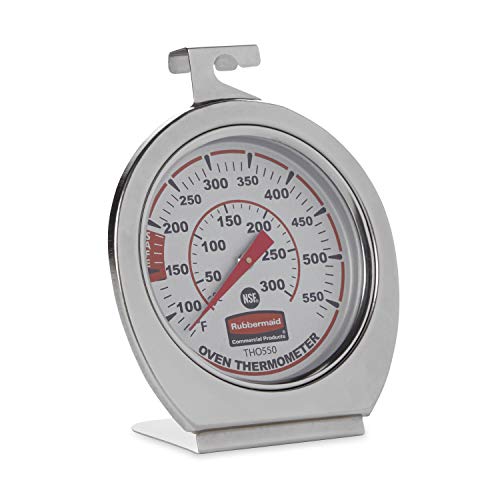
Several factors contribute to cookie spread, including dough temperature, baking surface preparation, and oven conditions. Warm dough spreads more quickly when baking begins, creating thinner cookies. Using greased cookie sheets encourages additional spreading as the dough slides too easily across the surface. Starting with warm cookie sheets from previous batches accelerates the spreading process before the cookies can set properly. Incorrect oven temperature—particularly when it’s too low—allows cookies to spread excessively before the structure sets.
For consistent, well-formed cookies, chill your dough before baking, use parchment paper instead of greasing sheets, allow baking sheets to cool between batches, and verify your oven temperature with an oven thermometer for accurate baking conditions.
Color Changes During Baking
Color transformation is the most reliable indicator of cookie doneness, with exact visual cues telling you exactly when to remove your cookies from the oven. As cookies bake, they undergo distinctive color changes that signal their progression from raw dough to perfectly baked treats.
Recommended Products

Fast and Accurate: 1 second response time! Meat thermometer digital features 3.9 inches food grade stainless steel probe and a high precision sensor which receives internal temp within seconds, accurate to ±0.9 degree Fahrenheit; Don’t spend any extra time leaning over a hot surface

No More Guesswork During Your Chill Cooking Time - professional digital thermometer devotes every beginner to becoming a prof! A good helper both in outdoor BBQ and Home party, It is the best gift for cooking enthusiasm and the useful kitchen gadget for festival meals

【Easy to Use】Easily release the meat probe at the push of a button, and control the backlight or power with another button. With TempPro, cooking becomes a seamless, stress-free experience
Golden Brown Edges
Golden brown edges are the primary visual indicator that your cookies are properly baked. This appealing color develops as the sugar in your cookie dough caramelizes and the Maillard reaction occurs between proteins and sugars. The edges typically darken first because they’re thinner and exposed to more direct heat. A uniform golden-brown perimeter creates an attractive contrast with the center and indicates that the structural integrity of the cookie has been established. When you notice this color transition happening, it’s time to start monitoring your cookies closely as they approach perfect doneness.
Uniform Coloring
Cookies display a characteristic color gradient when properly baked. The outer edges develop a deeper golden-brown hue while the centers remain slightly lighter. This gradient isn’t just visually appealing—it’s functional, indicating that your cookies will have the ideal texture contrast between crisp edges and tender centers. Cookies that remain pale throughout suggest underbaking, which can lead to doughy, undercooked centers that collapse when cooled. The center should still look set rather than raw, even if it’s lighter than the edges. This color differentiation varies by cookie type, with some styles requiring more uniform coloring than others.
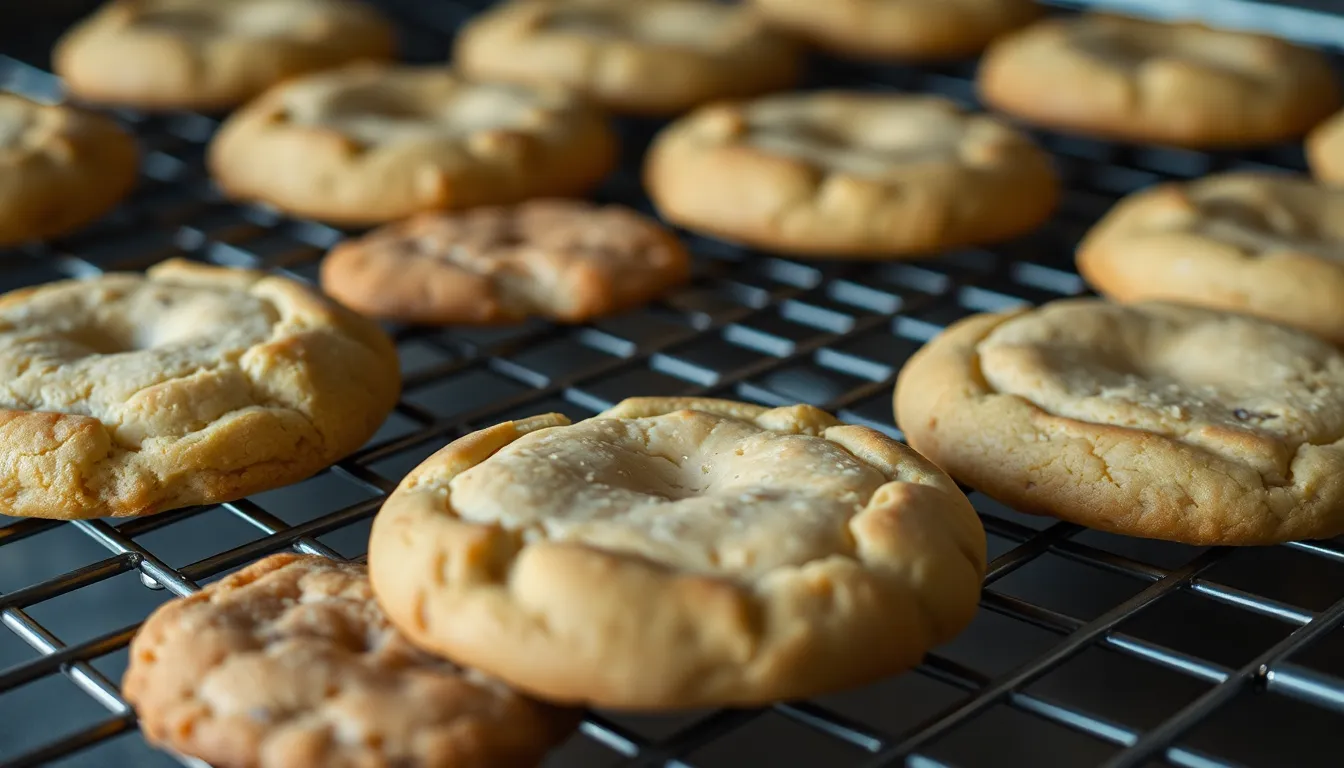
Surface Sheen
The surface appearance of your cookies transforms significantly during baking. Raw cookie dough has a distinctly wet, glossy sheen that gradually transitions to a matte finish as moisture evaporates and proteins set. This change in surface appearance is particularly noticeable in the center of the cookie. When the surface no longer looks wet or glossy but appears dry and set, your cookies have likely reached proper doneness. The transition from shiny to matte indicates that sufficient moisture has evaporated and the proteins have coagulated, creating the desired cookie structure.
Different Cookie Types, Different Done Looks
Each cookie variety displays unique visual cues when properly baked. Chewy cookies are done when they have set edges with a slight golden-brown color, while their centers appear soft but not raw—the surface should be matte, and the edges might begin to crack slightly. Crispy cookies require more thorough baking, with edges and bottoms darkening more substantially and centers becoming firm throughout with no glossiness remaining.
Cookie shape also influences appearance when done. Flat cookies typically show browned edges with a slight dome in the center when hot (which flattens during cooling), while puffy cookies maintain more of their shape throughout baking. Puffy varieties often display surface cracks as they expand, with their edges appearing lighter than flatter styles.
Specialty cookies like shortbread and biscotti have their own distinctive done looks. These varieties should develop a uniformly light to medium golden-brown color across their entire surface and feel firm to the touch throughout. Their dense structure requires this even coloring to ensure they’re fully baked without becoming too dry or hard.
The surface transformation from glossy to matte combined with the development of golden-brown edges provides reliable visual confirmation that your cookies have reached optimal doneness, regardless of which type you’re baking.
Common Mistakes When Judging Cookie Doneness
Relying solely on color leads to frequent baking errors. Many home bakers assume cookies must be uniformly golden brown to be finished, but this misconception often results in overbaked, dry cookies. The edges, not the entire cookie, should display that appetizing golden-brown hue while centers remain slightly lighter.
Underestimating carryover cooking creates another common pitfall. Cookies continue baking after removal from the oven due to residual heat, so waiting until they look completely done means they’ll actually overcook during cooling. Pull cookies from the oven when centers still appear slightly soft but edges are set.
Misinterpreting visual cues confuses many bakers. Pale, doughy-looking cookies typically indicate underbaking, while excessive spreading with persistent softness suggests they need additional time. The surface texture offers valuable information—a slight sheen with firm edges indicates proper doneness for most cookie varieties.
Neglecting the touch test prevents accurate assessment. Gently pressing the center should produce a slight spring-back sensation without completely deflating the cookie. This tactile feedback confirms the internal structure has developed properly while maintaining desired moisture content.
Overlooking recipe-exact indicators causes inconsistent results. Different cookie types display unique signs of doneness—some develop light surface cracks, others require a more uniform color. Adjusting your expectations based on the exact recipe you’re using ensures better outcomes with various cookie styles.
Recommended Products
![Gymdin Baking Sheet with Cooling Racks - 17'' x 11" x 0.5" Carbon Steel Cookie Sheets for Baking [2 Sheets + 2 Racks], Nonstick Baking Pans, Perfect for Baking, Roasting, and More](https://m.media-amazon.com/images/I/418BuFbZfyL._SL500_.jpg)
Ultimate Baking Sheet Set: This premium baking set includes 2 heavy-duty baking sheets (17" x 11" x 0.5") and 2 versatile cooling racks (14" x 11" x 0.5"), designed to fit standard ovens and toaster ovens effortlessly. Ideal for roasting bacon, crisping chicken, baking cookies, pastries, brownies, breads, and fruit pies, or cooling desserts to perfection.
VERSATILE BAKING KIT: Pack of 9 in 3 different sizes 15.9 x 12 x 1 inch, 12.4 x 9.6 x 1 inch, and 10.4 x 8.1 x 1 inch- This oven cooking set includes 3 rimmed baking sheets, 3 cooling racks and 3 silicone baking mats, fits most regular toaster ovens

【Collapsible 4 tier Cooling Rack】 Features a sturdy construction with a collapsible & adjustable design. Geesta wire cooling rack works works well for everything, from small items like cupcakes and muffins to large pies and cakes of significant weight.
Carry-Over Cooking: Why Timing Matters
Carry-over cooking significantly impacts your cookies’ final texture after they’re removed from the oven. Cookies continue baking on the hot sheet even after they’re out of the oven due to residual heat. This process transforms slightly underdone centers into perfectly tender treats as they cool down.
The center consistency of properly baked cookies may still be somewhat soft when first removed from the oven, but it shouldn’t appear wet or doughy. During the cooling period, cookies firm up naturally as the carry-over cooking completes the baking process. Understanding this phenomenon helps you avoid the disappointment of overdone, crunchy cookies that were left in too long.
Timing your cookie removal is crucial—taking them out when the edges are light golden brown while the centers remain slightly soft produces ideal results. Cookies that look “done” in the oven will often become too firm or crisp once cooled. The perfect moment to remove your cookies is when they’ve developed structure without overcooking, shown by those characteristic golden brown edges.
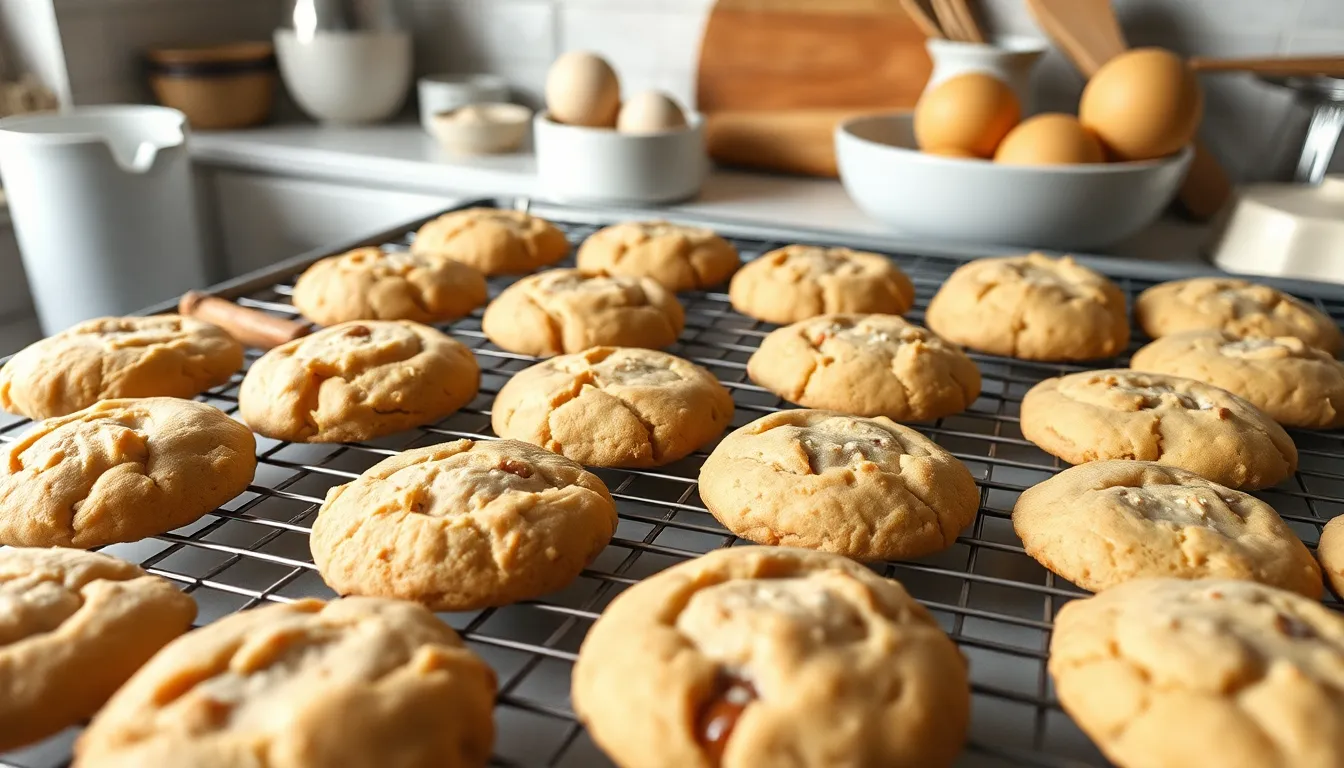
For optimal results, let your cookies rest on the baking sheet for 3-5 minutes after removing them from the oven. This short cooling period allows the carry-over cooking to finish gently while also giving the cookies time to set properly. After this brief rest, transfer them to a cooling rack to stop the cooking process and prevent soggy bottoms.
Smaller cookies require extra attention since they’re particularly susceptible to carry-over cooking effects. Their size causes them to brown faster on the outside while potentially remaining underbaked inside. Removing them at just the right moment—when the edges are set but the centers still appear slightly underdone—ensures they’ll reach perfection as they cool.
Temperature differentials within the cookie also influence carry-over cooking. The hotter outer edges conduct heat toward the cooler center, evening out the temperature and completing the baking process. This natural heat distribution is why cookies with golden edges and slightly underdone centers eventually develop that coveted consistent texture throughout.
Recommended Products
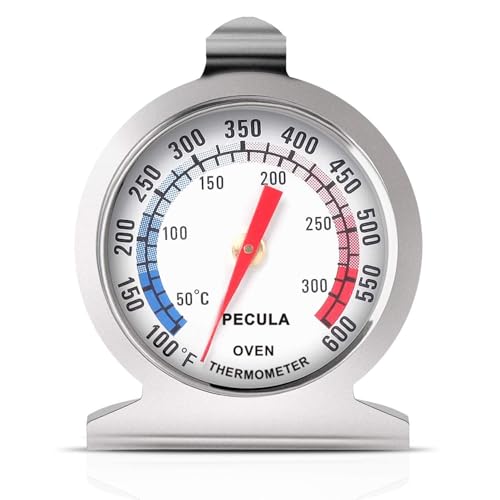
Clear Dial Display: PECULA's analog oven thermometer delivers precise, instant readings from 50–300°C / 100–600°F. Its dial features clear dual-zone blue and red indicators for at-a-glance temperature monitoring—perfect for ovens, grills, smokers, and deep fryers, ensuring you master every bake, roast, or fry.

Multi Usage for Oven Cooking: The oven thermometer can accurately monitor oven inside temperature from 150℉ to 600℉, It is perfectly designed for traditional ovens, electric ovens, toaster ovens, grills, smokers, or any other heat based food appliance.With the large numbers and clear dial display, the thermometer can monitor the oven cooking, displays true oven temperature quickly to assist in safe and correct food preparation.

Using Tools to Determine Cookie Doneness
Recommended Products

Premium Silicone Bakig Mat: Our kitchen baking mat is crafted with 100% food grade silicone. With 0.7mm thickness reinforced design (2x thicker than standard 0.3mm mats) can withstand daily kneading sourdough, rolling pizza dough, and shaping sticky fondant without warping or degradation

Perfect Fit for Half Sheet Pans: Sized at 16.54" x 11.62", these reusable silicone baking mats fit all standard half sheet trays. Ideal for baking cookies, bread, pastries, or roasting vegetables — no parchment paper or foil needed.

[DURABLE MATERIAL] Macaron silicone baking mats are engineered with premium silicone. Our macaroon mat silicone delivers great performance from -40°F to 500°F with no warping or cracking, preserving the true flavors of your delicate macarons and pastries.
The Toothpick Test
The toothpick test provides a reliable way to check if your cookies are perfectly baked. Insert a toothpick into the center of a cookie and examine what comes out – a few moist crumbs clinging to the toothpick indicate perfect doneness. Wet batter suggests the cookies need more time, while a completely clean toothpick might mean they’re overbaked. This method works particularly well for thicker cookies like chocolate chip or oatmeal varieties where the center doneness isn’t always apparent from visual cues alone.
Using a Food Thermometer
A food thermometer offers precise measurement for cookie doneness beyond visual indicators. Perfectly baked cookies reach an internal temperature between 93-96°C (200-205°F) when properly set. Simply insert the thermometer probe into the thickest part of the cookie without touching the baking sheet beneath. Temperature readings eliminate guesswork, especially for specialty cookies where color changes might be difficult to detect. Many professional bakers rely on this method for consistent results across different cookie types.
Timer Techniques
Timers serve as essential tools for achieving cookie perfection with proper attention to timing. Set your timer for 1-2 minutes less than the recipe suggests to account for carry-over cooking effects. Cookies continue baking on the hot sheet after removal from the oven, transforming slightly underdone centers into perfectly tender treats. Most standard cookies require a 3-5 minute rest on the baking sheet post-oven to complete the baking process gently without overcooking.
Visual Assessment Tools
Special visual tools can enhance your ability to detect cookie doneness beyond naked-eye observation. A small flashlight helps examine the texture transition between edges and centers, revealing whether the cookies have developed that characteristic golden-brown edge with a lighter center. Kitchen-exact lighting strips mounted under cabinets provide consistent lighting conditions for assessing color development. These visual aids prove especially helpful when baking in kitchens with poor natural lighting or when making cookies with subtle color changes.
Conclusion
Mastering the art of perfectly baked cookies comes down to recognizing key visual cues and understanding how they continue to develop after leaving the oven. Trust your eyes to spot those golden-brown edges with slightly lighter centers that signal cookie perfection.
Remember that each cookie type has its unique doneness indicators – whether you’re baking chocolate chip classics or delicate sugar cookies. The toothpick test and temperature checks offer helpful confirmation when your visual assessment leaves you uncertain.
With practice you’ll develop an instinct for that perfect moment to remove your cookies from the oven. Give them their essential 3-5 minute rest on the baking sheet to complete the process through carry-over cooking. Soon you’ll be consistently producing cookies with that irresistible balance of crispy edges and tender centers that everyone craves.
Frequently Asked Questions
Recommended Products

Three Versatile Sizes for Precision and Flexibility This set includes three offset spatulas with blade lengths of 6 inches, 8 inches, and 10 inches, giving you the flexibility to handle various baking and decorating tasks with ease. The 6-inch cake spatula is perfect for detailed work, such as spreading frosting on cupcakes or small pastries. The 8-inch blade is ideal for mid-sized cakes, while the 10-inch icing spatula excels in decorating larger tiered cakes, ensuring a smooth, professional finish every time

Professional quality small sized spatula, 4. 25- . 75-Inch blade

Various Sizes: Our cake spatula set includes five different sizes, ranging from 16.5cm/6.5inches to 21cm/8.27inches in length, ensuring you have a palette knife for a variety of cake decorating tasks
How do I know when cookies are perfectly baked?
Look for golden-brown edges with slightly lighter centers. The cookies should have a matte (not shiny) appearance and may have slight cracking on top. They should maintain their shape while being slightly puffed up. Remember that cookies continue baking after removal from the oven, so it’s better to remove them when they appear slightly underdone in the center.
Should cookie centers be completely baked?
No, cookie centers should typically be slightly underdone when you remove them from the oven. They will continue cooking from residual heat (carry-over cooking) on the hot baking sheet. For soft cookies, centers should appear slightly puffy and lighter in color. For crispy cookies, you’ll want a more uniform color throughout.
What’s the toothpick test for cookies?
Insert a toothpick into the center of a cookie. For perfectly baked cookies, the toothpick should come out with a few moist crumbs attached—not completely wet (underbaked) or completely clean (potentially overbaked). This test works especially well for thicker cookies like chocolate chip or oatmeal cookies.
What temperature should cookies reach when fully baked?
The ideal internal temperature for perfectly baked cookies is between 190-205°F (88-96°C). For most cookies, aim for 200-205°F (93-96°C). Using a food thermometer provides precise results, especially for thick cookies where visual cues can be misleading.
How long should cookies rest after baking?
Allow cookies to rest on the baking sheet for 3-5 minutes after removing them from the oven. This allows carry-over cooking to finish the baking process gently. After resting, transfer cookies to a cooling rack to stop the cooking process and prevent soggy bottoms.
Why do my cookies spread too much?
Excessive spreading can result from warm dough, greased baking sheets, hot baking sheets from previous batches, or incorrect oven temperature. To prevent spreading, chill your dough before baking, use parchment paper instead of greasing sheets, allow baking sheets to cool between batches, and verify your oven temperature with a thermometer.
What’s the difference in doneness for different cookie types?
Chocolate chip cookies should have golden-brown edges with lighter centers. Sugar cookies need a pale golden hue overall. Gingerbread cookies display a deeper amber tone. Oatmeal cookies develop a rich golden-brown appearance. Each cookie type has specific visual indicators based on its ingredients and desired texture.
Can I use special tools to check cookie doneness?
Yes! Besides the toothpick test and food thermometer, a timer set 2 minutes before the recipe’s suggested time helps prevent overbaking. Enhanced lighting tools like flashlights or kitchen lighting strips can improve your ability to detect color changes indicating perfect doneness.