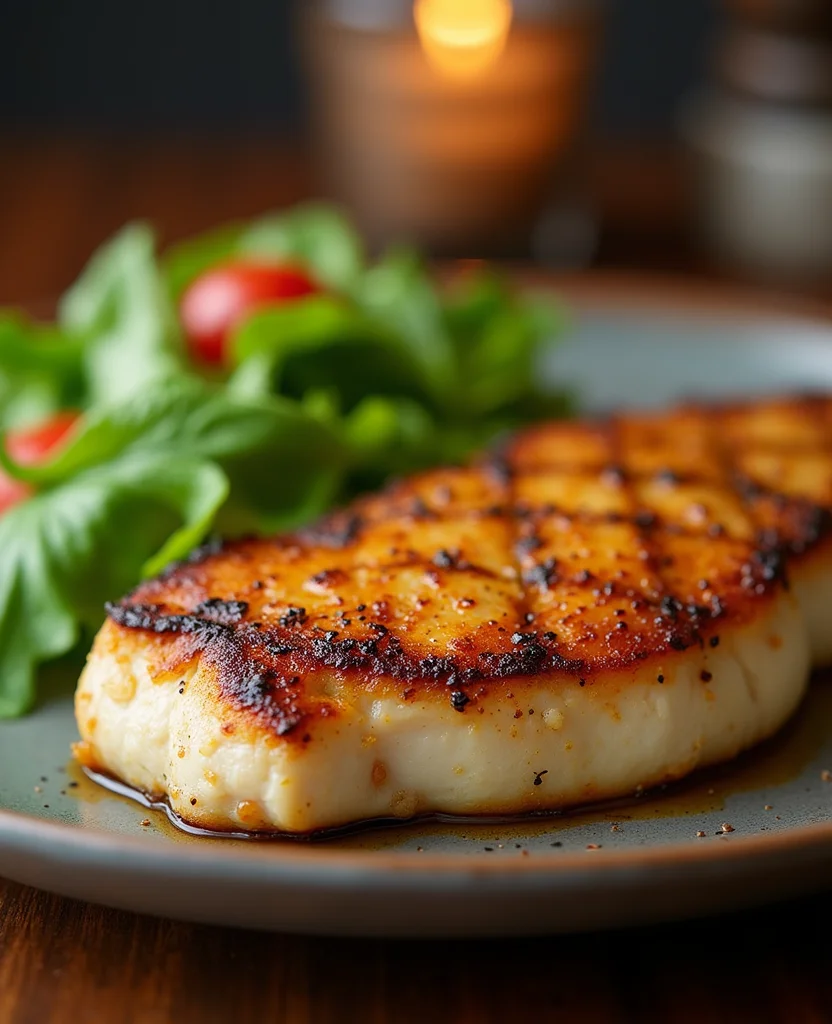
Chicken Paillard is a delightful dish that brings the taste of a French bistro right into your kitchen.
The juicy, tender chicken paired with a zesty lemon sauce creates a symphony of flavors that dance on your palate.
I first encountered this recipe during a culinary journey through Paris, where it quickly became a favorite.
Its quick preparation time makes it perfect for both busy weeknights and elegant dinners.
With just 12 minutes of cooking, you can bring a touch of France to your dining table.
Get ready to impress your family and friends with this exquisite yet simple dish.
The History and Cultural Significance
• Chicken Paillard traces its origins to France, where it was originally created by chefs in the 19th century.
• The dish evolved over decades as chefs began to experiment with different sauces and sides, eventually becoming the beloved version we know today.
• In French culture, this dish traditionally appears at casual bistro gatherings, symbolizing the simplicity and elegance of French home cooking.
• While many variations exist across different regions, the authentic version maintains the signature thinly pounded chicken breast that sets it apart from imitations.
Recommended Products
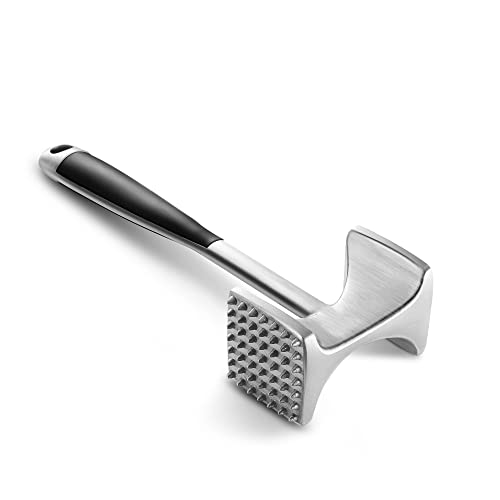
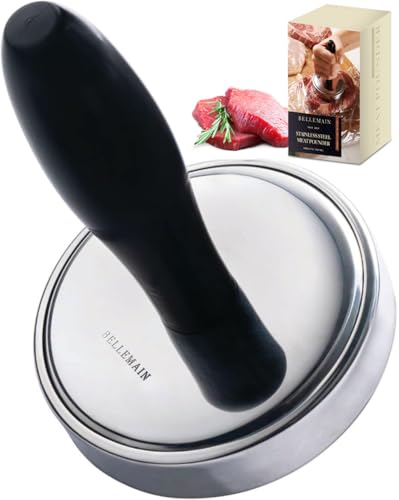
Ergonomic Design: We are always looking for a meat tenderizer with a comfortable handle that fits perfectly in your hand. This meat hammer from Kitexpert fits that bill which allows the mallet and gravity to do all the work in less time. Enjoy your cooking time!

EFFORTLESS MEAT TENDERIZING & FLATTENING: Say goodbye to tough meats! Our stainless steel meat pounder features a dual-sided design: the flat side ensures even pounding for chicken cutlets, while the textured side effectively softens steak and other meats.

【More Than A Meat Mallet Tenderizer】Perfect to infuse the meat with flavor, spices, and dry rub marinades. Crush ice for cocktails, loosening frozen vegetables, crack crab, and crush garlic, Great for baking: shell nuts, and crush hard candy-like toffee or peppermint.
Recipe Overview
Recommended Products

New release-MULTIFUNCTIONAL DOUBLE SIDED MALLET style - Use the textured sides surface for optimum use on a variety of meats Chicken. Or Use the smooth flatten side for pounding and flattening For cutlets. Using this tool to create perfect, tender, juicy steaks that are easier to chew and digest.
MEAT POUNDER: Transform tougher cuts of meat into juicy, tender, flavorful steaks. The meat beater breaks down muscle fibers and protein molecules, resulting in softer, thinner steaks that cook faster and are easier to chew.

POWERFUL AND STRONG PATENTED DESIGN: featuring a powerful, dual sided aluminum alloy head and an easy to grip patented handle, this meat tenderizer will help break down even the toughest cuts
Nutritional Information (per serving)
Recommended Products

HEALTHY SKILLET - Switzerland ILAG nonstick surface. Free of PFOA, PFOS, lead, cadmium and other toxic materials that can leach into food, safe & healthy.

【SNOWFLAKE TECHNOLOGY】Our design is created through a laser etching process to provide both stainless steel and non stick surface. This dual surface allows to cook with less oil, grease, and butter.Our clad surface is 50% more than usual Hex surface non stick frying pans.

Kitchen Powerhouse: The Zakarian x Dash Nonstick Cast Iron Skillet is a restaurant-quality Pan and searing Skillet with an ergonomic handle and dual pour spouts
Essential Equipment Guide
Meat Mallet: A meat mallet is essential for pounding the chicken breast to an even thinness, ensuring it cooks quickly and evenly. If you don’t have one, a rolling pin or the bottom of a heavy skillet can be used as alternatives. Look for a mallet with a comfortable grip and a flat side for best results.
Non-Stick Skillet: A non-stick skillet is important for achieving a golden brown sear on the chicken without it sticking to the pan. Alternatives include a well-seasoned cast-iron skillet or stainless steel pan. Choose a skillet with a heavy bottom for even heat distribution.
Instant-Read Thermometer: This tool is crucial for checking the internal temperature of the chicken to ensure it’s cooked through without being overdone. If you don’t have one, make sure the juices run clear when you slice into the chicken. Look for a thermometer with a quick response time and easy-to-read display.
Ingredients
For the Chicken
|
|
| Amount | Ingredient | Notes |
|---|---|---|
| 2 large | chicken breasts | boneless and skinless |
| 1 teaspoon | salt | enhances flavor |
| 1/2 teaspoon | black pepper | freshly ground |
For the Sauce
| Amount | Ingredient | Notes |
|---|---|---|
| 2 tablespoons | olive oil | adds richness |
| 1 clove | garlic | minced |
| 1 tablespoon | lemon juice | freshly squeezed |
| 1 tablespoon | capers | rinsed and drained |
For Garnish
| Amount | Ingredient | Notes |
|---|---|---|
| 1 tablespoon | parsley | finely chopped |
| 1 teaspoon | lemon zest | adds brightness |
Preparation Methods
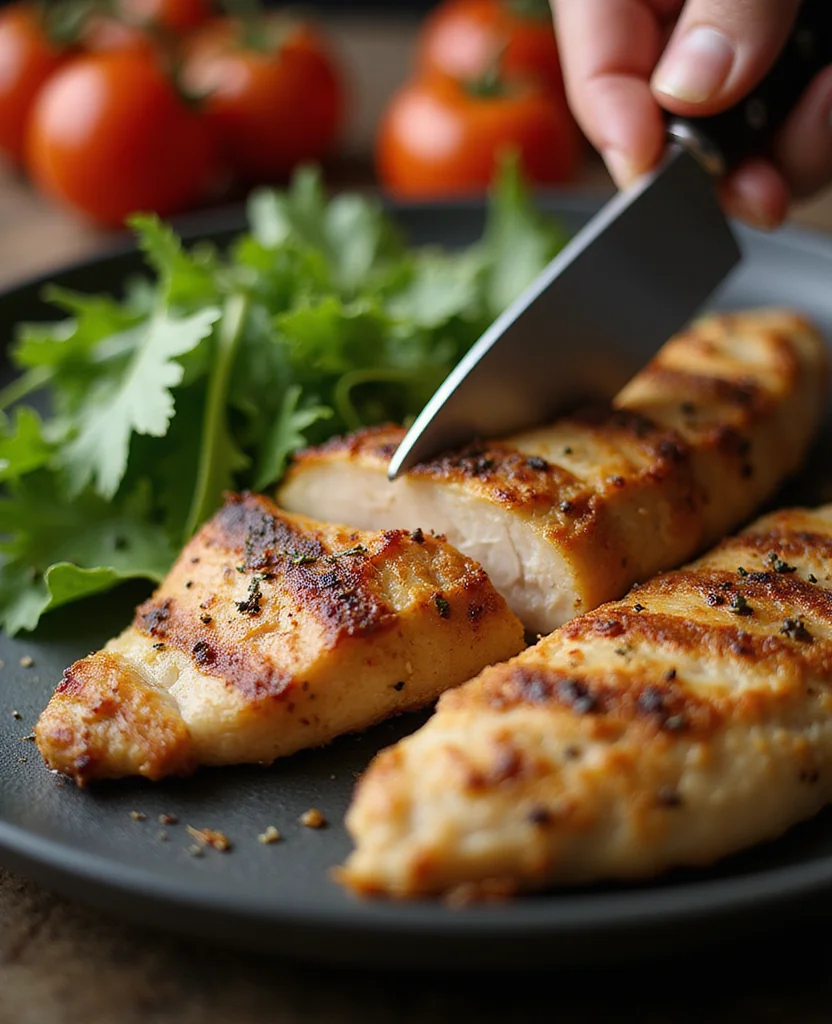
Pounding the Chicken: Pounding the chicken thin is crucial for even cooking and achieving the signature texture of the dish. Place the chicken between two sheets of plastic wrap and use a meat mallet to gently pound it to about 1/4 inch thickness. Be sure to apply even pressure to avoid tearing the meat.
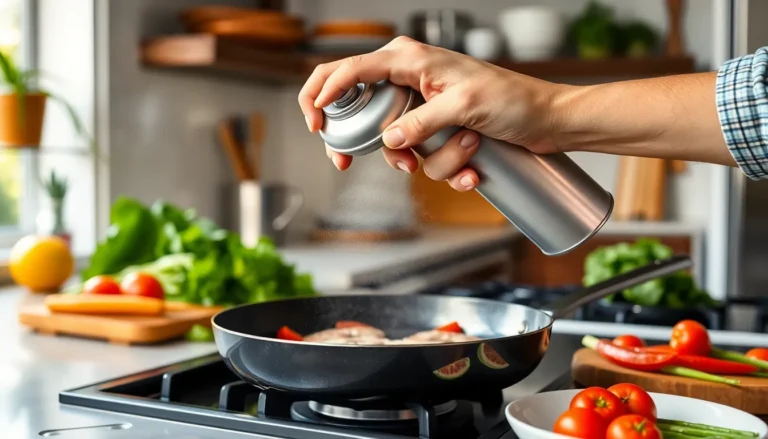
Pan-Searing: This technique involves cooking the chicken quickly over high heat to develop a flavorful crust while keeping the interior juicy. Ensure your pan is preheated and use a small amount of oil to prevent sticking. Listen for a sizzle when the chicken hits the pan.
Deglazing: Deglazing the pan with lemon juice after searing the chicken helps lift the flavorful bits stuck to the bottom, creating a rich sauce. Use a wooden spoon to scrape the pan and combine the juices with the other sauce ingredients for depth of flavor.
Step 1: Prepare Chicken

Place chicken breasts between two sheets of plastic wrap.
Use a meat mallet to pound the chicken to 1/4 inch thickness.
Ensure the chicken is evenly thinned to cook uniformly.
Remove plastic wrap and season both sides with salt and pepper.
Step 2: Heat Skillet
Place a non-stick skillet over medium-high heat.
Allow the skillet to preheat for about 2 minutes.
Ensure the skillet is hot enough for a quick sear.
Add a tablespoon of olive oil to coat the bottom.
Step 3: Sear Chicken
Add chicken breasts to the hot skillet.
Cook for 3-4 minutes on each side until golden brown.
Look for a golden crust forming on the surface.
Use tongs to flip the chicken gently.
Step 4: Remove Chicken
Transfer the seared chicken to a plate.
Cover with foil to keep warm.
Ensure the chicken is cooked through but still juicy.
Set aside while you prepare the sauce.
Step 5: Saute Garlic
Reduce heat to medium and add minced garlic to the skillet.
Stir frequently to prevent burning.
Cook until fragrant, about 30 seconds.
Ensure the garlic is lightly golden.
Recommended Products

2.0 inches large auto-rotating backlit display: Digital food thermometer has a 180° auto-rotating backlit display, making this kitchen thermometer perfect for left-hand users and allows you to use it in low light conditions

【8X Faster + 4X More Precise】: Upgraded with an industrial-leading professional thermocouple sensor, Themomonster meat thermometer digital with NIST certified ±0.5℉ precision provides you the accurate temperature of your food in just 0.5 Seconds.

Instant Read Food Thermometer | Our instant read thermometer features a temperature probe and advanced, highly accurate technology with 1-2 seconds response time; Instructions, meat temperature chart, comes pre-calibrated for your convenience, and recalibrating feature if needed.
Step 6: Deglaze and Make Sauce

Add lemon juice and capers to the skillet.
Use a wooden spoon to scrape up brown bits from the bottom.
Allow the mixture to simmer and thicken slightly.
Remove from heat once the sauce is well combined.
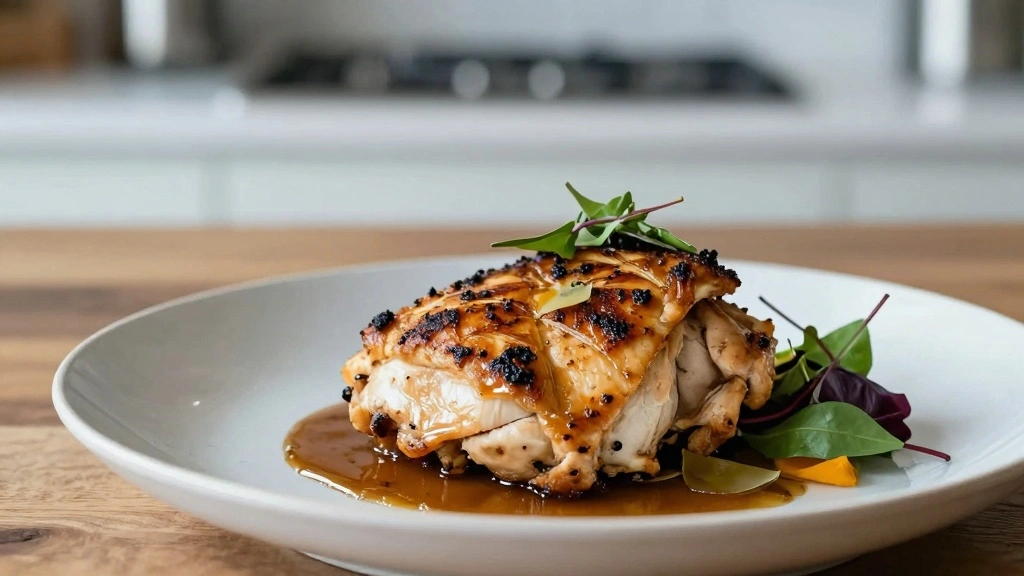
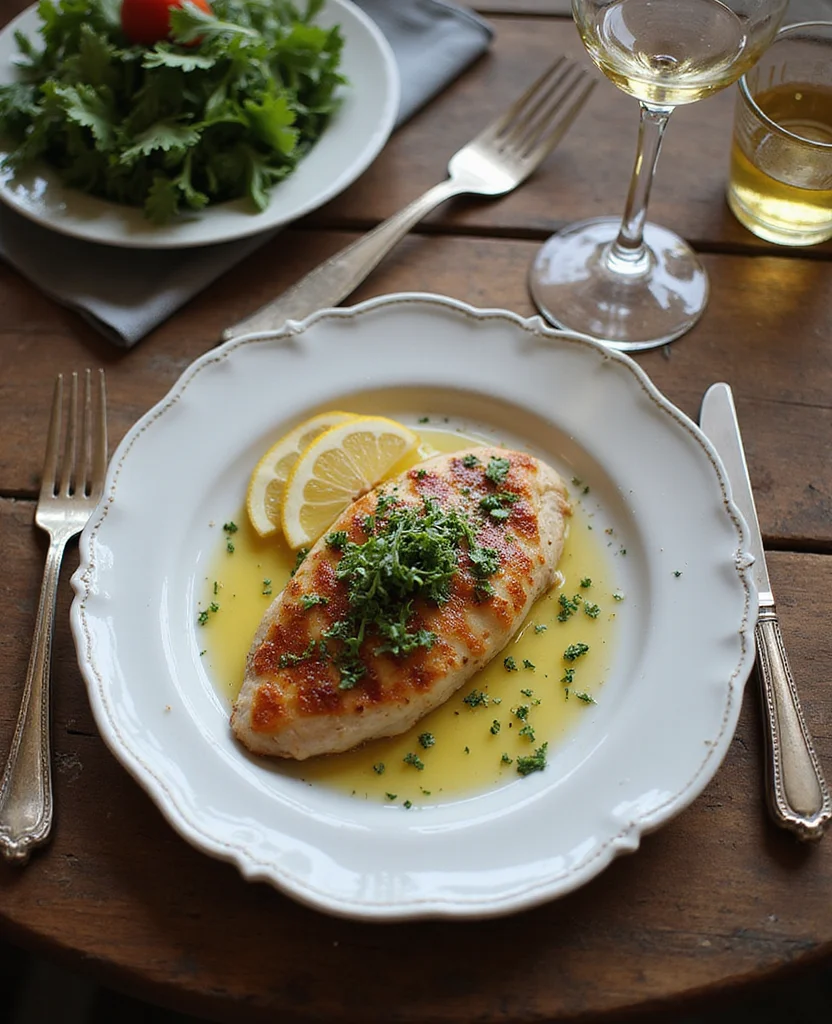
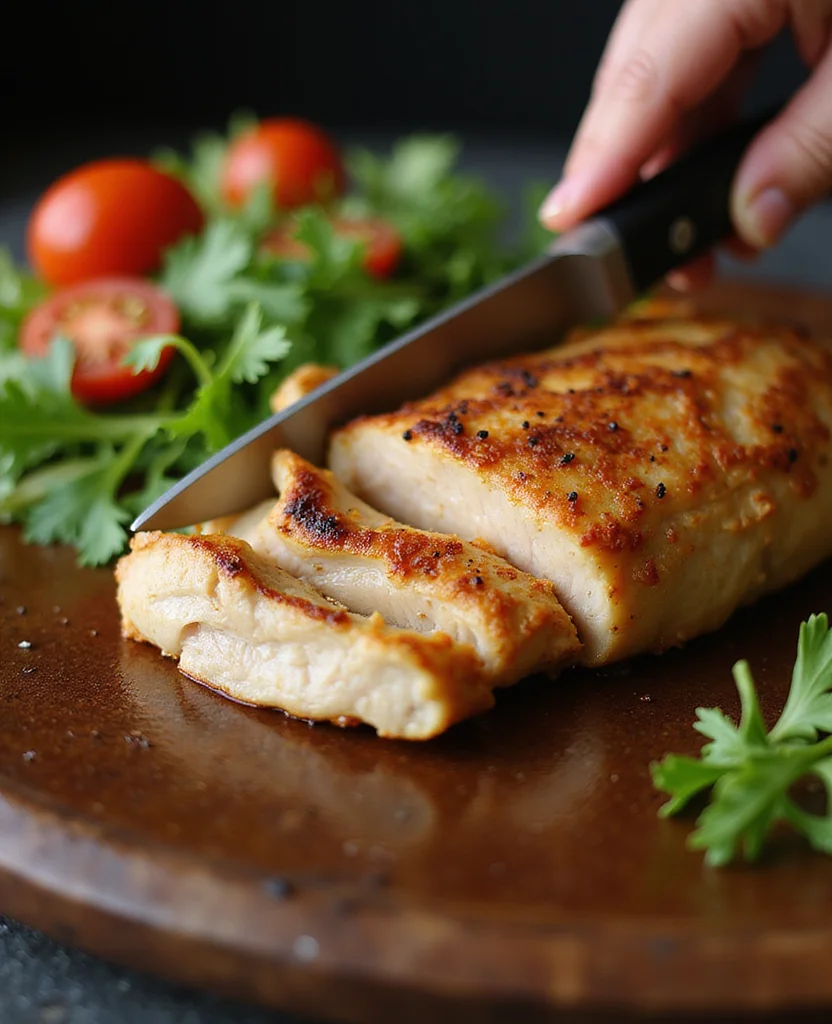
Step 7: Serve Chicken
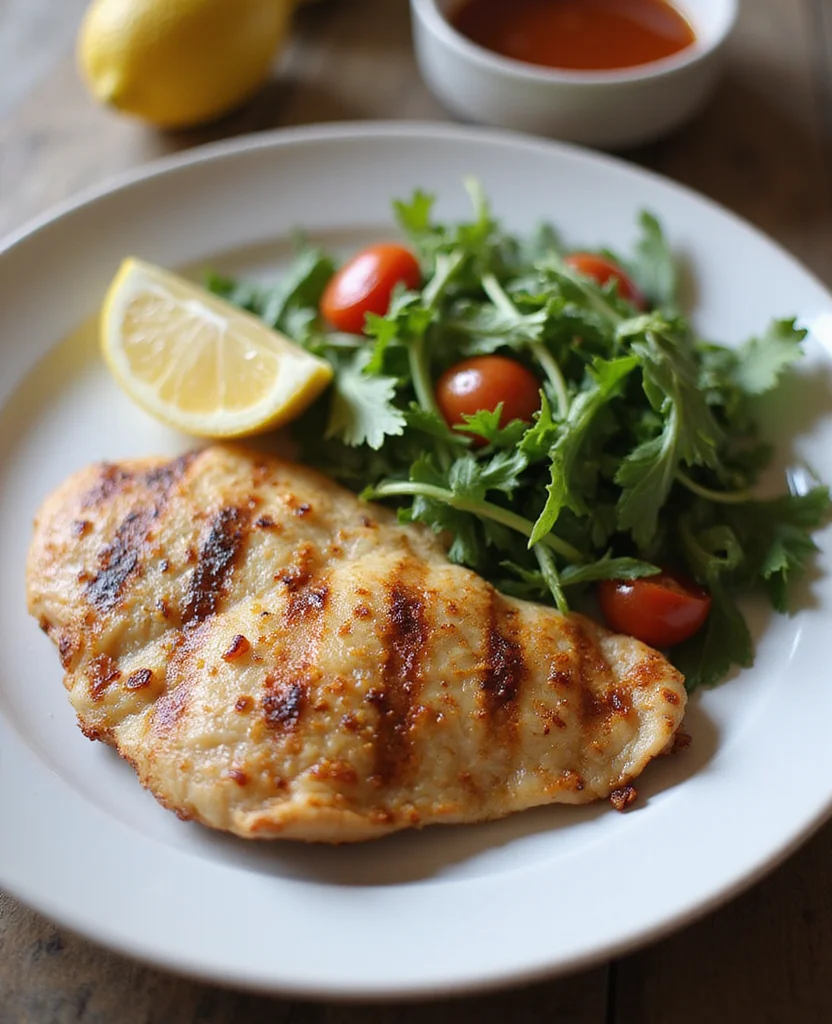
Place chicken breasts on serving plates.
Spoon the sauce over the chicken evenly.
Ensure each piece is well coated with sauce.
Garnish with parsley and lemon zest.
Step 8: Final Touches
Adjust seasoning with salt and pepper if necessary.
Serve immediately while hot.
Ensure the dish is visually appealing with garnishes.
Enjoy your French bistro dinner at home.
Critical Timing and Temperature Guide
Chicken Searing: Cook chicken for exactly 3-4 minutes per side at medium-high heat. Look for a golden-brown crust and ensure internal temperature reaches 165°F. Avoid overcrowding the pan to prevent steaming instead of searing.
Sauce Reduction: Simmer the sauce on medium heat for 2-3 minutes until it thickens slightly. Watch for a glossy finish and avoid over-reducing which can lead to a bitter taste.
Final Assembly: Serve the dish immediately after garnishing to maintain optimal temperature. Cold plates can cool down the dish quickly, so pre-warm plates if necessary.
Pro Tips for Chicken Paillard: 12-Min
• Ingredient Selection: Choose high-quality, free-range chicken for superior flavor and tenderness.
• Preparation Secret: After pounding, let the chicken rest at room temperature for 10 minutes to ensure even cooking.
• Temperature Management: Ensure the skillet is hot before adding chicken to achieve the perfect sear.
• Texture Enhancement: Lightly coat the chicken with a thin layer of flour before searing for a crispier texture.
• Flavor Layering: Add a splash of white wine to the sauce for added depth and complexity.
• Make-Ahead Strategies: Pound and season the chicken a day in advance; store in the fridge to save prep time.
• Restaurant-Quality Finishing Touches: Drizzle extra virgin olive oil over the finished dish for a glossy finish.
• Equipment Optimization: Use a lid to cover the skillet during the last minute of cooking to trap moisture and finish cooking the chicken.
Troubleshooting Common Issues
• Chicken Too Dry: Overcooking is the main cause; use an instant-read thermometer to check for doneness and remove from heat at 165°F.
• Sauce Too Thin: If the sauce doesn't thicken, continue simmering over medium heat and add a teaspoon of cornstarch mixed with water.
• Chicken Sticking to Pan: Ensure the skillet is properly preheated and use enough oil to prevent sticking.
• Bitter Sauce: Burnt garlic can cause bitterness; sauté garlic over medium heat and remove from heat if it begins to brown too quickly.
• Lack of Flavor: Ensure all components are well-seasoned, and don't forget the critical garnishes like lemon zest and parsley.
Variations and Regional Differences
• Italian Style: Incorporates fresh basil and a splash of balsamic vinegar in the sauce for a sweet and tangy twist.
• Provençal: Uses a combination of herbs de Provence and olives for a fragrant, Mediterranean-inspired dish.
• Asian Fusion: Adds soy sauce and ginger to the sauce, served with a side of stir-fried vegetables.
• American Comfort: Topped with a creamy mushroom sauce and served over mashed potatoes for a hearty meal.
Food Science Behind the Recipe
• Maillard Reaction: The browning of the chicken is a result of the Maillard reaction, which occurs when proteins and sugars in the meat react at high temperatures, creating complex flavors and aromas.
• Acid Tenderization: The lemon juice in the sauce helps tenderize the chicken by breaking down proteins, enhancing the overall texture.
• Heat Transfer: Using a preheated skillet ensures efficient heat transfer, allowing for rapid searing and locking in juices.
Frequently Asked Questions
What's the most common mistake people make when preparing Chicken Paillard? Overcooking the chicken, which can lead to dryness; using a thermometer helps ensure proper doneness.
Can I use chicken thighs instead of breasts? Yes, but adjust cooking time as thighs take longer to cook through.
How do I keep the chicken from drying out? Ensure even pounding and do not overcook; rest the chicken after cooking to reabsorb juices.
Is it possible to make this dish dairy-free? Absolutely, the dish is naturally dairy-free; just ensure your cooking oil is as well.
What can I substitute for capers? Chopped green olives or a dash of Worcestershire sauce can provide a similar tangy flavor.
Can I prepare the chicken in advance? Yes, you can pound and season the chicken up to a day ahead and store it in the refrigerator.
What's a good side dish for Chicken Paillard? A simple green salad or roasted vegetables complement the flavors well.
Serving and Presentation Guide
• Traditional Presentation: Serve the chicken on a flat white plate, drizzled with sauce, and garnished with fresh parsley and lemon zest.
• Modern Plating: Slice the chicken before plating and fan the slices out in a circle with the sauce drizzled artistically.
• Family Style: Serve on a large platter with the sauce in a separate dish for guests to serve themselves.
• Bistro Style: Accompany with a side of crusty French bread and a small mixed greens salad.
Recommended Products


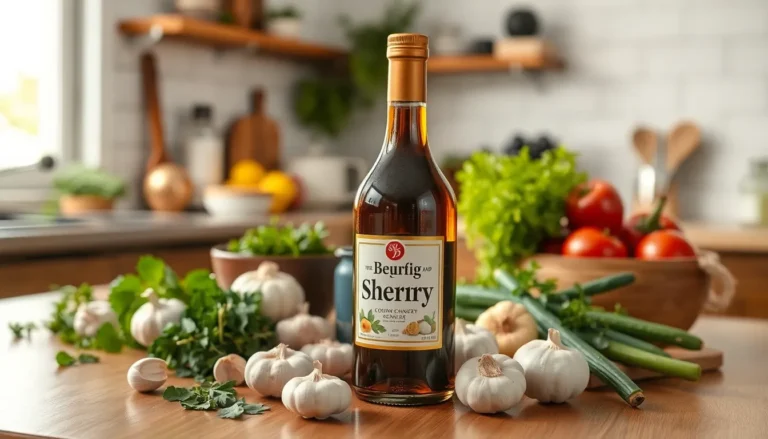
GET THAT CLEAN EATING FEELING - Try our Lemon Herb Sauce: A vibrant glaze made with fresh lemon juice, garlic, and olive oil.
Conclusion
Chicken Paillard is a quick and exquisite dish that brings a taste of French elegance to your table.
With its simple preparation and delightful flavors, it's a meal you'll want to make again and again.
I invite you to try this recipe and experience the joy of French cooking in your own home.
Bon appétit!