As the leaves turn golden and the air becomes crisp, apple baking recipes bring warmth and comfort to our kitchens.
The sweet aroma of apples and cinnamon evokes memories of cozy family gatherings and festive celebrations.
These desserts offer a perfect balance of tart and sweet flavors, making them a perennial favorite.
Whether you’re a seasoned baker or a beginner, these recipes are straightforward and rewarding.
Prepare to indulge in the delicious nostalgia of apple-infused treats that capture the essence of fall.
The History and Cultural Significance
• Apple Baking Recipes traces its origins to medieval Europe, where it was originally created by home cooks using local apples and spices.
• The dish evolved over decades as sugar became more accessible, eventually becoming the beloved version we know today.
• In American culture, this dish traditionally appears at Thanksgiving and Christmas, symbolizing family unity and gratitude.
• While many variations exist across different regions, the authentic version maintains a flaky crust and spiced apple filling that sets it apart from imitations.
Recommended Products

McCormick Apple Pie Spice is a balanced blend of cinnamon, nutmeg and allspice
![SPICES VILLAGE Apple Pie Spice [ 8 oz ] - Cinnamon, Ginger, Nutmeg, and Allspice Mix - Kosher, Gluten Free, Non GMO, Resealable Bulk Bag](https://m.media-amazon.com/images/I/51c4pSidszL._SL500_.jpg)
PREMIUM NATURAL INGREDIENTS: A blend of all-natural cinnamon, ginger, nutmeg, and allspice will infuse your kitchen with warmth. The smell of this mixture will make you want to use it every day to bring you happiness.

Warm and aromatic, this blend of cinnamon, nutmeg, allspice, and cardamom.
Recipe Overview
Recommended Products

Capable of paring, coring and slicing; paring only; or slicing and coring only

Complete Apple Tool Set: Your all-in-one package contains: 1 Apple Peeler (single blade, no replacement blade) for fast peeling, 1 Apple Corer/Slicer to core and slice into 8 wedges.

Material and Technology : The apple peeler is made of high-quality strong die cast magnesium which means it won’t rust and is very durable not brittle steel for greater stability and strength
Nutritional Information (per serving)
Recommended Products

Mrs. Anderson’s Easy Pie Crust Maker helps roll perfectly round pie crusts in a consistent thickness so they bake evenly, all without the floury mess

PREMIUM HARDWOOD CONSTRUCTION: Built from moisture-resistant hardwood that delivers a smooth, non-dragging rolling surface for consistent results every time; the 10-inch barrel and balanced weight distribution make rolling all types of dough effortless

HIGH-QUALITY STAINLESS STEEL - Ordinary aluminum Rolling Pin is prone to rust and damage, Quellance fondant rolling pin is made of perfect 430 stainless steel. Elegant and stylish, high grade satin brushed stainless steel finish for a long life; No rust!
Essential Equipment Guide
Rolling Pin: A rolling pin is crucial for achieving a uniform dough thickness, essential for even baking. Alternatives like an empty wine bottle can work in a pinch, but a heavy, non-stick rolling pin is ideal.
Apple Peeler-Corer-Slicer: This tool saves time and ensures uniform apple slices, which cook evenly. Look for one with a sturdy base and adjustable settings.
Baking Dish: A high-quality baking dish distributes heat evenly, preventing undercooked centers or burnt edges. Opt for ceramic or glass for the best results.
Ingredients
For the Filling
|
|
| Amount | Ingredient | Notes |
|---|---|---|
| 6 cups | apples | peeled, cored, and sliced |
| 1 cup | granulated sugar | adds sweetness |
| 2 teaspoons | cinnamon | for warmth and spice |
| 1/4 teaspoon | nutmeg | for depth of flavor |
For the Crust
| Amount | Ingredient | Notes |
|---|---|---|
| 2 1/2 cups | all-purpose flour | sifted for light texture |
| 1 teaspoon | salt | enhances flavor |
| 1 cup | unsalted butter | cold, cubed |
| 6 tablespoons | ice water | for dough consistency |
Preparation Methods
Blind Baking: Blind baking involves pre-baking the crust before adding the filling. It prevents a soggy bottom and ensures a crisp texture.
Caramelizing Apples: This technique involves cooking apple slices with sugar until golden, enhancing their natural sweetness and flavor.
Dough Chilling: Chilling the dough before rolling helps maintain its structure and prevents shrinkage during baking.
Step 1: Prepare the Dough

Combine flour and salt in a large bowl.
Add cold, cubed butter and mix until the mixture resembles coarse crumbs.
Gradually add ice water, stirring until the dough comes together.
Wrap the dough in plastic wrap and refrigerate for at least 30 minutes.
Step 2: Prepare the Apples

Peel, core, and slice the apples using an apple peeler-corer-slicer.
Place the apple slices in a large mixing bowl.
Add sugar, cinnamon, and nutmeg to the apples, tossing to coat evenly.
Set the apple mixture aside to allow the flavors to meld.
Step 3: Roll Out the Dough

Remove the dough from the refrigerator and let it sit for a few minutes.
On a lightly floured surface, roll out the dough to fit your baking dish.
Transfer the rolled dough into the dish, pressing gently into the corners.
Trim any excess dough hanging over the edges.
Step 4: Blind Bake the Crust

Preheat the oven to 375°F (190°C).
Line the crust with parchment paper and fill with pie weights or dry beans.
Bake for 15 minutes, then remove the weights and parchment.
Continue baking for another 5 minutes until the crust is lightly golden.
Step 5: Cook the Apples

In a large skillet, melt a tablespoon of butter over medium heat.
Add the apple mixture and cook until the apples begin to soften.
Stir occasionally to prevent sticking, cooking for about 10 minutes.
Remove from heat and let cool slightly.
Recommended Products
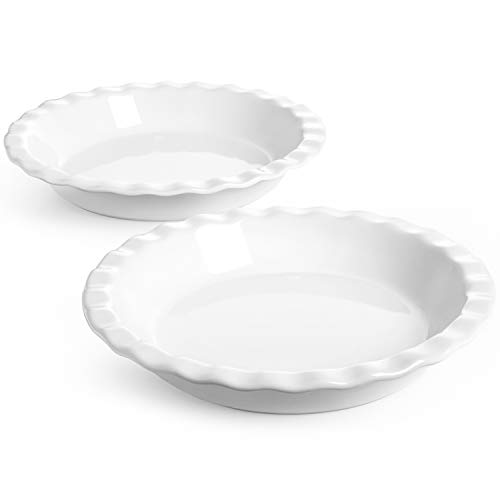
A Versatile Dish You Worth It: 9 inch in diameter, 1.7-inch in height; Our fluted stoneware pie dish not just for home-made baking fruit pies, pot pies, crisps, quiches, but also fits the regular 9-inch pie crust bought in the grocery store; So you can save time preparing pie
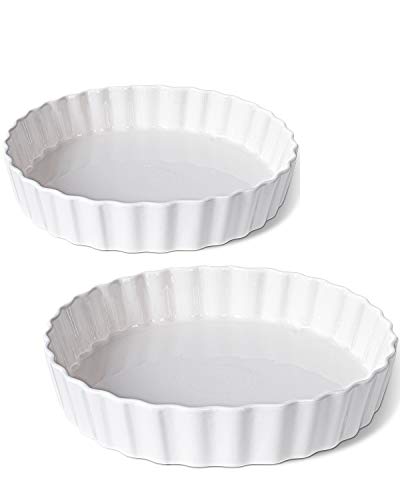
9.5 INCH VERSATILE BAKING PAN SET OF 2: Each DELLING ceramic tart pan features a 9.5-inch outer edge diameter with a 1.4-inch depth, the classic proportion for French fruit tarts, savory quiches, crustless egg bakes, chicken pot pies, and cheesecakes. The set of 2 means you can bake a main dish and a dessert simultaneously, or keep one ready while the other is in the oven.

Heat Retention: Made from durable stoneware, this ceramic pie dish locks in heat and keeps food warm longer. Perfect for serving fresh-from-the-oven pies, quiches, or casseroles, it ensures every slice stays at the ideal temperature for family meals or holiday gatherings.
Step 6: Assemble the Pie

Pour the cooked apple mixture into the pre-baked crust.
Distribute the apples evenly for uniform baking.
Roll out the remaining dough for the top crust or create a lattice.
Place the top crust over the apples, sealing the edges.
Step 7: Bake the Pie

Preheat the oven to 400°F (205°C).
Place the assembled pie on a baking sheet to catch any drips.
Bake for 25-30 minutes, or until the crust is golden brown.
Allow the pie to cool on a wire rack before serving.
Step 8: Serve and Enjoy

Slice the pie into generous servings.
Serve warm with a scoop of vanilla ice cream or whipped cream.
Enjoy the comforting flavors of spiced apples and buttery crust.
Share with family and friends for a delightful treat.
Critical Timing and Temperature Guide
Pre-baking the Crust: Bake at 375°F (190°C) for a total of 20 minutes, until the edges are just starting to color. Avoid over-baking at this stage.
Cooking the Apple Filling: Cook apples over medium heat for 10 minutes until soft but not mushy. Keep an eye on the liquid to prevent burning.
Baking the Assembled Pie: Bake at 400°F (205°C) for 25-30 minutes. Look for a golden brown crust and bubbling filling.
Pro Tips for Apple Baking Recipes
• Ingredient Selection: Choose firm, tart apples like Granny Smith for the best balance of sweetness and acidity.
• Preparation Secret: Add a pinch of salt to the apple filling to enhance the fruit's natural sweetness.
• Temperature Management: Ensure all dough ingredients are cold to maintain a flaky texture.
• Texture Enhancement: Blind baking the crust prevents sogginess and ensures a crisp bottom.
• Flavor Layering: Toast the spices gently before adding to the filling to release their full aroma.
• Make-Ahead Strategies: Prepare the dough and apple filling a day in advance, storing the dough in the fridge and the filling in an airtight container.
• Restaurant-Quality Finishing Touches: Brush the top crust with egg wash and sprinkle with sugar for a glossy finish.
• Equipment Optimization: Use a pizza stone to maintain even heat distribution during baking.
Troubleshooting Common Issues
• Crust Shrinkage: This occurs when the dough is overworked. To prevent it, handle the dough gently and chill before rolling.
• Soggy Bottom: A soggy crust can result from under-baking. Ensure you blind bake the crust properly and cook the filling until thickened.
• Runny Filling: If the filling is too liquidy, add a tablespoon of cornstarch to thicken it before baking.
• Burnt Edges: Cover the pie edges with foil during baking to prevent them from burning while the center cooks.
• Overbaked Apples: Apples can become mushy if overcooked. Cook them just until soft but still holding their shape.
Variations and Regional Differences
• French Tarte Tatin: This upside-down version features caramelized apples and a buttery, flaky pastry, often served with crème fraîche.
• Dutch Apple Pie: Known for its crumbly streusel topping, this variation offers a delightful texture contrast to the soft filling.
• Southern Fried Apple Pies: These hand pies are deep-fried for a crispy exterior and filled with a spiced apple mixture.
• German Apfelstrudel: Characterized by its thin, flaky layers of dough and spiced apple filling, often served with a dusting of powdered sugar.
Food Science Behind the Recipe
• Maillard Reaction: This chemical reaction occurs when the top crust browns, creating complex flavors and aromas.
• Gelatinization of Starches: As the filling cooks, starches thicken the juices, preventing a runny pie.
• Fat and Flour Interaction: Cold butter in the dough creates steam pockets during baking, resulting in a flaky crust.
Frequently Asked Questions
What's the most common mistake people make when preparing apple pies? Overworking the dough, which results in a tough crust.
Can I use any type of apple for this recipe? While you can use any apple, firmer and tarter varieties like Granny Smith are recommended for the best results.
How do I prevent my pie from being too sweet? Balance the sugar with a splash of lemon juice or use tart apples.
How do I store leftover pie? Cover and refrigerate for up to 3 days, or freeze for longer storage.
Why is my crust not flaky? Ensure all ingredients are cold and avoid overmixing the dough.
Can I make the pie ahead of time? Yes, prepare and assemble the pie, then freeze it unbaked. Bake from frozen, adding extra time as needed.
Is it necessary to peel the apples? Peeling is recommended for a smoother texture, but you can leave the skins on for added fiber and color.
Serving and Presentation Guide
• Traditional Presentation: Serve warm slices on a dessert plate with a dollop of whipped cream or a scoop of vanilla ice cream.
• Rustic Approach: Present the pie in a cast iron skillet for a casual, homemade feel.
• Elegant Plating: Use a pastry cutter to create clean, even slices, garnishing with mint leaves or a dusting of powdered sugar.
• Family-Style Presentation: Place the whole pie on a wooden board, allowing guests to serve themselves.
Recommended Products

The freshest fruits picked at their peak to deliver homemade taste and quality.

Made with the freshest, highest-quality fruits harvested and preserved at their peak to bring you exceptional texture and taste

Conclusion
There's nothing quite like the aroma of apple pie baking in the oven, filling your home with warmth and comfort.
This recipe offers a perfect blend of tradition and simplicity, making it a staple for any occasion.
I hope you enjoy creating these delicious apple desserts as much as you'll love sharing them.
Happy baking!