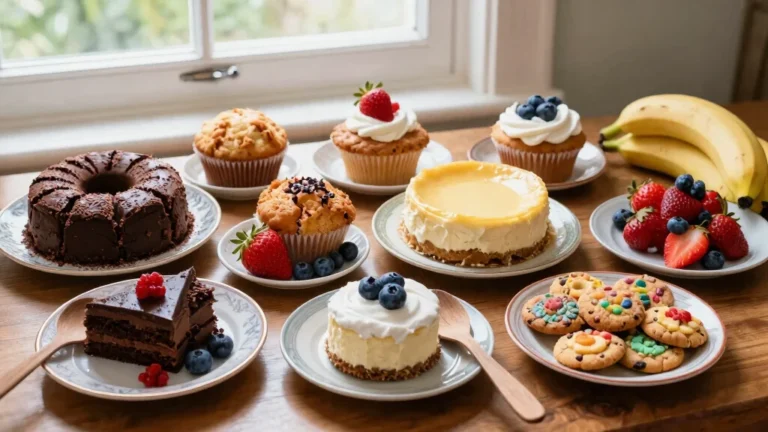
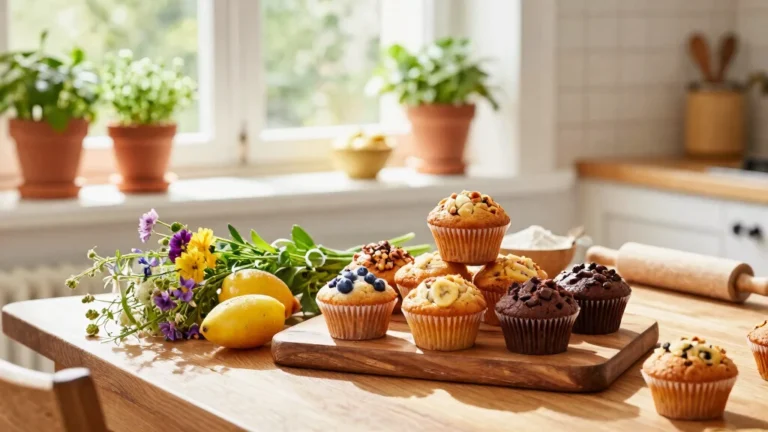
There’s nothing quite like seeing the joy on a child’s face when they create their very own baked treat.
This collection of easy baking recipes for kids is designed to be fun, engaging, and simple enough for young bakers to follow.
Expect vibrant flavors, delightful textures, and a sense of accomplishment as your children master these kid-friendly treats.
These recipes are perfect for a rainy day activity or for celebrating special moments with homemade goodies.
Let your little ones explore the world of baking with confidence and creativity.
The History and Cultural Significance
• Baking traces its origins to ancient Egypt, where it was originally created as a means of preserving grains.
• The tradition of baking evolved over centuries, with new techniques and ingredients introduced through trade and exploration.
• In many cultures, baking is a communal activity, often associated with celebrations and family gatherings.
• While many variations exist across different regions, the authentic version maintains simplicity and accessibility, making it ideal for all ages.
Recommended Products

Endless Giggles and Happy Times: Watch the smiles and memories unfold with ZICOTOs’ kids’ cooking sets for real cooking! From baking with mom and making snacks with daddy to hosting pretend cooking shows, your little chef will love every moment with the cute set

Real food. Real science. Real fun! Bake itty-bitty pies, cupcakes, pastries, and pizzas using teeny-tiny tools and pans; learn why cakes rise, eggs get solid, and cookies smell delicious; baking set fits into an 5.2 x 3.4 x 2.2-inch tin to easily take to grandma’s house or a sleepover
Recipe Overview
Recommended Products
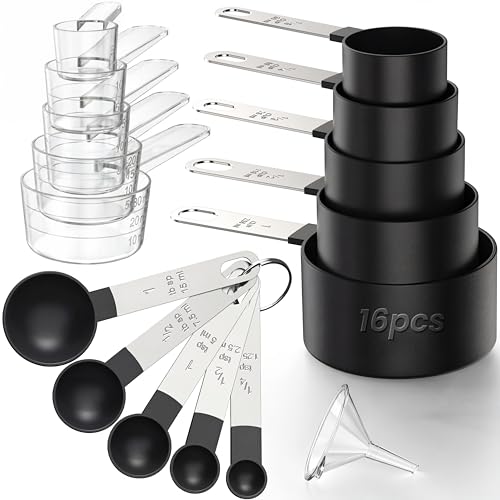
16PCS SET: Including multiple sizes, including 1cup, 1/2cup, 1/3cup, 1/4cup, 1/8cup, 30ml, 20ml, 15ml, 10ml, 5ml, 1tbsp, 1/2tbsp, 1tsp, 1/2tsp, 1/4tsp, and 1 funnel

[Multiple Sizes]: Including 5 Measuring cups (1/8, 1/4, 1/3 , 1/2 , 1 cup), 5 Measuring spoons (1/4, 1/2 , 1 tsp, 1/2, 1 tbsp). Meet All Your Needs On Cooking And Baking.

[Multiple Sizes]: Including 4 Measuring cups ( 1/4, 1/3, 1/2, 1 cup), 6 Measuring spoons (1/8, 1/4, 1/2 , 1 tsp, 1/2, 1 tbsp). Meet All Your Needs On Cooking And Baking
Nutritional Information (per serving)
Recommended Products

Natural, Unbleached Parchment Paper: Made from natural wood pulp, our parchment paper baking sheet is completely free from fluorescent agents, chlorine, and other harmful chemicals. It's food-grade, waterproof, non-toxic and BPA-FREE.

Natural, Unbleached Parchment Paper: Made from natural wood pulp, our parchment paper baking sheet is completely free from fluorescent agents, chlorine, and other harmful chemicals. It's food-grade, waterproof and BPA-FREE. Also the paper sheets is biodegradable, eco-friendly.

Package Includes: Twenty two (22) Reynolds Kitchens Cookie Baking Sheets measuring 12 inches long by 16 inches wide
Essential Equipment Guide
Mixing Bowls: Essential for combining ingredients efficiently. Opt for a set of various sizes to accommodate different recipes. Stainless steel or glass bowls are great alternatives due to their durability.
Measuring Cups and Spoons: Accurate measurements are key in baking. Look for sets that include a range of sizes for precision. Consider digital scales as an alternative for exact measurements.
Baking Sheets: Important for even baking and easy clean-up. Choose non-stick or lined with parchment paper to prevent sticking. Consider rimmed sheets to avoid spills.
Ingredients
For the Base
|
|
| Amount | Ingredient | Notes |
|---|---|---|
| 1 cup | all-purpose flour | sifted for light texture |
| 1/2 cup | unsalted butter | softened |
| 1/2 cup | sugar | adds sweetness |
For the Topping
| Amount | Ingredient | Notes |
|---|---|---|
| 1 cup | chocolate chips | melted |
| 1/2 cup | sprinkles | for decoration |
Preparation Methods
Creaming: Creaming butter and sugar is crucial for incorporating air into the batter, resulting in a light texture. Use a mixer at medium speed. The mixture should be pale and fluffy.
Folding: Gently incorporate dry ingredients into the wet mixture to avoid overmixing. Use a spatula and a gentle hand to maintain airiness.
Melting Chocolate: Use a double boiler or microwave in short bursts to prevent burning. Stir frequently for a smooth, glossy finish.
Step 1: Gather Ingredients

Start by gathering all the necessary ingredients to ensure you have everything on hand.
Measure each ingredient accurately using measuring cups and spoons for precision.
This preparation step helps streamline the baking process.
Ensure butter is softened for easy mixing.
Step 2: Preheat Oven

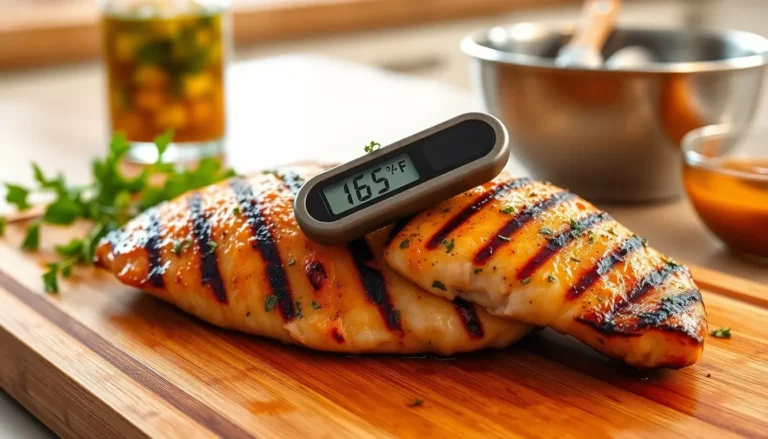
Preheat your oven to 350 degrees Fahrenheit to ensure even baking.
This step is crucial as it allows the oven to reach the necessary temperature before baking.
Check the oven thermometer to confirm the correct temperature.
Prepare baking sheets with parchment paper.
Step 3: Cream Butter and Sugar

In a mixing bowl, combine the softened butter and sugar.
Use a mixer to beat them together until the mixture is light and fluffy.
This process should take about 3-5 minutes on medium speed.
Scrape down the sides of the bowl to ensure even mixing.
Step 4: Add Flour

Gradually add the sifted flour to the creamed mixture.
Use a spatula to fold in the flour gently, avoiding overmixing.
The mixture should be smooth and well combined.
Look for a cohesive dough that holds together.
Step 5: Shape Cookies

Scoop tablespoons of dough onto the prepared baking sheets.
Space each scoop about 2 inches apart to allow for spreading.
Use your hands or a spoon to flatten each scoop slightly.
Ensure even shapes for consistent baking.
Step 6: Bake Cookies

Place the baking sheets in the preheated oven.
Bake the cookies for 10-12 minutes or until edges are golden brown.
Rotate the baking sheets halfway for even baking.
Look for slightly crisp edges and a soft center.
Recommended Products

3-PIECE: Set includes 1-qt, 1.5-qt, and 2.5-qt round glass bowls. This is the perfect set for all manners of prepping, baking and home entertainment.

COMPLETE KIDS COOKING SET: This all-inclusive junior cooking set includes a chef’s hat, cooking apron, potato masher, pizza cutter, knife, peeler, cutting board, food tongs, basic kitchen utensils, and two mixing bowls that collapse for convenient storage.

VERSATILE 4-PIECE MIXING BOWL SET – Four nesting sizes (18oz, 1.25QT, 2.5QT, 4QT) handle every job: whisk eggs and dressings in the small bowls, mix cookie dough and pancake batter in the large, prep veggies, or serve salads, chips, and popcorn at the table.
Step 7: Cool Cookies

Remove the baking sheets from the oven and let cookies cool for 5 minutes.
Transfer cookies to a wire rack to cool completely.
This step ensures the cookies firm up without becoming too hard.
Allow at least 10 minutes of cooling before decorating.
Step 8: Melt Chocolate

In a small bowl, melt chocolate chips using a microwave or double boiler.
Stir frequently to prevent burning and ensure smoothness.
The chocolate should be glossy and pourable.
Be cautious of overheating, which can seize the chocolate.
Step 9: Decorate Cookies

Drizzle the melted chocolate over the cooled cookies using a spoon or piping bag.
Add sprinkles immediately to ensure they stick to the chocolate.
Work quickly before the chocolate sets.
The decoration should be even and colorful.
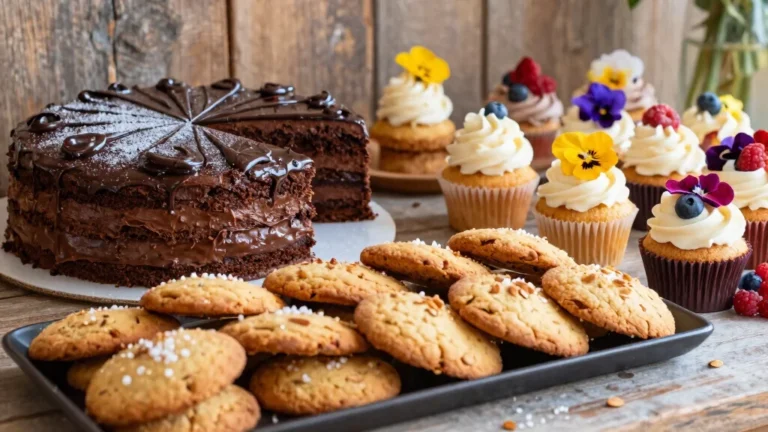
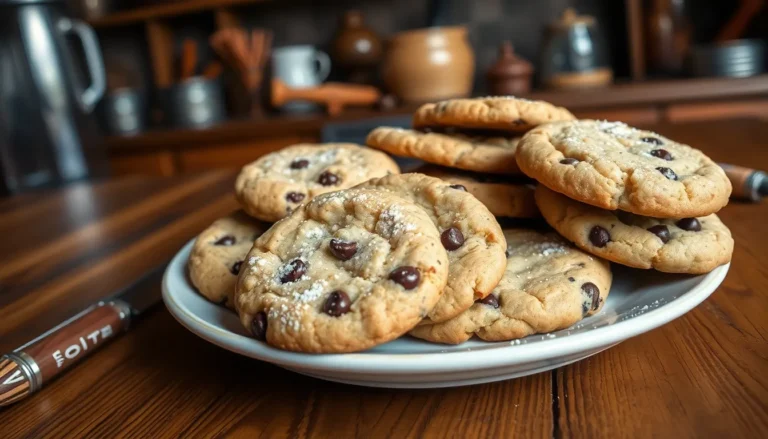
Step 10: Serve and Enjoy

Arrange the decorated cookies on a serving platter.
The cookies are now ready to be enjoyed by kids and adults alike.
Perfect for a snack or dessert at any gathering.
Store leftovers in an airtight container for freshness.
Critical Timing and Temperature Guide
Baking Cookies: Bake at 350°F for 10-12 minutes, watching for golden edges. Avoid overbaking, as this can lead to hard cookies.
Melting Chocolate: Melt at low heat, stirring frequently. Overheating can cause chocolate to seize and become grainy.
Cooling Cookies: Cool for 5 minutes on the baking sheet, then transfer to a wire rack. This prevents cookies from becoming soggy.
Pro Tips for Baking Recipes for Kids
• Ingredient Selection: Use high-quality chocolate chips and fresh butter for the best flavor and texture.
• Preparation Secret: Chill the dough for 15 minutes before baking to enhance texture and prevent spreading.
• Temperature Management: Use room temperature eggs and butter for even mixing and better emulsification.
• Texture Enhancement: For chewier cookies, slightly underbake and let them cool on the baking sheet.
• Flavor Layering: Add a pinch of salt to the chocolate for a deeper flavor and contrast.
• Make-Ahead Strategies: Dough can be made in advance and frozen. Thaw in the fridge before shaping and baking.
• Restaurant-Quality Finishing Touches: Sprinkle a touch of sea salt on top of each cookie for a gourmet finish.
• Equipment Optimization: Use silicone baking mats for even heat distribution and easy release.
Troubleshooting Common Issues
• Cookies Spreading Too Much: Ensure dough is chilled before baking. Check oven temperature accuracy.
• Cookies Too Hard: Reduce baking time slightly and use a lighter hand with flour.
• Chocolate Seizing: Melt chocolate slowly and stir frequently. Avoid contact with water.
• Uneven Baking: Rotate baking sheets halfway through the baking process.
• Burnt Edges: Check oven calibration and use parchment paper to prevent direct contact.
Variations and Regional Differences
• American Style: Often includes nuts or dried fruits for added texture and flavor.
• European Style: May use marzipan or almond paste for a richer, denser texture.
• Asian Fusion: Incorporates matcha or black sesame for unique flavors and colors.
• Latin American Twist: Adds cinnamon or chili powder for a spicy kick.
Food Science Behind the Recipe
• Maillard Reaction: Occurs during baking, giving cookies their golden color and complex flavor.
• Emulsification: The process of combining fat and sugar, essential for a smooth, creamy batter.
• Gluten Development: Minimal mixing prevents overdevelopment, keeping cookies tender.
Frequently Asked Questions
What's the most common mistake people make when preparing baking recipes for kids? Overmixing the dough, which can lead to tough cookies.
Can I substitute whole wheat flour for all-purpose flour? Yes, but expect a denser texture and adjust liquid ingredients as needed.
How do I store leftover cookies? In an airtight container at room temperature, away from direct sunlight.
What can I use instead of chocolate chips? Chopped chocolate bars or candy pieces work well as substitutes.
How can I make these cookies gluten-free? Use a gluten-free flour blend designed for baking, ensuring a 1:1 ratio.
Can I add more flavor to the cookies? Yes, vanilla extract or a pinch of cinnamon can enhance flavors.
What's the best way to melt chocolate without burning? Use a double boiler or microwave in short intervals, stirring often.
Serving and Presentation Guide
• Traditional Presentation: Serve on a platter lined with a colorful napkin for a festive touch.
• Casual Approach: Arrange cookies in a decorative jar for an inviting, homey feel.
• Gift Presentation: Wrap cookies in cellophane bags with a ribbon for a simple gift.
• Party Display: Stack cookies on a tiered stand for an impressive dessert table centerpiece.
Recommended Products

🌈 Bright & Colorful Fun – A rainbow mix of candy-coated chocolate chips adds vibrant color and joy to every treat.

Colorful crunch for desserts – These rainbow candy coated chocolate chips add the classic cosmic brownie sprinkle look with a crisp candy shell and smooth chocolate center that brings color, texture, and fun to homemade treats.

One 12-ounce bag of Mini Semi-Sweet Chocolate Chips
Conclusion
These easy baking recipes for kids offer a delightful introduction to the joy of cooking.
Perfect for creating memories and delicious treats, these recipes are a hit with children and adults alike.
Encourage your young bakers to explore and enjoy the creative process of baking.