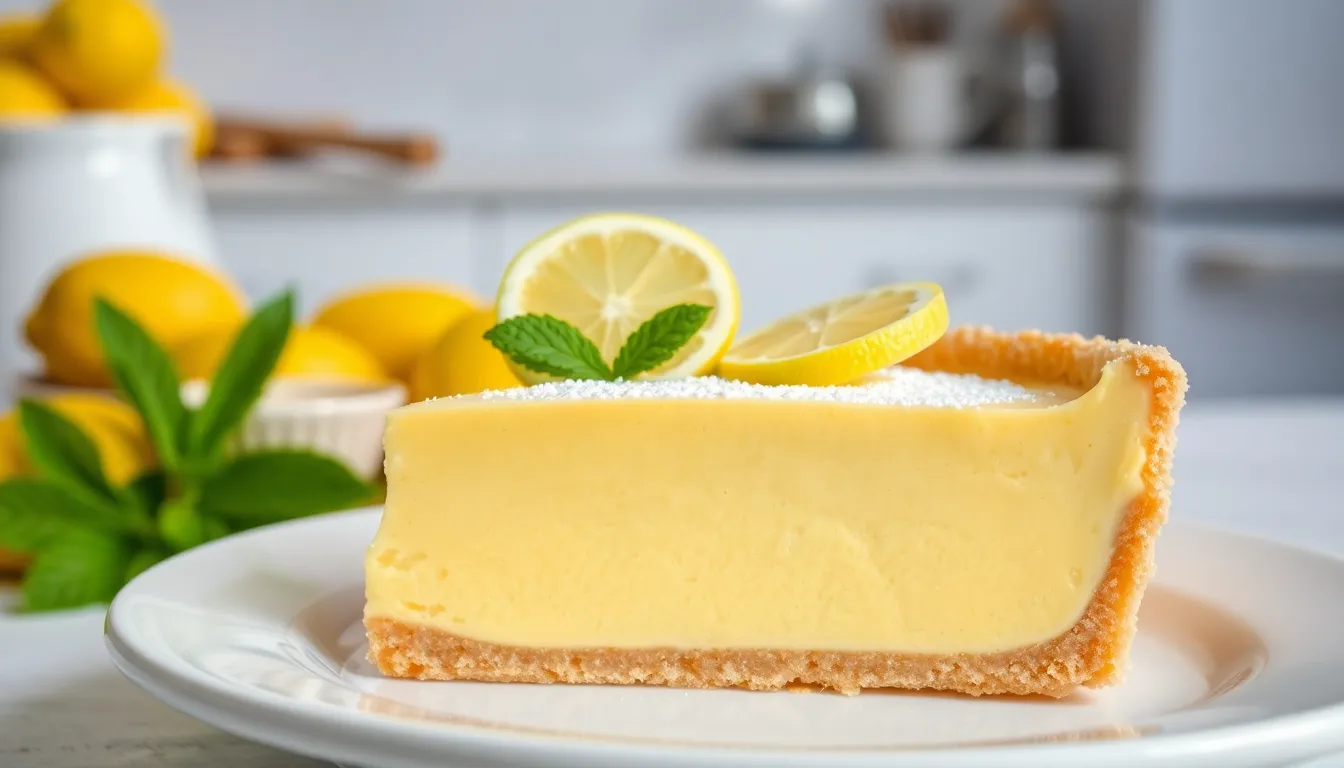
Looking for a lemon pie without the fuss of meringue? This easy no-meringue lemon pie delivers all the tangy, sweet flavor you love with half the work.
Bright, zesty lemon pie has always been a crowd-pleaser, but traditional recipes can be intimidating with their finicky meringue toppings. This simplified version skips the meringue altogether, focusing instead on the perfect balance of tart lemon filling and buttery crust. You’ll love how the bold citrus flavor shines through without being overwhelmed by a mountain of egg whites.
Whether you’re a baking novice or simply short on time, this no-meringue lemon pie is your answer to a dessert that impresses without stress. The smooth, silky filling sets beautifully and slices cleanly, making it perfect for everything from casual family dinners to special occasions.
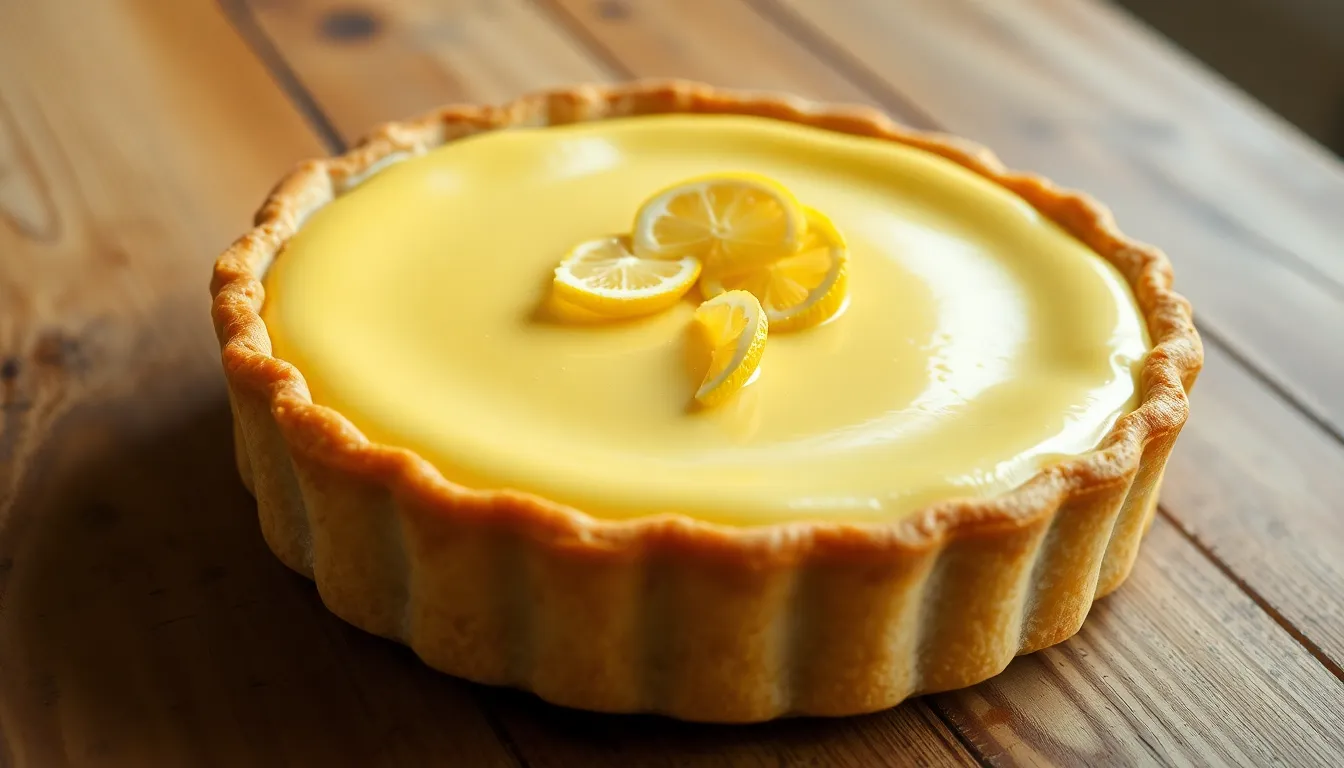
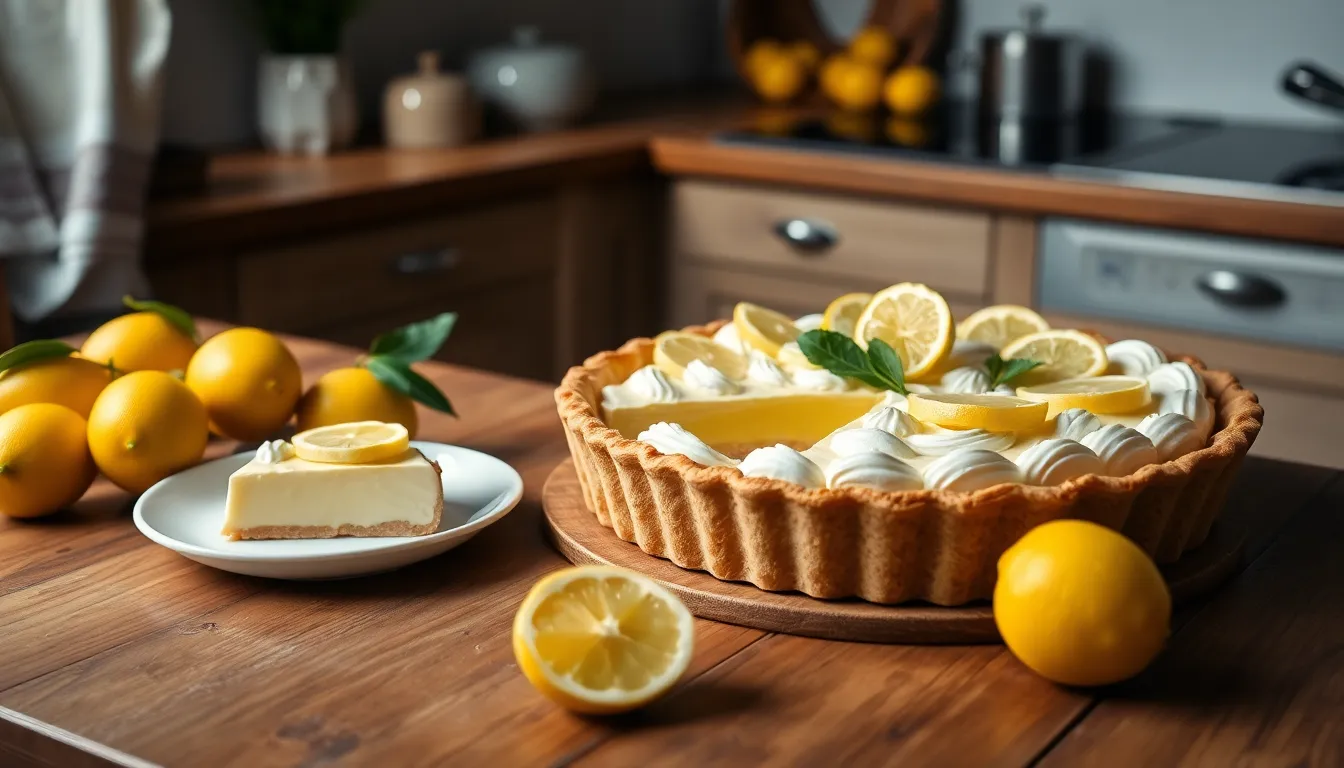
Classic Lemon Pie Without Meringue
This traditional lemon pie delivers bright citrus flavor without the fuss of meringue topping. Perfect for lemon lovers who prefer a straightforward dessert experience the pie features a velvety smooth filling nestled in a flaky homemade crust. The absence of meringue allows the pure lemon flavor to take center stage creating a dessert that’s both elegant and approachable.
Ingredients for the Crust
- 1¼ cups all-purpose flour
- ¼ teaspoon salt
- ⅓ cup cold unsalted butter cubed
- 3-4 tablespoons ice water
Ingredients for the Filling
- 1 cup granulated sugar
- ¼ cup cornstarch
- ¼ teaspoon salt
- 1½ cups water
- 3 large egg yolks lightly beaten
- 2 tablespoons butter
- ⅓ cup fresh lemon juice
- 1 tablespoon lemon zest
- Optional: 1-2 drops yellow food coloring
Preparing the Crust
Start by preparing your pie crust. In a large bowl combine flour and salt. Cut in the cold butter using a pastry blender or two forks until the mixture resembles coarse crumbs. Sprinkle ice water over the mixture one tablespoon at a time tossing gently with a fork until the dough holds together when pressed.
Form the dough into a disk wrap in plastic wrap and refrigerate for at least 30 minutes. This resting period allows the gluten to relax ensuring a tender crust.
Roll the chilled dough on a lightly floured surface into a 12-inch circle. Transfer carefully to a 9-inch pie plate crimping the edges for a decorative finish. Prick the bottom with a fork several times to prevent bubbling.
Line the crust with parchment paper and fill with pie weights or dried beans. Bake at 375°F for 15 minutes then remove the weights and parchment. Return to the oven for another 5-7 minutes until lightly golden. Allow the crust to cool completely before filling.
Making the Lemon Filling
In a medium saucepan whisk together sugar cornstarch and salt. Gradually add water whisking continuously to prevent lumps. Cook over medium heat stirring constantly until the mixture thickens and comes to a boil about 5-7 minutes.
Reduce heat to low and cook for another 2 minutes. Remove from heat. Temper the egg yolks by gradually adding about ½ cup of the hot mixture to the beaten yolks whisking constantly. This step prevents the eggs from scrambling.
Pour the tempered egg mixture back into the saucepan whisking vigorously. Return to medium-low heat and cook for 2 more minutes while stirring continuously. The filling should be thick enough to coat the back of a spoon.
Remove from heat and stir in butter lemon juice and zest until fully incorporated. Add food coloring if desired for a more vibrant yellow color.
Assembling and Chilling
Pour the hot filling directly into the cooled pie crust smoothing the top with a spatula. To prevent a skin from forming press a piece of plastic wrap directly onto the surface of the filling.
Refrigerate the pie for at least 4 hours or overnight until completely set. This cooling time is crucial for proper slicing.
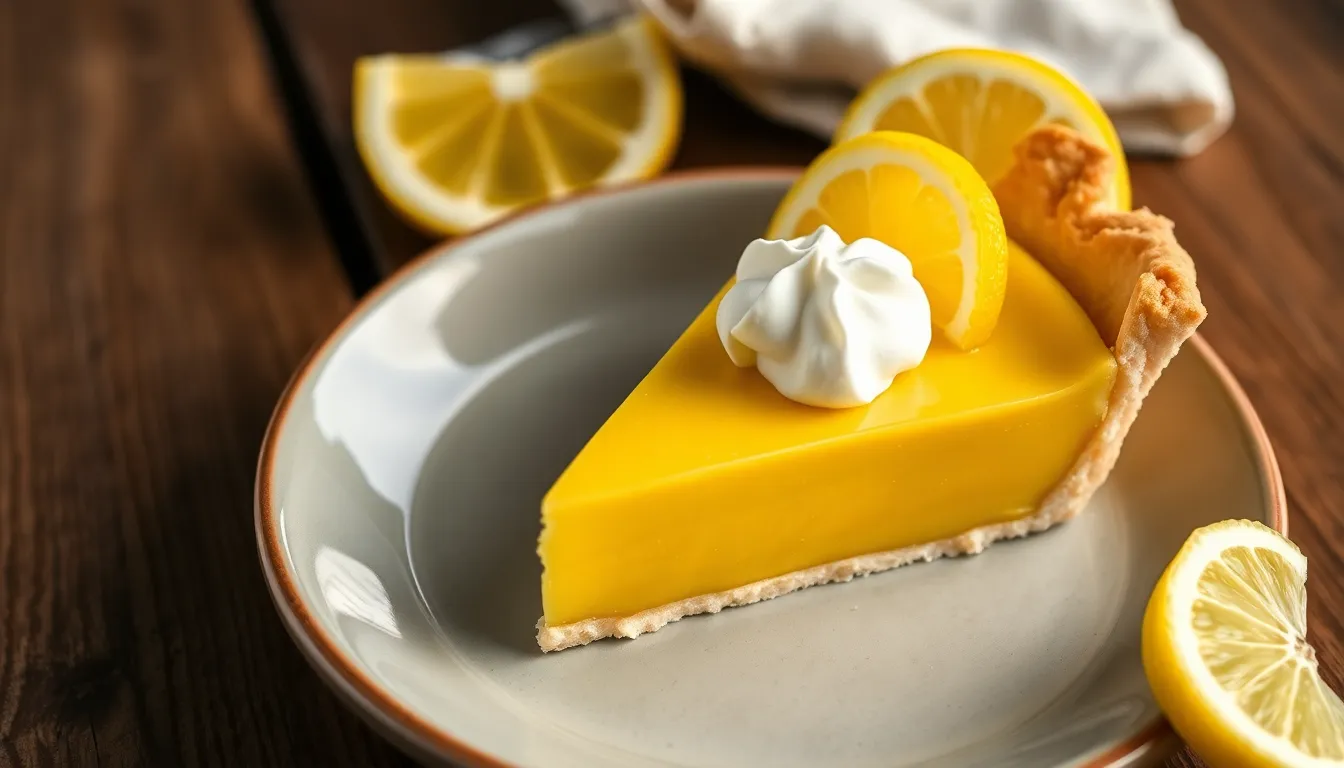
Before serving remove the plastic wrap and garnish with fresh lemon slices or a light dusting of confectioners’ sugar if desired. For the best presentation use a sharp knife dipped in hot water and wiped clean between cuts to achieve clean slices.


Why This Lemon Pie Recipe Works
This lemon pie recipe stands out for its perfect balance of simplicity and flavor. You’ll appreciate how the bright citrus filling delivers intense lemon flavor without requiring the technical challenge of meringue preparation. The streamlined approach focuses on what truly matters – a velvety smooth lemon filling and buttery crust that complement each other perfectly.
Unlike traditional lemon meringue pies that can weep or deflate, this no-meringue version maintains its beautiful presentation from the first slice to the last. The filling sets firmly enough to create clean slices yet remains luxuriously creamy when you take a bite. This consistency makes it ideal for preparing ahead for gatherings or special occasions.
The recipe utilizes fresh lemon juice and zest rather than artificial flavorings, ensuring an authentic citrus taste that balances sweetness with natural tanginess. Your taste buds will detect the difference between this homemade filling and store-bought alternatives immediately.
Temperature control proves crucial to this recipe’s success – the gentle cooking process prevents curdling while developing rich flavor. The filling’s slow cooling and chilling time allows the starches to fully set and flavors to deepen, resulting in a more pronounced lemon character than rushed versions.
The buttery crust provides the perfect textural contrast to the smooth filling, creating an experience that satisfies both flavor and mouthfeel expectations. You can easily adapt this versatile recipe with different citrus variations or crust options while maintaining its foolproof preparation method.


Ingredients For Lemon Pie No Meringue
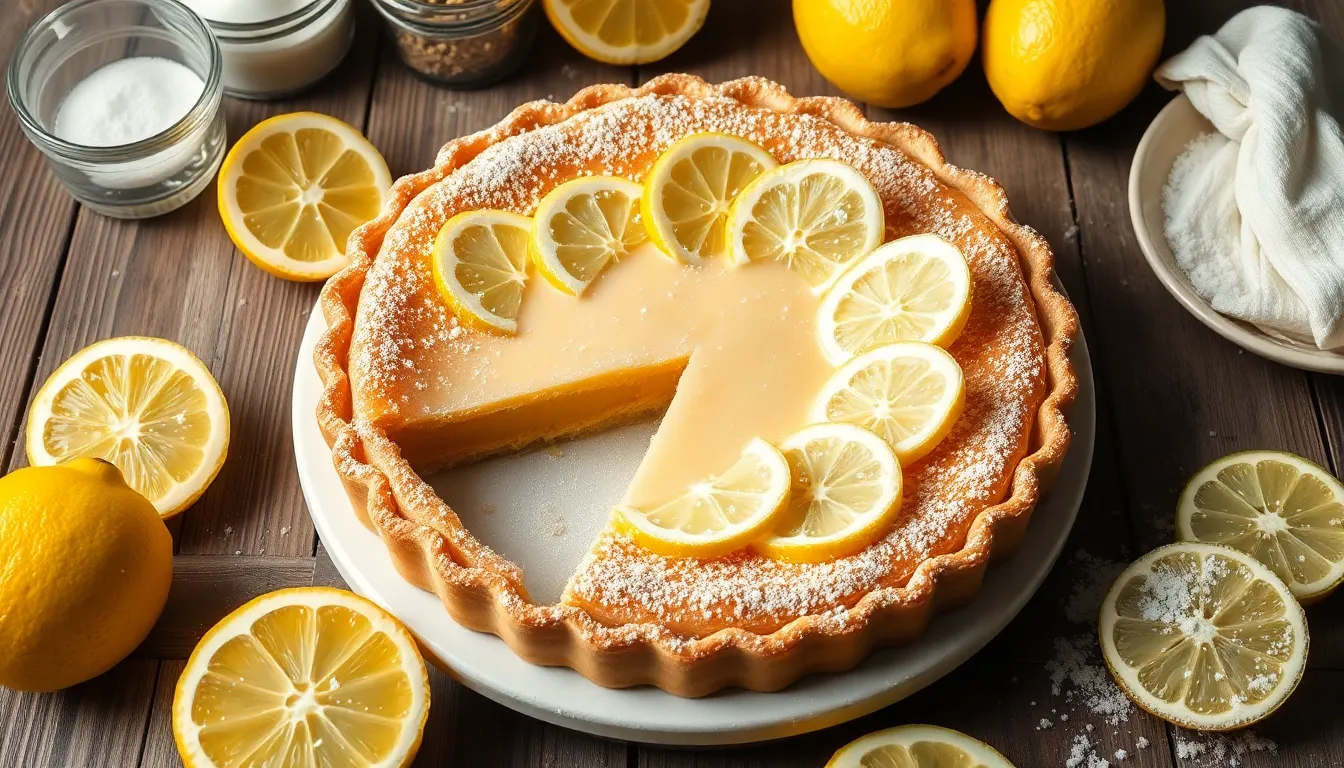
This no-fuss lemon pie requires just a handful of quality ingredients for spectacular results. Gather these components before you begin for a smooth baking experience.
For The Buttery Pie Crust
- 1¼ cups all-purpose flour
- ½ teaspoon salt
- 1 tablespoon granulated sugar
- ½ cup cold unsalted butter (1 stick) cut into small cubes
- 3-4 tablespoons ice water
- 1 teaspoon white vinegar (helps create flakiness)
For The Tangy Lemon Filling
- 1 cup granulated sugar
- ¼ cup cornstarch
- ¼ teaspoon salt
- 1½ cups water
- 4 large egg yolks lightly beaten
- 2 tablespoons butter
- ⅓ cup fresh lemon juice (approximately 2-3 lemons)
- 1 tablespoon lemon zest
- Optional: yellow food coloring (1-2 drops for vibrant color)
- Optional garnishes: thin lemon slices whipped cream or confectioners’ sugar


Kitchen Tools You’ll Need
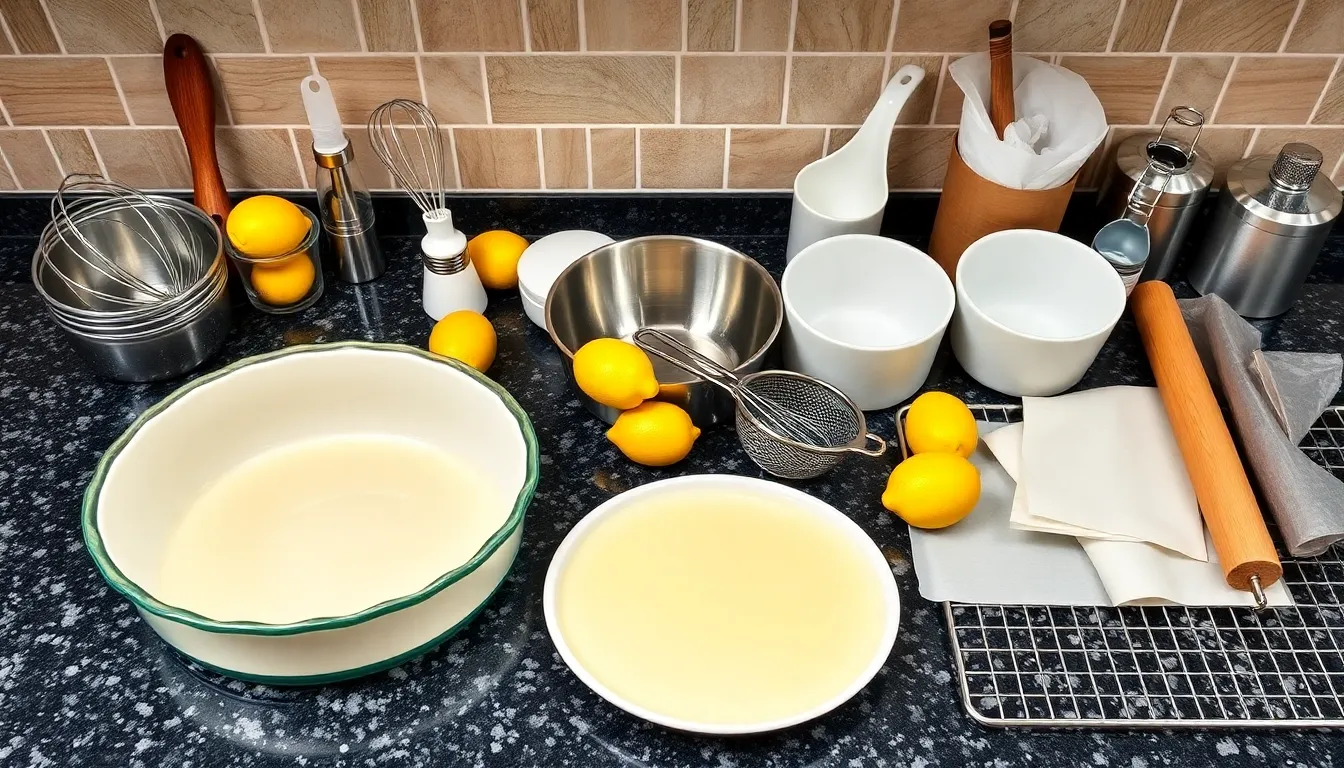
Preparing a lemon pie without meringue requires several essential kitchen tools to ensure perfect results every time. Gather these items before starting your baking process:
- 9-inch pie dish – Preferably glass or ceramic for even heating
- Medium saucepan – For cooking the lemon filling
- Mixing bowls – At least two different sizes for separate components
- Whisk – To combine filling ingredients smoothly and prevent lumps
- Wooden spoon or silicone spatula – For stirring the filling as it thickens
- Measuring cups and spoons – For accurate ingredient portions
- Zester or microplane – To extract fresh lemon zest
- Citrus juicer – For efficiently extracting juice from lemons
- Rolling pin – If using homemade pie crust
- Plastic wrap – For chilling dough or covering the finished pie
- Fine-mesh strainer – Optional but helpful for straining the filling
- Pie weights or dried beans – For blind baking the crust
- Parchment paper – For lining the crust during blind baking
- Aluminum foil – To protect crust edges from over-browning
- Cooling rack – For properly cooling the pie after baking
Your lemon filling needs careful temperature control during cooking to prevent curdling. A heavy-bottomed saucepan distributes heat evenly and reduces hot spots that might scramble the eggs. When whisking the filling ingredients together ensure you use a sturdy whisk that can reach the corners of your pan to prevent any mixture from sticking and burning.


How To Make Lemon Pie No Meringue
Creating this delicious lemon pie without meringue involves three simple stages that yield spectacular results. Follow these straightforward steps to achieve a perfect balance of tangy lemon filling in a buttery, flaky crust.
Preparing The Perfect Pie Crust
Start by combining 1½ cups all-purpose flour, 2 tablespoons sugar, and ½ teaspoon salt in a large mixing bowl. Cut in 6 tablespoons cold butter using a pastry blender or two forks until the mixture resembles coarse crumbs. Add ice-cold water one tablespoon at a time (about 4-6 tablespoons total) until the dough just holds together when pinched. Form the dough into a disk, wrap in plastic wrap, and refrigerate for at least 30 minutes.
Roll the chilled dough on a lightly floured surface into a 12-inch circle. Transfer to a 9-inch pie dish by carefully rolling the dough around your rolling pin and unrolling it over the dish. Press the dough gently into the bottom and sides of the dish. Trim excess dough leaving a 1-inch overhang, then fold under and crimp the edges. Prick the bottom several times with a fork to prevent bubbling. Chill the prepared crust for 15 minutes while preheating your oven to 375°F. Line the crust with parchment paper, fill with pie weights or dried beans, and blind bake for 15 minutes. Remove the weights and parchment, then bake for another 5-7 minutes until lightly golden.
Making The Lemon Filling
Combine 1 cup granulated sugar and ¼ cup cornstarch in a medium heavy-bottomed saucepan. Whisk in 1½ cups water, ½ cup fresh lemon juice, and 2 tablespoons lemon zest until smooth. Place over medium heat and cook while stirring constantly until the mixture starts to thicken.
In a separate bowl, whisk together 4 large egg yolks. Temper the eggs by gradually adding about ½ cup of the hot lemon mixture while whisking continuously. Pour the tempered egg mixture back into the saucepan and reduce heat to medium-low. Cook for another 4-5 minutes, stirring constantly until the filling becomes thick and glossy. Remove from heat and whisk in 2 tablespoons butter and a drop of yellow food coloring if desired. The filling should coat the back of a spoon and hold a line when you run your finger through it.
Baking Your Pie
Pour the hot lemon filling into your pre-baked pie crust, smoothing the top with a spatula for an even surface. Allow the pie to cool on a wire rack for about 1 hour at room temperature. Transfer to the refrigerator and chill for at least 4 hours or preferably overnight to allow the filling to set completely.
For the best results, remove the pie from the refrigerator about 15-20 minutes before serving to take the chill off. Use a sharp knife dipped in hot water and wiped clean between cuts for neat slices. Garnish each slice with a dollop of whipped cream and a small lemon wedge or twist for an elegant presentation. This lemon pie will remain fresh when covered and refrigerated for up to 3 days, though the crust may soften slightly after the first day.


Recipe Variations

This classic lemon pie recipe offers plenty of room for personalization with these delicious adaptations that maintain the signature tangy flavor while introducing new textures and taste elements.
Shortbread Crust Option
For a more tender and cookie-like base, try substituting the traditional pie crust with a buttery shortbread version. Mix 1½ cups all-purpose flour with ½ cup powdered sugar and a pinch of salt in a food processor. Add 3/4 cup cold cubed butter and pulse until the mixture resembles coarse crumbs. Press this mixture firmly into your pie dish creating an even layer across the bottom and up the sides. Prick the crust with a fork several times before blind baking at 350°F for 15-18 minutes until lightly golden. This shortbread crust provides a sweeter foundation that beautifully complements the tangy lemon filling while offering a more forgiving alternative for those who find traditional pie crust challenging.
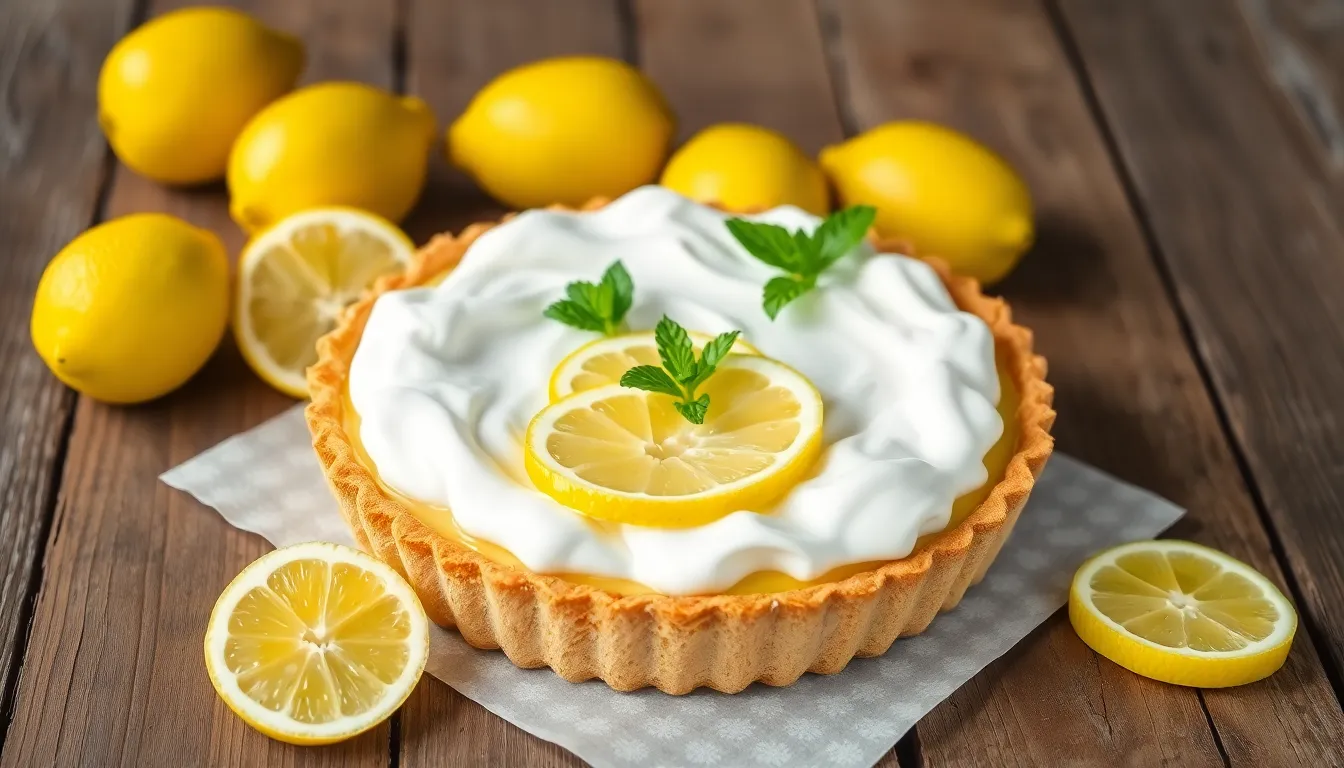
Creamy Whipped Topping
Elevate your no-meringue lemon pie with a luxurious whipped cream topping that adds visual appeal and a soft texture contrast. Chill 1 cup of heavy whipping cream in the refrigerator along with your mixing bowl and beaters for at least 30 minutes. Whip the cold cream until soft peaks begin to form then add 3 tablespoons of powdered sugar and 1 teaspoon of vanilla extract. Continue whipping until stiff peaks form but be careful not to overbeat. Spread or pipe the whipped cream over your completely cooled lemon pie just before serving. For extra flavor complexity try folding 2 tablespoons of lemon curd into your whipped cream or sprinkle the finished topping with lemon zest for a burst of citrus aroma and visual appeal.


Make-Ahead And Storage Tips
Planning ahead can make entertaining stress-free when it comes to this no-meringue lemon pie. You can prepare this delicious dessert up to 3 days before serving without compromising its quality or flavor.
To make your pie ahead of time simply follow the complete recipe and allow it to cool fully at room temperature. Cover the cooled pie tightly with plastic wrap making sure the wrap doesn’t touch the surface of the filling. Refrigerate until needed and remove from the refrigerator about 20 minutes before serving for the best flavor and texture.
For storing leftovers keep your lemon pie refrigerated. The pie will maintain its best quality for up to 4 days when properly stored in the refrigerator. After slicing any remaining portions should be covered with plastic wrap or transferred to an airtight container to prevent the filling from absorbing refrigerator odors.
Freezing this lemon pie is also an option for longer storage. For best results freeze the completely cooled pie uncovered until solid then wrap it tightly in a double layer of plastic wrap followed by a layer of aluminum foil. The frozen pie will keep well for up to 2 months. Thaw overnight in the refrigerator before serving.
Remember that the texture of the crust may change slightly after freezing but the flavor will remain delicious. You can refresh the crust by placing the thawed pie in a 350°F oven for about 10 minutes before serving.
For individual slices place each piece on a parchment-lined baking sheet and freeze until firm. Once frozen wrap each slice separately and store in a freezer-safe container. This method allows you to enjoy a single serving whenever a craving strikes without thawing the entire pie.


Serving Suggestions
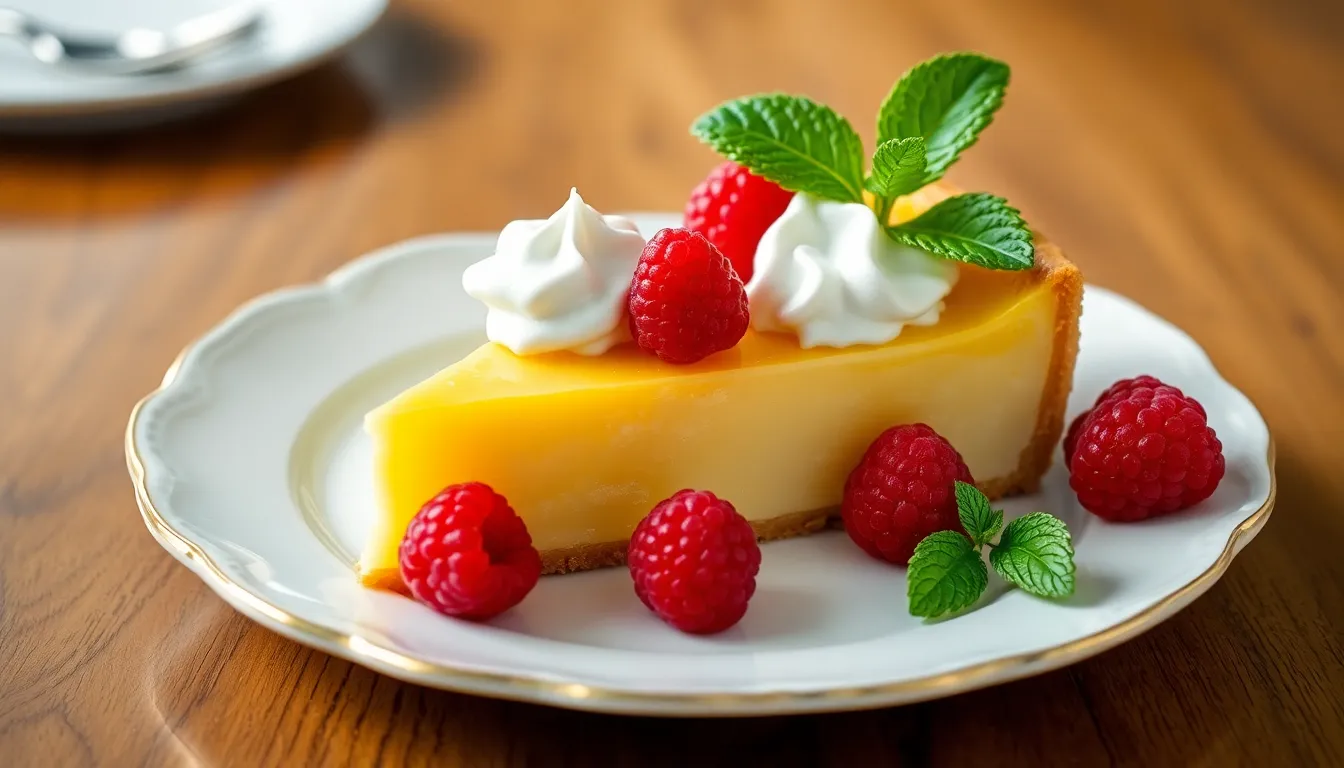
This no-meringue lemon pie shines brightest when presented with thoughtful accompaniments that enhance its tangy flavor profile. Try serving each slice with a dollop of freshly whipped cream to balance the citrus notes with creamy sweetness. Fresh berries such as raspberries or blueberries provide both visual contrast and complementary flavors when scattered alongside your pie slice.
For beverage pairings consider serving this dessert with hot tea such as Earl Grey or chamomile which complement the lemon flavor beautifully. Coffee enthusiasts might enjoy a medium roast that won’t overpower the delicate citrus notes of the pie. On warmer days an iced tea garnished with mint creates a refreshing combination.
Create an elegant presentation by dusting individual slices with powdered sugar just before serving. Mint leaves positioned alongside each plate add a touch of color and sophisticated aroma. Consider serving your lemon pie slightly chilled rather than straight from the refrigerator to maximize flavor development.
For special occasions transform this humble dessert into an impressive finale by serving it on your best dessert plates with silver forks. Add a small scoop of vanilla ice cream on the side to create a delightful temperature contrast with each bite. Drizzle a small amount of raspberry coulis on the plate for an artistic touch that enhances both presentation and flavor complexity.


Perfect Pairings

Your no-meringue lemon pie deserves companions that complement its bright tangy flavor while creating a balanced dessert experience. Thoughtful beverage and food pairings can elevate this classic dessert to new heights for any occasion.
Beverage Companions
Earl Grey tea makes an exceptional pairing with lemon pie as its bergamot notes enhance the citrus flavors without overwhelming them. A crisp Prosecco or Champagne offers effervescence that cuts through the richness of the pie while highlighting its lemony brightness. For coffee lovers try a medium roast with caramel undertones rather than dark roasts that might compete with the pie’s delicate flavors.
Iced tea with a sprig of mint provides a refreshing counterpoint during warmer months. White wines like Riesling or Gewürztraminer offer fruity notes that beautifully complement the lemon filling’s tartness. Serve these slightly chilled for the best flavor experience.
Complementary Desserts
Create a stunning dessert spread by pairing your lemon pie with contrasting flavors and textures:
- Fresh berry platters with blackberries raspberries and blueberries
- Shortbread cookies that echo the buttery crust
- Dark chocolate truffles for those who enjoy sweet-tart contrasts
- Vanilla bean ice cream to temper the tanginess
A small cheese board featuring mild options like brie or mascarpone can provide a sophisticated conclusion to dinner parties when served alongside thin slices of your lemon pie.
Seasonal Accompaniments
Spring and summer gatherings benefit from fresh herb garnishes like basil or mint that add aromatic dimensions to your dessert offering. During fall months consider serving the pie with spiced apple cider and cinnamon sticks for a seasonal touch. Winter holidays call for cranberry compote served alongside for a festive red and yellow presentation.
Fresh fruit sauces drizzled on the plate before placing your pie slice create restaurant-quality presentations. Try raspberry coulis or blueberry compote for colorful accents that complement without overwhelming the star attraction.


Troubleshooting Tips

Even with a simple recipe like this no-meringue lemon pie, occasional challenges can arise. Here are answers to common issues you might encounter:
Runny Filling
Your lemon filling should have a pudding-like consistency when set. If it’s too runny, you likely didn’t cook it long enough or at a high enough temperature. The filling needs to reach a full bubble and thicken properly before removing from heat. Next time, ensure it simmers for at least 1-2 minutes after it begins to thicken and coat the back of a spoon. For salvaging a runny pie, refrigerate it for at least 6 hours or overnight which often helps it firm up.
Lumpy Filling
Lumps typically appear when egg yolks aren’t properly tempered or the mixture isn’t whisked continuously during cooking. To prevent this issue, whisk constantly while cooking the filling and ensure you slowly add hot liquid to egg yolks while whisking vigorously. If you notice lumps forming, immediately remove from heat and strain the filling through a fine-mesh sieve before pouring into your crust.
Soggy Crust
A soggy bottom crust ruins the textural contrast of this pie. Blind baking is essential—prick the bottom of your crust with a fork before baking and use pie weights or dried beans. Make sure to bake the empty crust until it’s golden and completely set. Another trick involves brushing the inside of your pre-baked crust with a thin layer of beaten egg white while it’s still hot, creating a moisture barrier between filling and crust.
Cracked Crust
Cracks in your pie crust usually indicate the dough was overworked or became too warm before baking. Handle the dough minimally and keep it chilled until ready to use. If cracks appear during blind baking, make a simple paste of flour and water to patch them before adding the filling. For decorative crusts that crack during baking, strategic placement of whipped cream can hide imperfections when serving.
Weeping or Beading
Small droplets of moisture on your pie’s surface (weeping) typically occur when the filling is overcooked or cooled too quickly. Cook the filling just until thickened and allow the pie to cool gradually at room temperature before refrigerating. If beading occurs, gently blot the surface with a paper towel before serving.
Filling Too Tart or Sweet
Balance is key with lemon desserts. If your finished pie tastes too tart, serve it with sweetened whipped cream to offset the acidity. For an overly sweet pie, a sprinkle of additional lemon zest on top before serving can heighten the citrus notes. Take notes on your preference and adjust the sugar-to-lemon ratio slightly in your next attempt.


The Best Seasons For Lemon Pie
While lemon pie without meringue can be enjoyed year-round, certain seasons offer distinct advantages for this bright and tangy dessert. Spring brings the first harvest of fresh lemons with peak flavor and abundant juice content. During March through May, citrus fruits reach their prime quality with the perfect balance of acidity and sweetness that elevates your pie filling.
Summer months transform this refreshing dessert into a welcome counterpoint to warm weather dining. The cool, citrusy profile provides a palate-cleansing finale after grilled meals and seasonal salads. Serving chilled lemon pie at summer gatherings offers guests a satisfying yet light dessert option that won’t feel heavy in the heat.
Fall presents a unique opportunity to pair lemon pie with autumn’s warming spices and seasonal fruits. Try adding a pinch of cinnamon to your crust or serving with poached pears for a transitional seasonal dessert. The bright citrus notes create an interesting contrast with the traditional fall flavor palette.
Winter holidays traditionally feature heavy, rich desserts, making a vibrant lemon pie a standout alternative. The sunny yellow filling brings welcome brightness to winter tables when seasonal produce options are limited. During December through February, Florida and California citrus reaches peak season, providing excellent lemons for your no-meringue pie.
For optimal results year-round, look for lemons that feel heavy for their size with bright yellow, thin-skinned exteriors. These characteristics indicate juicy fruit with maximum flavor for your pie. Meyer lemons, available from November through March, offer a sweeter alternative to standard varieties and can create a uniquely fragrant filling.


Conclusion
This no-meringue lemon pie delivers all the bright citrus flavor you love without the fuss. Its perfect balance of tangy filling and buttery crust makes it an ideal dessert for any occasion from casual family dinners to elegant gatherings.
Whether you stick with the classic recipe or try one of the variations we’ve shared you’ll appreciate how this pie maintains its beautiful appearance from first slice to last. The straightforward preparation process means you can enjoy this delightful dessert year-round.
With the proper techniques and fresh ingredients you now have everything needed to create a show-stopping lemon pie that will have everyone asking for seconds. Happy baking!
Frequently Asked Questions
How is this lemon pie different from traditional lemon meringue pie?
This no-meringue lemon pie offers the same tangy-sweet flavor as traditional versions but eliminates the technical challenge of preparing meringue. It features a velvety smooth lemon filling in a flaky crust, making it simpler to prepare while maintaining an elegant presentation from first slice to last. Without meringue, you won’t experience issues like weeping or deflating that can occur with traditional lemon meringue pies.
How long does this lemon pie need to chill before serving?
For best results, chill the pie for at least 4 hours before serving. This cooling time allows the filling to properly set, ensuring clean, neat slices. Overnight chilling works wonderfully if you’re planning ahead for an event or gathering. Proper chilling is essential for the pie to maintain its shape when cut.
Can I make this pie ahead of time?
Yes! This pie can be prepared up to three days in advance without compromising quality. After baking, cool it completely, cover tightly with plastic wrap, and refrigerate until serving time. This make-ahead capability makes it perfect for entertaining or holiday preparations when you want to minimize day-of cooking.
What’s the best way to store leftover lemon pie?
Store leftovers in the refrigerator, covered with plastic wrap or in an airtight container, for up to four days. For longer storage, you can freeze the pie whole or in individual slices. To freeze, wrap tightly in plastic wrap followed by aluminum foil and freeze for up to 2 months. Thaw overnight in the refrigerator before serving.
Can I use bottled lemon juice instead of fresh?
While bottled lemon juice will work in a pinch, fresh lemon juice provides significantly better flavor. The recipe relies on the bright, authentic taste of real lemons, including their zest, which contains essential oils that give the pie its characteristic aroma and depth of flavor. For best results, use fresh lemons whenever possible.
What should I do if my filling is too runny?
If your filling turns out runny, you likely needed to cook it longer or at a slightly higher temperature. The filling should be thick enough to coat the back of a spoon before adding it to the pie crust. If you’ve already baked the pie and it’s still runny, refrigerate it longer—at least 6 hours or overnight—to help it set more firmly.
Can I use a store-bought pie crust instead of homemade?
Absolutely! While the recipe provides instructions for a homemade crust that offers the best buttery complement to the lemon filling, a quality store-bought crust works well for convenience. Pre-bake the store-bought crust according to package directions before adding the filling, just as you would with homemade dough.
What are the best garnishes for this lemon pie?
Fresh whipped cream is the classic choice, providing a creamy contrast to the tangy filling. Other excellent options include thin lemon slices, a light dusting of powdered sugar, fresh berries, or mint leaves. For special occasions, consider serving with a scoop of vanilla ice cream and raspberry coulis for an elegant presentation.
Can I make this pie with other citrus fruits?
Yes! The recipe works beautifully with other citrus variations. Try lime for a key lime-style pie, or use orange, grapefruit, or even Meyer lemons for a sweeter twist. You may need to adjust the sugar slightly depending on the natural sweetness of your chosen citrus. The technique remains the same regardless of which citrus you select.
Why did my pie crust shrink during baking?
Crust shrinkage typically occurs when the dough is overworked, causing the gluten to develop too much, or when the dough wasn’t properly chilled before baking. To prevent shrinkage, handle the dough minimally, chill it thoroughly before rolling out, and use pie weights during blind baking. Also, ensure your crust overhangs the pie plate slightly to account for minor shrinkage.