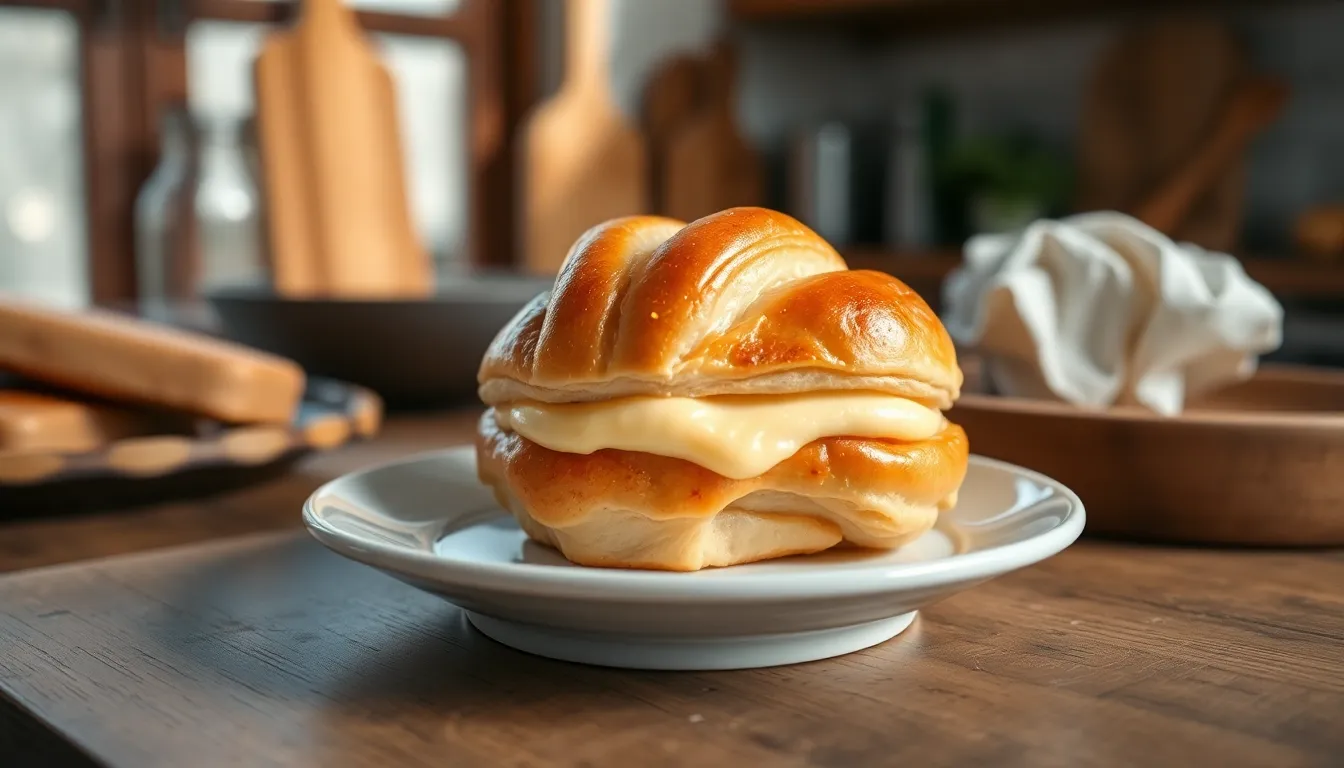
Missing a warm, flaky pastry with your morning coffee? This gluten-free cheese danish recipe will transform your breakfast routine with its buttery layers and creamy filling – without any of the gluten!
Indulging in a freshly baked cheese danish shouldn’t be off-limits just because you’re following a gluten-free diet. I’ve perfected this recipe after countless test batches to create a pastry that rivals any traditional danish. The secret lies in the specialized gluten-free flour blend and technique that delivers that authentic flaky texture you’ve been missing.
The Perfect Gluten Free Cheese Danish
Creating a truly exceptional gluten free cheese danish requires attention to detail and understanding of how gluten free ingredients behave. This pastry combines a flaky buttery exterior with a rich cream cheese filling for that classic danish experience without the gluten.
The secret to achieving that authentic danish texture lies in the lamination process. Unlike traditional danishes that rely on gluten development for structure your gluten free version needs a carefully balanced flour blend and precise temperature control throughout preparation.
For the perfect cheese filling mix room temperature cream cheese with just enough sugar to sweeten without overpowering. A touch of lemon zest brightens the flavor while vanilla extract adds warmth and depth. This filling should be smooth yet thick enough to maintain its shape during baking.
The dough requires several folding and chilling cycles to create those signature flaky layers. Keeping your butter cold throughout this process is crucial as it creates steam pockets when baking resulting in the light airy texture that makes danishes so irresistible.
When shaping your danishes remember that gluten free dough lacks the elasticity of conventional dough. Work gently and use parchment paper to assist with folding and shaping. This prevents sticking and helps maintain the dough’s integrity as you form each pastry.
A final egg wash before baking gives your danishes that golden professional finish. Bake until the edges turn light golden brown while monitoring closely as gluten free pastries can brown more quickly than their traditional counterparts.


Why You’ll Love This Gluten Free Cheese Danish
These gluten free cheese danishes deliver all the pleasure of traditional pastries without any of the gluten concerns. You’ll appreciate the flaky gluten free puff pastry base that perfectly replicates the buttery texture of classic Danish pastries while remaining completely safe for those with celiac disease or gluten sensitivity.
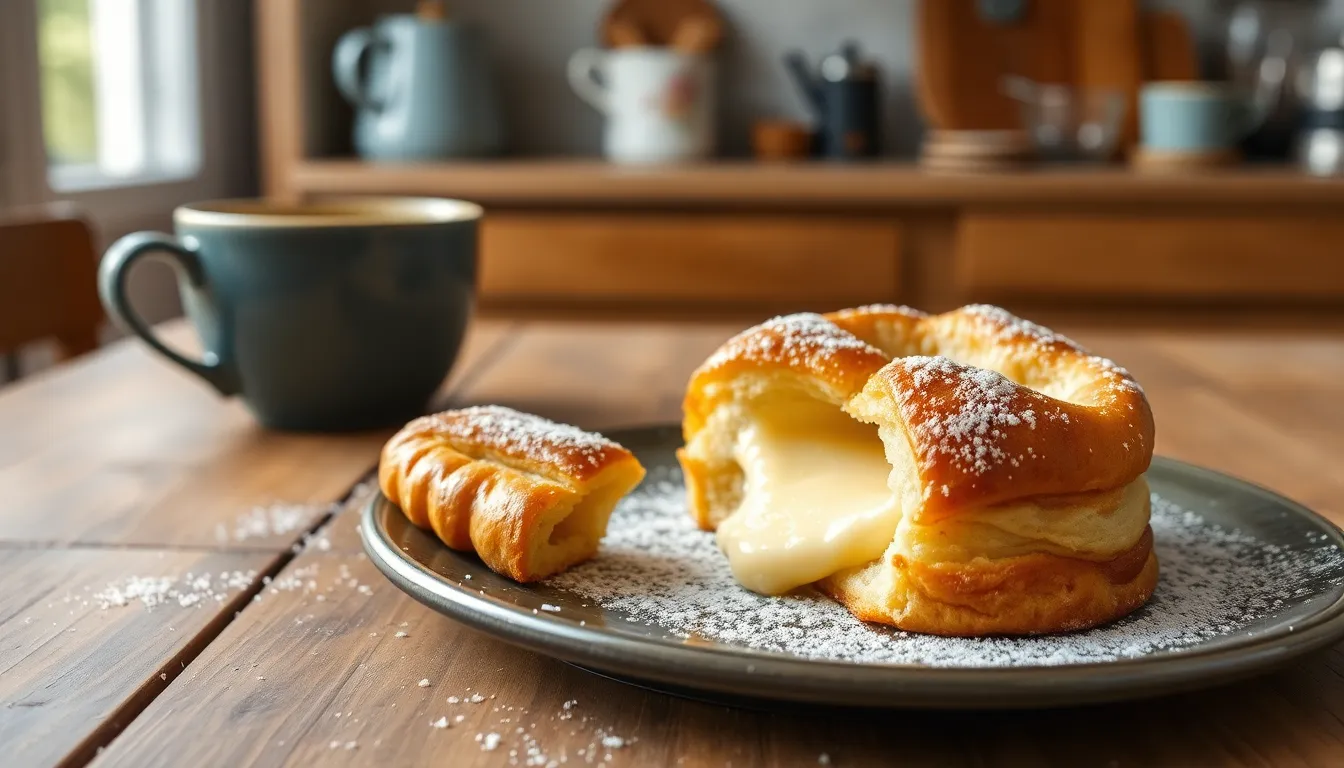
The cream cheese filling offers an irresistible combination of smooth texture and balanced flavor. Each bite delivers the perfect harmony of tangy cream cheese, sweetness from sugar, brightness from lemon juice, and aromatic vanilla extract. This filling creates a luxurious center that contrasts beautifully with the crisp pastry layers.
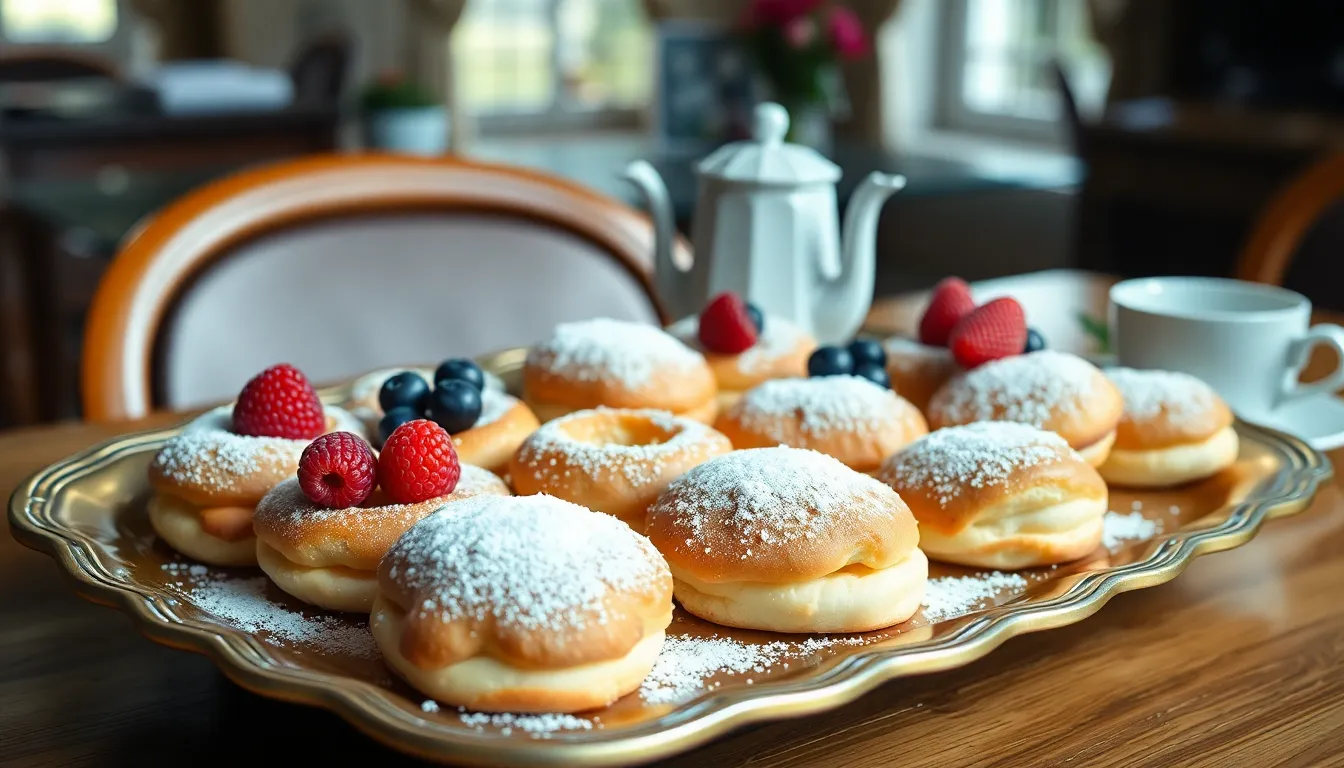
Preparation simplicity stands out as another major advantage of this recipe. You’ll find the process straightforward – just mix your filling ingredients, cut and fold the puff pastry squares, and bake until golden. The egg wash applied to the edges enhances both color and texture, while the final powdered sugar glaze adds a professional finishing touch.
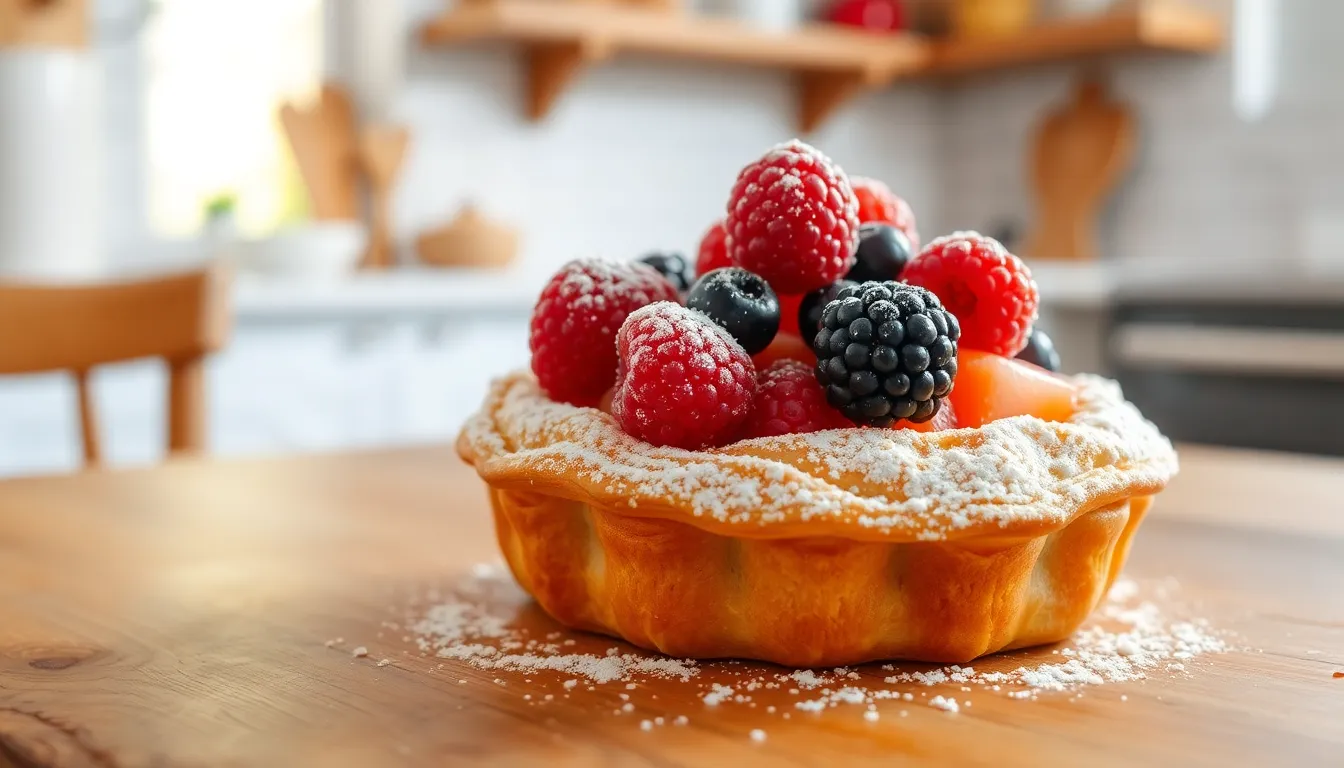
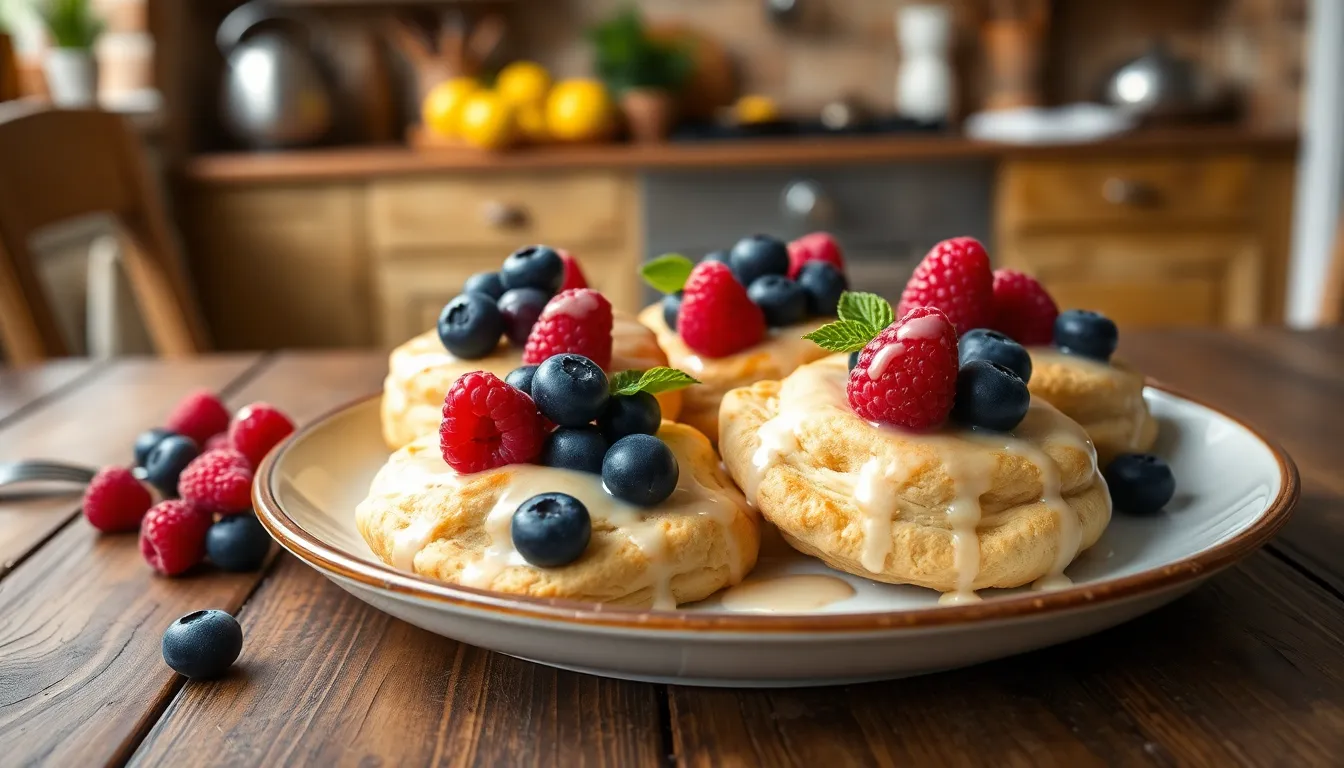
These danishes offer remarkable versatility in flavors and presentations. You can easily customize each pastry by adding fresh berries atop the cheese filling or incorporating fruit jam for variety. The addition of lemon zest provides a refreshing brightness that balances the richness perfectly.
For those with multiple dietary restrictions, these pastries accommodate more than just gluten concerns. Many recipe variations exist for nut-free, soy-free, and even dairy-free adaptations using plant-based alternatives and specialized flour blends. The Schar brand gluten free puff pastry works exceptionally well as a convenient base for this recipe.
The baking process transforms simple ingredients into spectacular results at 400°F for just 15-20 minutes. Your kitchen will fill with the enticing aroma of buttery pastry and sweet filling as they bake to golden perfection.


Ingredients For Gluten Free Cheese Danish
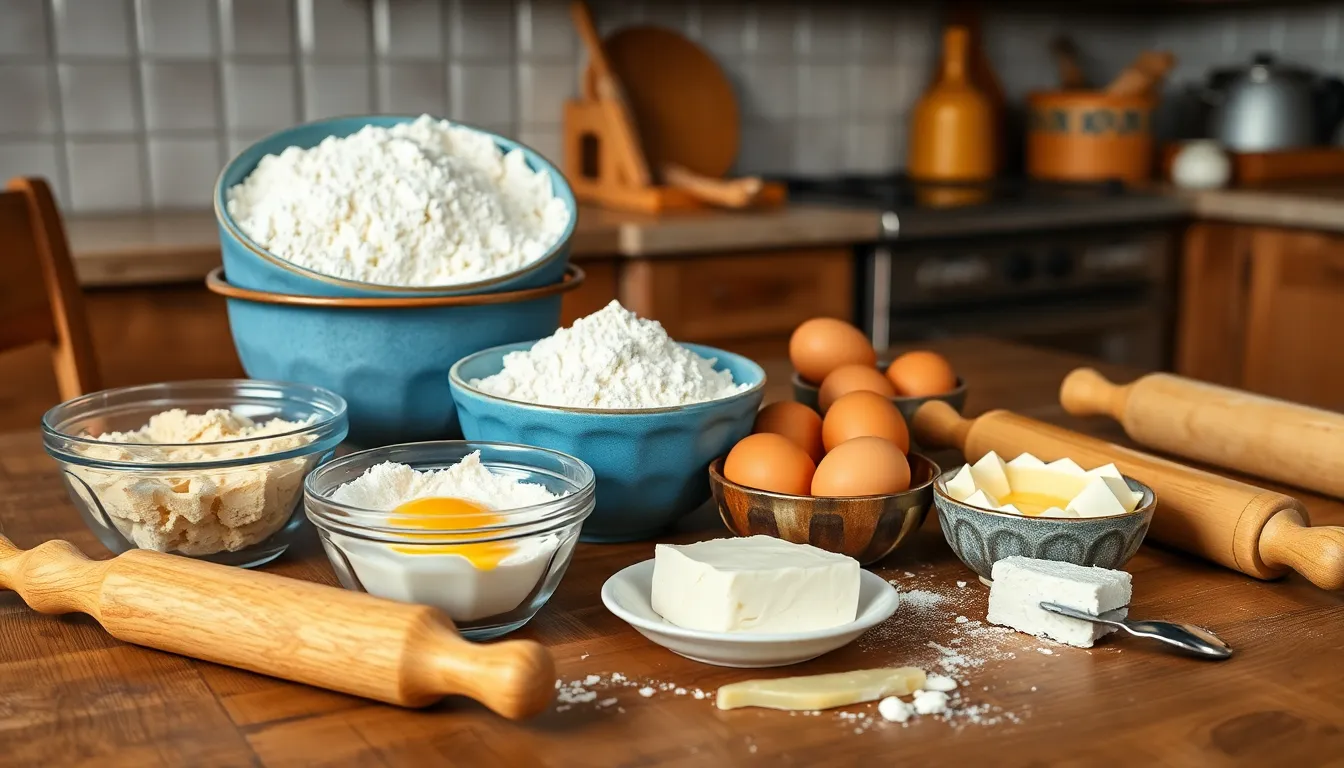
Gather these quality ingredients to create delicious gluten-free cheese danishes that rival traditional bakery versions. Each component plays a vital role in achieving the perfect balance of flaky pastry and creamy filling.
For The Pastry Dough
- 2 cups gluten-free flour blend (with xanthan gum included)
- ¼ cup tapioca starch
- 1/8 teaspoon salt
- 10 tablespoons cold unsalted butter
- 1/3 cup cane sugar
- 3 eggs (2 for dough 1 for egg wash)
- 1 teaspoon vanilla extract
- 1 teaspoon lemon juice
- 2 teaspoons active dry yeast
- 1 teaspoon sugar (for activating yeast)
- ½ cup warm milk or non-dairy alternative
Alternative option: Use pre-made gluten-free puff pastry dough (approximately two 10×10 inch squares) if you prefer a shortcut.
For The Cream Cheese Filling
- 8 ounces cream cheese softened to room temperature
- 1 egg yolk
- 3 tablespoons granulated sugar
- ¼ teaspoon vanilla extract
- ¼ teaspoon lemon juice
- ¼ teaspoon lemon zest (for enhanced flavor)
- Pinch of salt (to balance sweetness)
For The Glaze
- ½ cup powdered sugar
- 1-2 tablespoons lemon juice or milk
- ¼ teaspoon vanilla extract (optional for additional flavor)


Equipment Needed
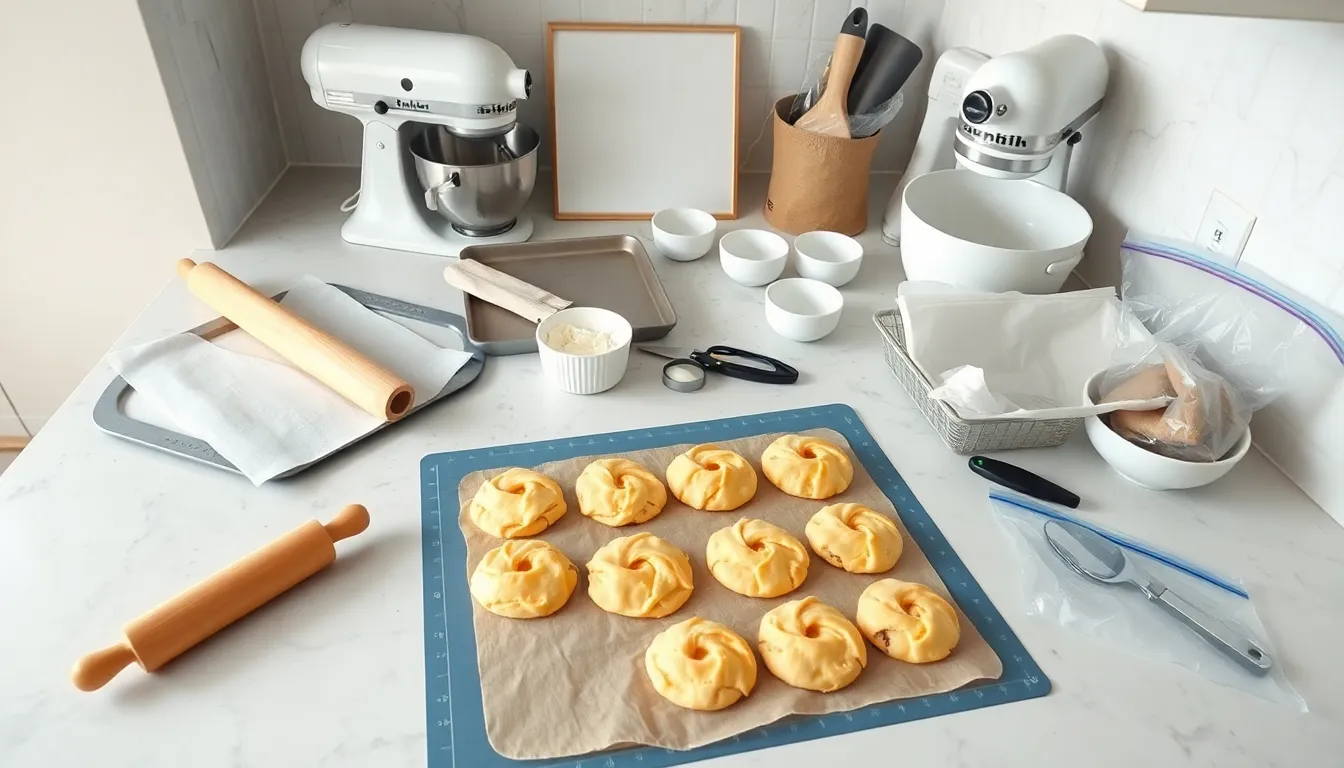
Before diving into your gluten-free cheese danish creation, gather these essential tools to ensure smooth preparation:
- Rolling Mat or Parchment Paper – Creates a non-stick surface for rolling out your delicate gluten-free dough without it tearing or sticking
- Rolling Pin – Provides even pressure to achieve uniform dough thickness for consistent baking
- Baking Tray or Cookie Sheet – Offers sufficient space for your danishes to expand and bake evenly
- Electric Mixer or Hand Mixer – Blends your cream cheese filling until perfectly smooth and creamy
- Pizza Cutter or Sharp Knife – Cleanly cuts dough into precise squares or rectangles for uniform danishes
- Parchment Paper or Silicone Baking Mat – Lines baking trays to prevent sticking and makes cleanup easier
- Small Bowls and Spoons – Helps organize and mix various ingredients separately before combining
- Optional: Zip-Top Bag – Creates an improvised piping bag for drizzling glaze over your finished danishes
Setting up your workspace with these tools before starting will make the danish-making process significantly more efficient. Proper equipment ensures your gluten-free pastry maintains its structure throughout preparation and baking, which is particularly important since gluten-free dough typically requires more careful handling than traditional pastry dough.


How To Make Gluten Free Cheese Danish
Creating perfect gluten free cheese danishes requires attention to detail and proper technique. Follow these step-by-step instructions to achieve flaky, tender pastries that rival traditional versions.
Preparing The Dough
You have two excellent options for creating your gluten free Danish dough:
Option 1: Using Gluten Free Puff Pastry
- Purchase store-bought gluten free puff pastry sheets for convenience
- Thaw frozen pastry sheets in the refrigerator overnight
- Keep the pastry cold until ready to use for easier handling
- Work quickly to prevent the butter in the pastry from melting
Option 2: Making Yeast-Based Gluten Free Dough
- Activate your yeast in warm milk with a pinch of sugar until foamy
- Combine gluten free flour blend, tapioca starch, cold butter pieces, eggs, sugar, vanilla, and lemon juice
- Mix until a soft dough forms, being careful not to overmix
- Allow the dough to rise in a warm spot for 45-60 minutes until nearly doubled in size
- Refrigerate for 30 minutes before rolling to make handling easier
Making The Cream Cheese Filling
Your cream cheese filling should be smooth, rich, and perfectly balanced:
- 8 oz cream cheese, softened to room temperature
- 1 egg yolk
- 1/4 cup granulated sugar
- 1 teaspoon vanilla extract
- 1 teaspoon fresh lemon juice
- 1/2 teaspoon lemon zest
Beat all ingredients with an electric mixer until completely smooth and creamy. This process typically takes less than a minute. Avoid overmixing which can introduce too much air into the filling.
Assembling The Danish
Follow these steps for beautifully shaped danishes:
- Roll out your chilled dough or pastry sheet on a lightly floured parchment paper
- Cut the dough into equal squares or rectangles (4-6 pieces per sheet)
- Pierce the center of each piece lightly with a fork, leaving a 1-inch border unpierced
- Fold the corners over about 1 inch toward the center to create an octagonal shape
- Spoon a generous tablespoon of cream cheese filling into the center of each pastry
- Optional: Add fresh berries on top of the filling for color and flavor
- Brush the exposed pastry edges with egg wash (1 beaten egg mixed with 1 tablespoon water)
- Sprinkle a light dusting of granulated sugar over the pastries for extra sweetness and crunch
Baking Instructions
Your baking technique is crucial for achieving perfectly golden pastries:
- Preheat your oven to 400°F (204°C)
- Place assembled danishes on a parchment-lined baking sheet, spacing them at least 2 inches apart
- Bake puff pastry danishes for 12-15 minutes until golden brown and puffy
- Yeast-based danishes may require slightly longer, about 15-20 minutes
- Watch carefully during the last few minutes as gluten free pastries can brown quickly
- Allow to cool for 10 minutes before glazing
- Prepare a simple glaze by mixing 1 cup powdered sugar with 1-2 tablespoons lemon juice or milk
- Drizzle or pipe the glaze over the warm danishes in a decorative pattern
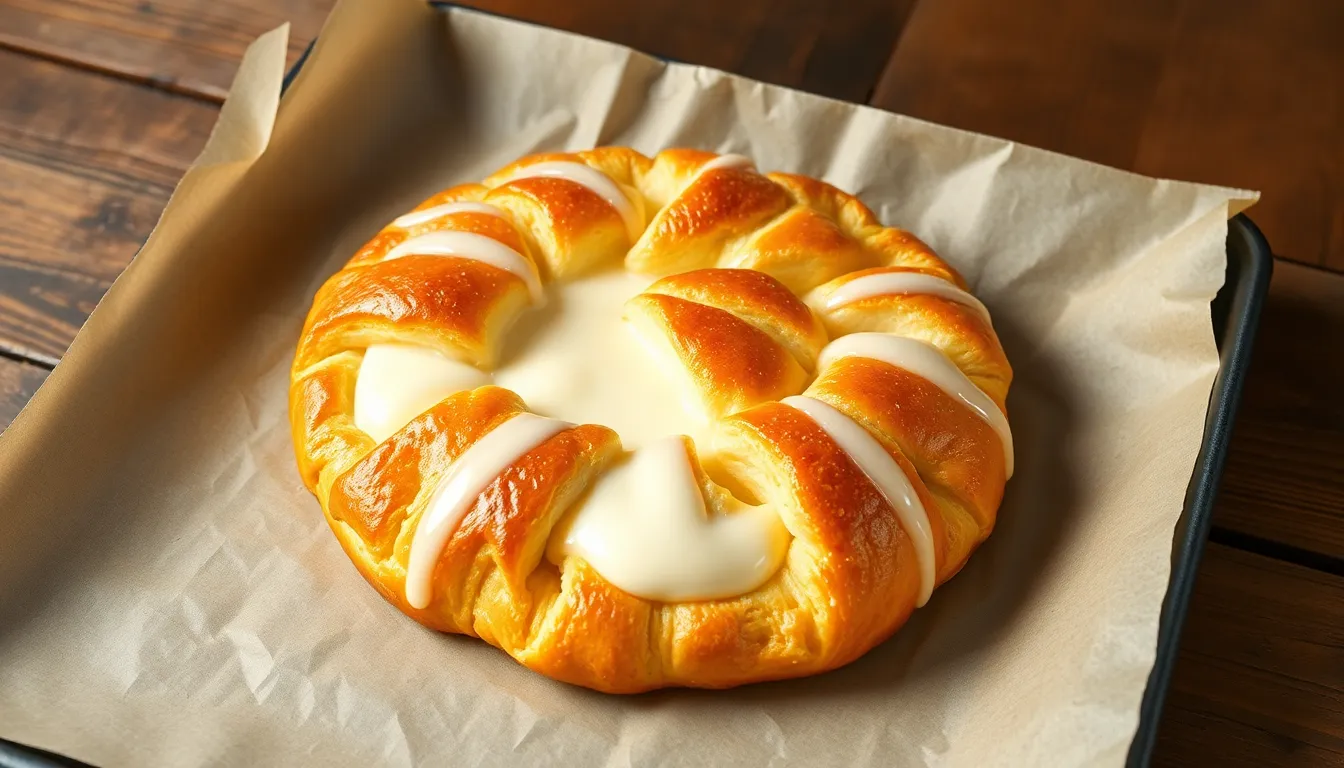
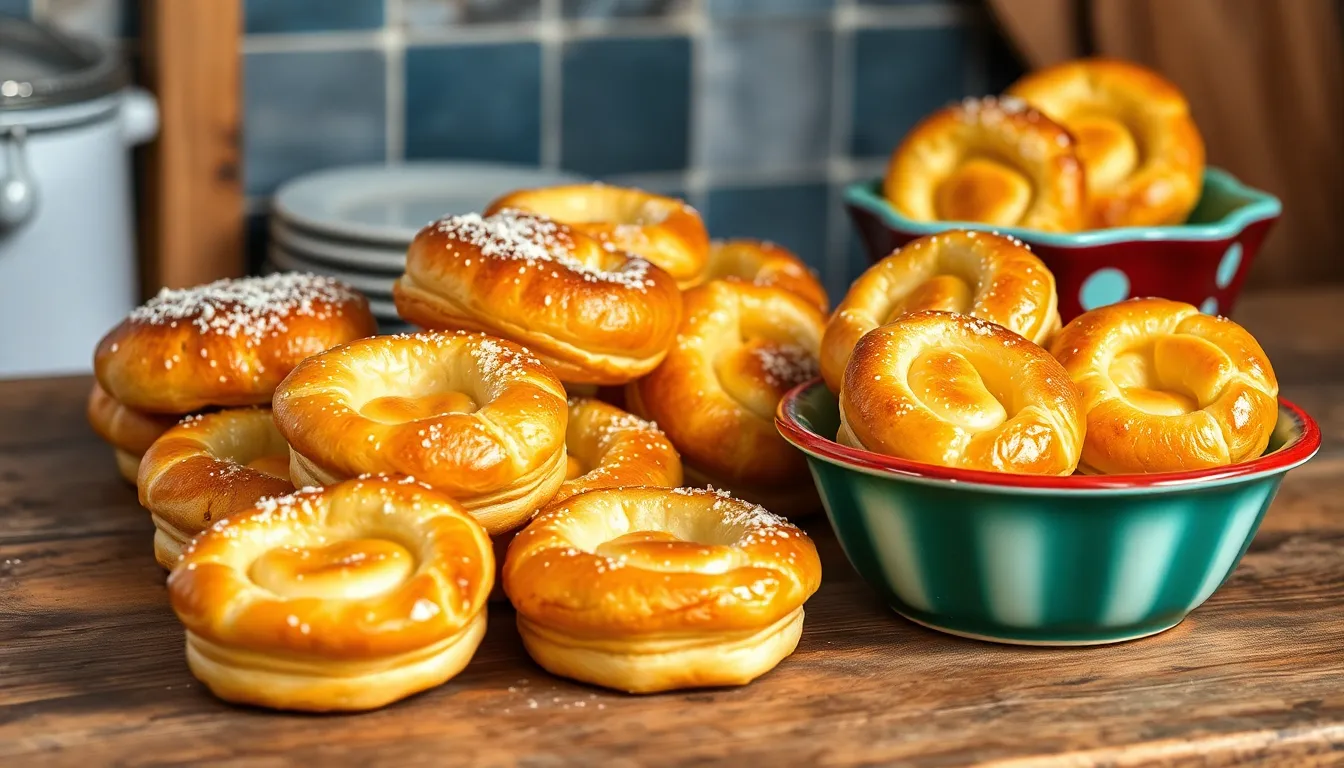
The finished danishes should have a flaky exterior, tender layers, and a creamy filling that creates the perfect contrast of textures.


Tips For The Best Gluten Free Cheese Danish

Creating perfect gluten free cheese danishes requires attention to detail and quality ingredients. Follow these expert tips to achieve bakery-worthy results every time:
Select Quality Gluten Free Puff Pastry
Choose high-quality gluten free puff pastry as your foundation. Brands like Schar offer reliable premade options that provide the necessary flakiness. When working with the pastry, if cracks appear during rolling, simply patch them before proceeding to ensure structural integrity.
Perfect Your Cream Cheese Filling
Make your filling exceptionally creamy by using full-fat cream cheese at room temperature. This allows for easier mixing and a smoother consistency. Incorporate 1 teaspoon of lemon zest and juice to add brightness that balances the richness. The ideal ratio includes 8 ounces cream cheese to 2-4 tablespoons sugar for perfect sweetness.
Apply Egg Wash Properly
Brush egg wash thoroughly on all exposed dough edges before baking. This simple step promotes even browning and creates that signature golden sheen characteristic of professional pastries. For best results, use just the yolk mixed with a splash of water for maximum color development.
Optimize Baking Temperature
Bake your danishes at a higher temperature between 400-425°F. This temperature range ensures proper puffing of the pastry layers while creating crisp exteriors. Watch carefully during baking as gluten free pastries can sometimes brown more quickly than their traditional counterparts.
Allow Cooling Time Before Glazing
Let your danishes cool for at least 10 minutes before applying any glaze. Applying glaze too soon will cause it to melt and run off rather than creating that attractive drizzled finish. The cooling period also allows the filling to set properly for clean slicing.
Customize With Add-ins
Enhance your cheese danish by incorporating additional flavors. Fresh berries, cherry jam, or chocolate chips can be folded into the cream cheese mixture before filling. For fruit additions, consider placing them on top of the filling before baking for vibrant presentation.
Handle With Care
Use parchment paper when working with gluten free dough to prevent sticking and maintain structural integrity. The dough tends to be more delicate than traditional wheat-based pastry, so gentle handling preserves the all-important layers that create flakiness.
Create Generous Portions
Fill your danishes generously with the cream cheese mixture. This prevents dry results and ensures each bite contains the perfect balance of flaky pastry and creamy filling. Aim for approximately 2 tablespoons of filling per danish for optimal taste experience.
Storage And Make-Ahead Options
Proper storage is essential for maintaining the quality of your gluten-free cheese danishes. These delicate pastries require exact handling to preserve their flaky texture and creamy filling.
Refrigeration
Store your leftover gluten-free cheese danishes in an airtight container in the refrigerator for 2-5 days. The cream cheese filling is perishable and not shelf-stable, making refrigeration necessary. Place parchment paper between layers to prevent sticking and maintain the pastry’s structure.
Freezing Options
Gluten-free cheese danishes freeze exceptionally well, offering multiple make-ahead possibilities:
- Freezing the Dough: Shape your gluten-free Danish dough into a disk, wrap it tightly in plastic wrap, and freeze for up to 3 months. When ready to use, thaw overnight in the refrigerator before proceeding with your recipe.
- Freezing Assembled Pastries: After shaping and filling your danishes, place them on a baking sheet and freeze until solid. Transfer to airtight freezer bags for storage up to 1 month. Bake directly from frozen, adding 10-15 minutes to the normal baking time.
- Freezing Baked Danishes: Cool your baked danishes completely, wrap individually in plastic wrap, and store in freezer bags for up to 3 months. Thaw overnight in the refrigerator before reheating.
Reheating For Best Texture
Refrigeration can cause gluten-free pastries to lose their crisp texture. Revive your danishes by warming them in a toaster oven or conventional oven at 300°F for 5-7 minutes before serving. This restores the delightful contrast between flaky exterior and creamy filling.
Make-Ahead Tips
Prepare a stress-free breakfast by assembling your danishes the night before. Place the filled and shaped pastries on a baking sheet, cover with plastic wrap, and refrigerate overnight. In the morning, simply bake as directed for freshly made danishes with minimal effort.
- Allow cream cheese to reach room temperature before mixing the filling for the smoothest texture
- Avoid overfolding the dough edges when shaping to leave adequate space for filling
- Use full-fat cream cheese for the richest flavor and best consistency
| Storage Method | Storage Time | Special Instructions |
|---|---|---|
| Refrigerator | 2-5 days | Store in airtight container with parchment between layers |
| Freezer (dough) | Up to 3 months | Wrap tightly in plastic wrap; thaw overnight in refrigerator |
| Freezer (assembled) | Up to 1 month | Freeze on baking sheet first; bake from frozen |
| Freezer (baked) | Up to 3 months | Cool completely before wrapping; thaw in refrigerator |
| Room temperature | Up to 2 days | Use only for short-term storage in sealed container |


Variations And Add-Ins
Your gluten-free cheese danish can transform from a classic treat to a personalized pastry masterpiece with these creative modifications. Explore these options to customize your danishes for any occasion or preference.
Fruit Toppings
Fresh berries provide both vibrant color and natural sweetness to your gluten-free cheese danish. Blueberries or raspberries make excellent choices as they hold their shape during baking while releasing just enough juice to infuse flavor into the cream cheese filling. Place these fruits directly on top of the cream cheese mixture before baking for a stunning presentation.
Jam or fruit preserves offer another delicious topping option that adds moisture and concentrated flavor. Cherry preserves deliver a bold tang while raspberry jam provides a classic sweetness that complements the cream cheese perfectly. You can either spread a thin layer between the pastry and cheese filling or create a decorative swirl on top before baking. For a finishing touch after baking, warm some additional preserves and brush over the pastries for a glossy, fruit-forward glaze.
Flavor Variations
Lemon zest and juice brighten the cream cheese filling with their citrus notes, creating a perfect balance to the richness of the cheese. Adding approximately 1-2 teaspoons of fresh lemon zest to your filling mixture introduces a subtle aromatic quality that elevates the entire pastry. This citrus element cuts through sweetness and adds complexity to each bite.
Vanilla extract provides essential warmth and depth to the cream cheese filling. Using pure vanilla extract rather than imitation varieties makes a noticeable difference in the final flavor profile. For a more intense vanilla presence, consider using vanilla bean paste which provides both flavor and visual appeal with tiny specks throughout the filling.
Chocolate lovers can create a decadent variation by incorporating mini chocolate chips into the cream cheese mixture or drizzling melted chocolate over the finished danishes. The contrast between the tangy filling and sweet chocolate creates an irresistible combination. Almond extract offers another dimension of flavor when used sparingly (¼ teaspoon) alongside the vanilla.
A simple glaze made from powdered sugar mixed with lemon juice or milk provides the perfect finishing touch. This sweet, glossy topping not only enhances the appearance but also adds another layer of flavor complexity. Adjust the consistency by adding more liquid for a thinner drizzle or keeping it thicker for a more pronounced white topping that sets with a slight crunch.
Serving Suggestions
Your gluten-free cheese danishes are versatile treats that can enhance various dining occasions throughout the day. Present these flaky pastries as the centerpiece of your next breakfast or brunch gathering with these serving ideas:
For Breakfast or Brunch:
- Pair with a steaming cup of coffee or tea for a perfect morning combination
- Create a breakfast board with your danishes alongside fresh fruit and yogurt
- Serve slightly warm to accentuate the contrast between the flaky exterior and creamy filling
- Offer as part of a weekend brunch spread with savory options like eggs and bacon
As a Dessert Option:
- Present on a decorative platter with a light dusting of powdered sugar
- Accompany with a scoop of vanilla ice cream for an elevated dessert experience
- Add a drizzle of honey or maple syrup for additional sweetness
- Include fresh berries on the side to balance the richness of the pastry
For Special Occasions:
- Arrange bite-sized versions on a tiered stand for baby showers or bridal events
- Serve at holiday brunches with seasonal fruit garnishes
- Include as part of a gluten-free dessert table at celebrations
- Package individually as thoughtful homemade gifts for friends with dietary restrictions
Family-Style Serving:
- Place freshly baked danishes in the center of the table for a shared family breakfast
- Warm slightly before serving if they’ve been stored in the refrigerator
- Cut larger danishes into quarters for sampling different variations or toppings
- Present alongside a selection of jams and fruit compotes for customization
These serving suggestions highlight the versatility of your gluten-free cheese danishes while maintaining their status as a special treat suitable for both everyday enjoyment and memorable occasions.


Nutritional Information
Understanding the nutritional profile of your gluten-free cheese danish helps you make informed dietary choices. Traditional cheese danish pastries contain important amounts of fat and sugar while delivering moderate protein content. When adapting to a gluten-free version, certain nutritional aspects change while others remain similar.
A typical serving of gluten-free cheese danish (one pastry) contains approximately:
| Nutrient | Amount | % Daily Value |
|---|---|---|
| Calories | 270 | – |
| Total Fat | 18g | 28% |
| Saturated Fat | 10g | 50% |
| Cholesterol | 70mg | 23% |
| Sodium | 160mg | 7% |
| Total Carbohydrates | 24g | 7% |
| Sugars | 9g (8g added) | 18% |
| Protein | 5g | 10% |
| Calcium | 35mg | 4% |
| Iron | 1mg | 13% |
| Potassium | 69mg | 1% |
The primary difference between traditional and gluten-free cheese danish lies in the flour composition. Gluten-free versions substitute wheat flour with alternative blends typically combining rice flour, tapioca starch, and corn starch. These specialized flour blends maintain similar calorie content while accommodating those with gluten sensitivity or celiac disease.
Fat content remains comparable in gluten-free versions as both rely on butter for creating flaky layers and cream cheese for the rich filling. The protein content stays relatively consistent as it derives mainly from eggs and dairy components rather than flour.
Carbohydrate sources shift from wheat to gluten-free starches and added sugars in the modified recipe. Fiber content may vary slightly depending on the exact gluten-free flour blend used but generally remains low unless fiber-enriched ingredients are added intentionally.
Your homemade gluten-free cheese danish offers nutritional control advantages over store-bought versions. You can adjust sugar levels, incorporate healthier fats, or add nutrient-dense ingredients like fruits to enhance the nutritional profile while maintaining the indulgent experience of this beloved pastry.


Conclusion
Your gluten-free cheese danish journey doesn’t have to end with just one batch. Armed with this recipe you can now create bakery-quality pastries right in your kitchen without gluten concerns. The flaky layers and creamy filling will impress both gluten-free guests and traditional pastry lovers alike.
Remember that patience is key when working with gluten-free dough. Take your time with the lamination process and keep ingredients cold for the best results.
Don’t hesitate to experiment with seasonal fruits or flavor variations to make these danishes uniquely yours. Whether for a special breakfast treat or an elegant brunch offering these gluten-free cheese danishes prove that dietary restrictions never have to limit culinary pleasure.
Frequently Asked Questions
What makes this gluten-free cheese danish recipe special?
This recipe stands out because it achieves the authentic flaky layers and creamy filling of traditional danishes without gluten. Through extensive testing, the recipe uses a specialized gluten-free flour blend and proper lamination techniques to create that perfect buttery exterior and rich cream cheese center. Unlike many gluten-free pastries that fall short in texture, this danish delivers the genuine pastry experience for those with celiac disease or gluten sensitivity.
How do I get flaky layers in gluten-free pastry?
The key to flaky layers is proper lamination—folding cold butter into the dough through multiple chilling and folding cycles. Keep your butter cold throughout the process, as it creates steam pockets during baking that form those delicious layers. Handle the gluten-free dough gently using parchment paper for support, and don’t skip the chilling steps between folds. The multiple folding creates distinct layers that puff up beautifully when baked.
Can I use store-bought gluten-free puff pastry instead?
Absolutely! For a quicker version, high-quality store-bought gluten-free puff pastry works well. While homemade dough offers more control over flavor and texture, pre-made pastry is a convenient time-saver. Simply thaw according to package directions, roll it out, add your cream cheese filling, shape, and bake. Look for brands that specifically mention “puff pastry” rather than just “pastry dough” for better results.
What’s the best way to store leftover gluten-free cheese danishes?
Store leftovers in an airtight container in the refrigerator for 2-5 days, placing parchment paper between layers to prevent sticking. For longer storage, freeze baked danishes for up to 3 months. To reheat, warm in a 300°F oven for 5-10 minutes until crisp again. Avoid microwaving as it makes the pastry soggy. Unbaked assembled danishes can be frozen for up to 1 month and baked directly from frozen.
Can I prepare these danishes the night before?
Yes! Prepare the dough and cream cheese filling separately and refrigerate overnight. You can also assemble the danishes completely, cover them on the baking sheet, and refrigerate overnight. In the morning, let them sit at room temperature for 20-30 minutes while your oven preheats, then apply the egg wash just before baking. This makes them perfect for stress-free breakfast entertaining.
How do I know when the cheese danishes are done baking?
Look for a golden brown exterior and puffed edges, typically after 15-20 minutes at 400°F. Gluten-free pastries often brown more quickly than traditional ones, so start checking at the 12-minute mark. The filling should be set but might still have a slight jiggle in the center, which will firm up as it cools. A toothpick inserted near the center should come out mostly clean.
Can I add fruit to these gluten-free cheese danishes?
Definitely! Fresh berries like blueberries, raspberries, or strawberries make excellent additions. Add 1-2 tablespoons of berries on top of the cream cheese filling before baking. Alternatively, use 1-2 teaspoons of jam or fruit preserves swirled into the cream cheese mixture for fruit flavor throughout. For best results, avoid excessively juicy fruits that might make the pastry soggy.
Are there dairy-free options for this recipe?
Yes, you can make dairy-free versions using plant-based butter alternatives and dairy-free cream cheese substitutes. Coconut oil-based vegan butters work best for lamination, while almond or cashew-based cream cheese alternatives provide a similar texture for the filling. Add 1 tablespoon of lemon juice to the dairy-free filling to mimic the tanginess of traditional cream cheese. The results won’t be identical but still delicious.
What equipment is essential for making these danishes?
The most important tools are a rolling pin, parchment paper, a baking sheet, and a mixer for the filling. Parchment paper is crucial for handling gluten-free dough, which tends to be more delicate. A pizza cutter helps create clean edges, and a pastry brush is needed for applying egg wash. A kitchen scale is also highly recommended for measuring ingredients precisely, which is particularly important in gluten-free baking.
Why do my gluten-free pastries sometimes turn out gritty?
Grittiness usually comes from using rice flour that’s not finely ground or from insufficient hydration in the dough. Use superfine rice flour in your gluten-free blend and ensure your dough has enough moisture. Letting the dough rest before rolling also helps the flours fully absorb the liquid ingredients. If using a commercial blend, choose one labeled “fine” or “superfine” for the best texture in delicate pastries.