Ever wondered how to transform ordinary chicken into something extraordinary? Chicken musubi, a delicious Hawaiian-inspired snack, combines tender seasoned chicken with sticky rice wrapped in nori for a portable treat that’ll leave you craving more.
Chicken musubi takes inspiration from the classic spam musubi, a beloved Hawaiian staple with Japanese roots. This protein-packed handheld delight features marinated chicken that’s been caramelized to perfection, placed atop seasoned rice, and wrapped snugly in crisp nori. It’s the perfect grab-and-go meal that balances savory flavors with satisfying textures.
What Is Chicken Musubi?
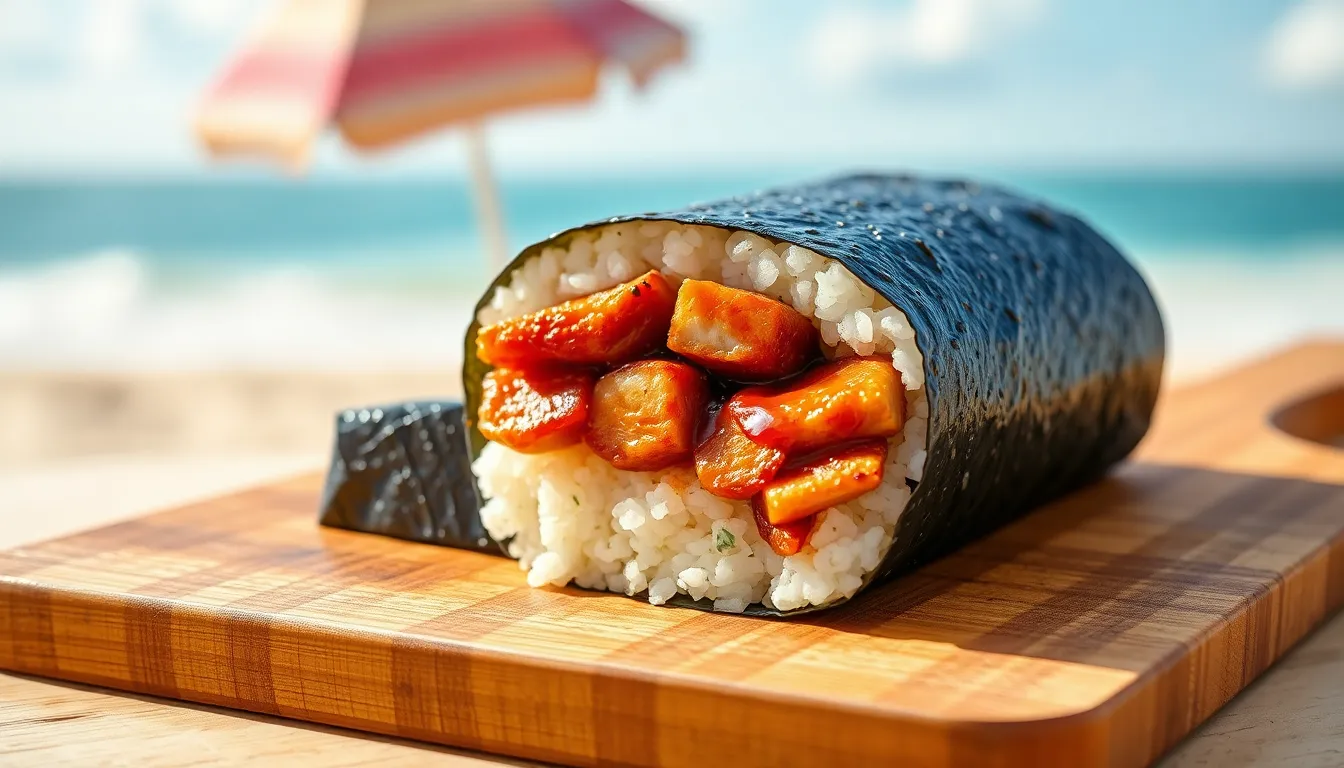
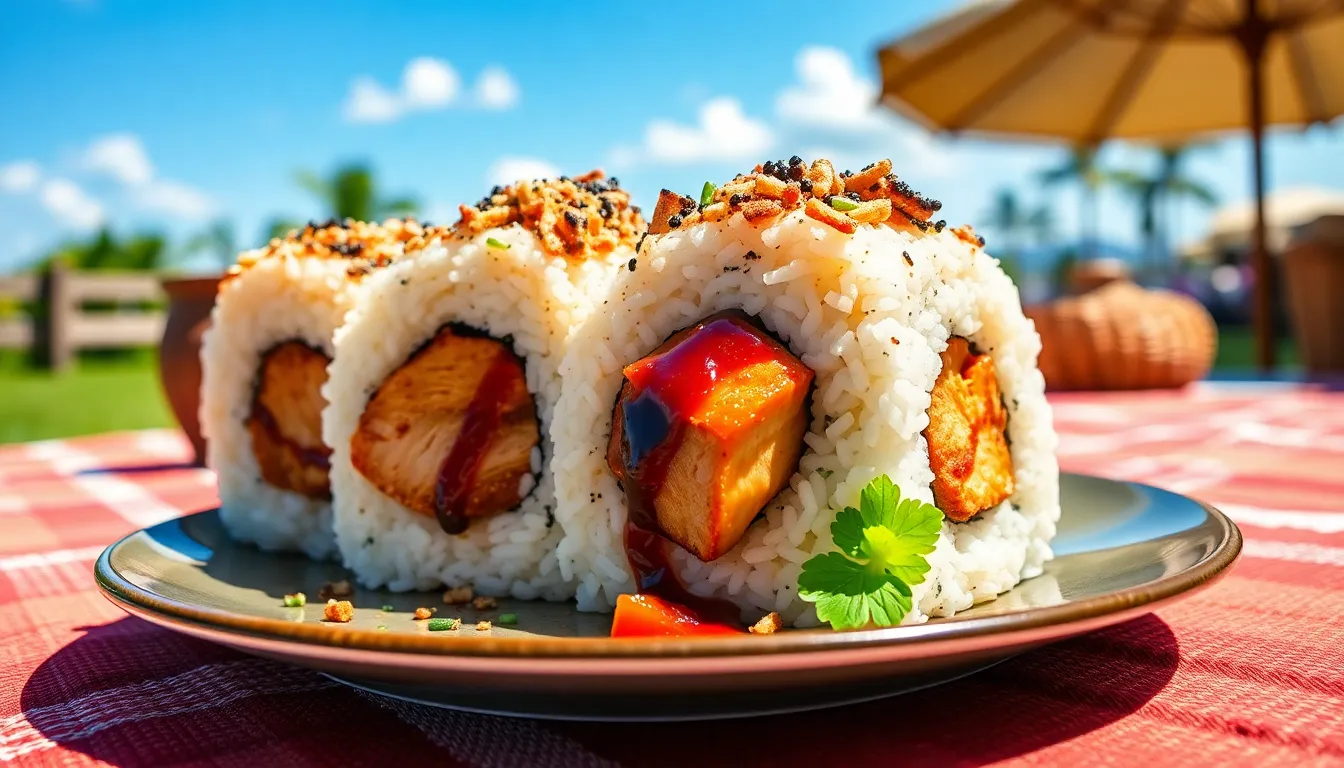
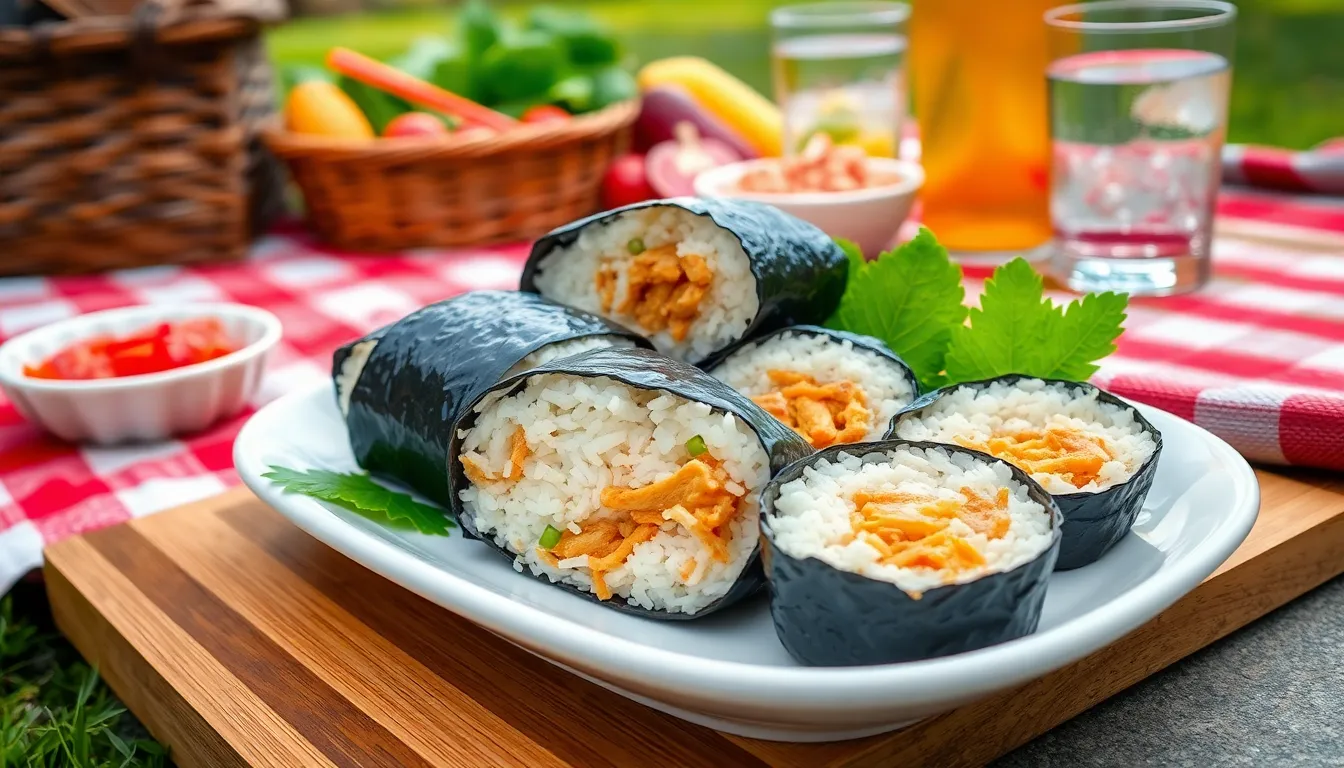
Chicken musubi is a delicious Hawaiian-inspired rice ball that features seasoned chicken instead of the traditional Spam. This handheld delight consists of a layer of sticky white rice topped with teriyaki-marinated chicken and wrapped in a strip of nori (seaweed). The components are pressed together in a compact rectangular shape that makes it perfect for eating on the go.
The dish represents a flavorful evolution of the classic Spam musubi that has been a staple in Hawaiian cuisine for decades. Local eateries across Hawaii serve chicken musubi as a protein-rich alternative that appeals to those who prefer chicken over processed meat. The combination of savory chicken with sweet and tangy teriyaki sauce creates a perfectly balanced flavor profile.
Musubi itself has roots in Japanese onigiri (rice balls) but has been transformed through Hawaiian influences into something uniquely its own. The term “musubi” refers to the way the ingredients are bound together both physically and symbolically. Rice serves as the foundation while the nori wrapper holds everything in place with its slightly crisp texture and umami flavor.
Unlike sushi which often incorporates raw fish and vinegared rice chicken musubi uses plain sticky rice and fully cooked marinated chicken. This makes it more accessible and appealing to those who might shy away from raw seafood. The portable nature and satisfying combination of carbs and protein make chicken musubi a popular choice for beach outings hikes lunch boxes and quick meals throughout Hawaii and beyond.


Why You’ll Love This Recipe
This chicken musubi recipe transforms simple ingredients into an irresistible Hawaiian-inspired treat that will quickly become a family favorite. The perfect balance of savory chicken, slightly sweet teriyaki sauce, and umami-rich nori creates a truly addictive flavor combination that satisfies cravings instantly.
You’ll appreciate how accessible this recipe is, requiring only basic ingredients like boneless chicken thighs, short-grain sushi rice, soy sauce, and nori sheets. The preparation process is straightforward and adaptable, whether you prefer your chicken simmered in homemade teriyaki sauce or crispy fried with a spicy batter.
Busy households will value the incredible portability of these compact rice bundles. Each musubi wraps perfectly in nori, making them ideal for lunchboxes, picnics, beach outings, or hiking adventures when you need substantial fuel on the go.
This recipe offers wonderful versatility in preparation methods. You can customize your musubi with teriyaki-simmered chicken, spicy fried chicken variations, or simply grilled chicken combined with perfectly seasoned rice. The addition of furikake seasoning takes the flavor profile to new heights with minimal effort.
Health-conscious eaters will enjoy this protein-packed alternative to traditional Spam musubi. The combination of lean chicken and rice delivers sustained energy in a compact, hand-held package that feels indulgent without excessive processing.


Ingredients Needed
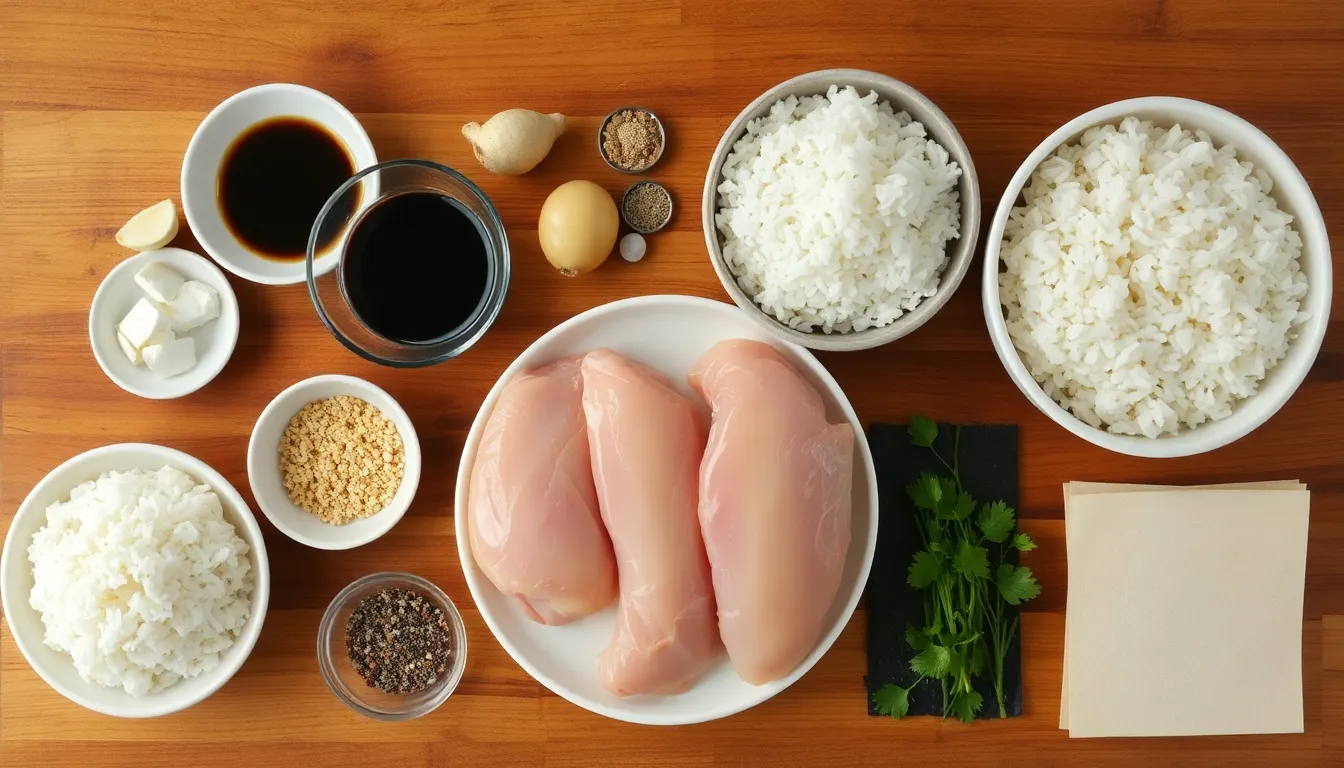
Creating delicious chicken musubi requires three distinct component groups: the flavorful chicken, perfectly seasoned rice, and assembly materials. Each element plays a crucial role in achieving the authentic taste and texture of this Hawaiian-inspired dish.
For The Chicken
- 1 lb boneless skinless chicken thighs (about 4 pieces, trimmed to 2×4 inches)
- 3 tbsp light soy sauce
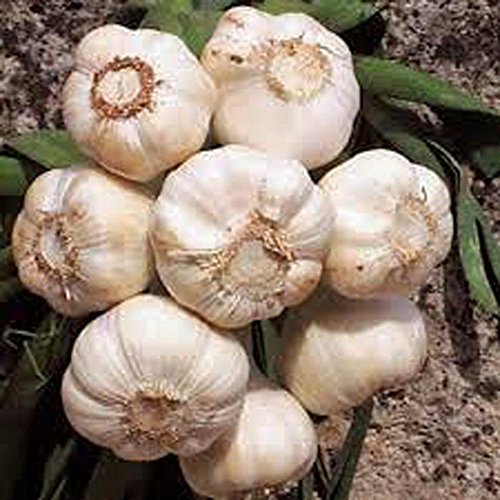
- 1 tbsp minced garlic
- Sliced ginger
- 1 tsp chili paste (optional)
- 1 tsp sesame oil
- 1 tbsp rice vinegar
- 3 tbsp brown sugar
- ¼ cup flour
- ¼ cup cornstarch
- 2 tbsp Japanese barbecue sauce
- 1 egg, lightly beaten
- Neutral oil for frying
For The Rice
- 3-5 cups cooked short grain rice (Calrose or sushi rice recommended)
- Water for cooking (1:1 ratio with uncooked rice)
- 2 tbsp rice vinegar
- 2 tbsp sugar
- 1 tsp salt
For Assembly
- Sushi nori sheets (cut into 2-inch wide strips)
- Furikake or rice seasoning (optional)
- Musubi press or mold (helpful but optional)


Equipment Required

Creating perfect chicken musubi requires just a few key tools to help you achieve those neat rectangular packages of deliciousness. Gather these essential items before starting your musubi-making adventure:
- Musubi mold or press – This rectangular-shaped tool helps form uniform rice blocks and is the secret to professional-looking musubi. If you don’t have a dedicated musubi press, a cleaned spam can with both ends removed works as an effective alternative.
- Sharp knife – You’ll need this for cutting nori sheets and slicing your finished musubi into serving portions.
- Cutting board – A sturdy surface for assembling and cutting your musubi.
- Non-stick skillet or grill pan – Essential for cooking your marinated chicken to juicy perfection.
- Rice cooker – While not strictly necessary, a rice cooker ensures perfectly sticky sushi rice every time.
- Small bowl of water – Keep this handy to wet your hands when handling sticky rice and to seal the nori wrapper.
- Measuring cups and spoons – For accurate ingredient portions in both the chicken marinade and rice seasoning.
- Mixing bowls – You’ll need these for marinating the chicken and seasoning the rice.
- Plastic wrap – Useful for covering your musubi press or mold to prevent sticking and for wrapping finished musubi if not serving immediately.
- Tongs or cooking chopsticks – For handling hot chicken while cooking and assembling.
While the equipment list might seem extensive, most items are common kitchen tools you likely already own. The only specialized item is the musubi mold, which is relatively inexpensive and available at Asian markets or online retailers.


How To Make Chicken Musubi
Creating perfect chicken musubi requires attention to three key components: properly prepared sticky rice, flavorful teriyaki chicken, and careful assembly. Follow these step-by-step instructions to create this Hawaiian-inspired delicacy at home.
Preparing The Rice
Start with Japanese short-grain rice (sushi rice) for its essential sticky texture that holds the musubi together. Cook 3 to 4 cups of rice according to package instructions until perfectly tender. Allow the cooked rice to cool slightly but keep it warm enough to remain sticky for proper shaping. The rice should be tacky enough to hold its form when pressed but not so hot that it’s difficult to handle. For authentic musubi, the rice should maintain its integrity when compressed without becoming mushy or falling apart.
Cooking The Chicken
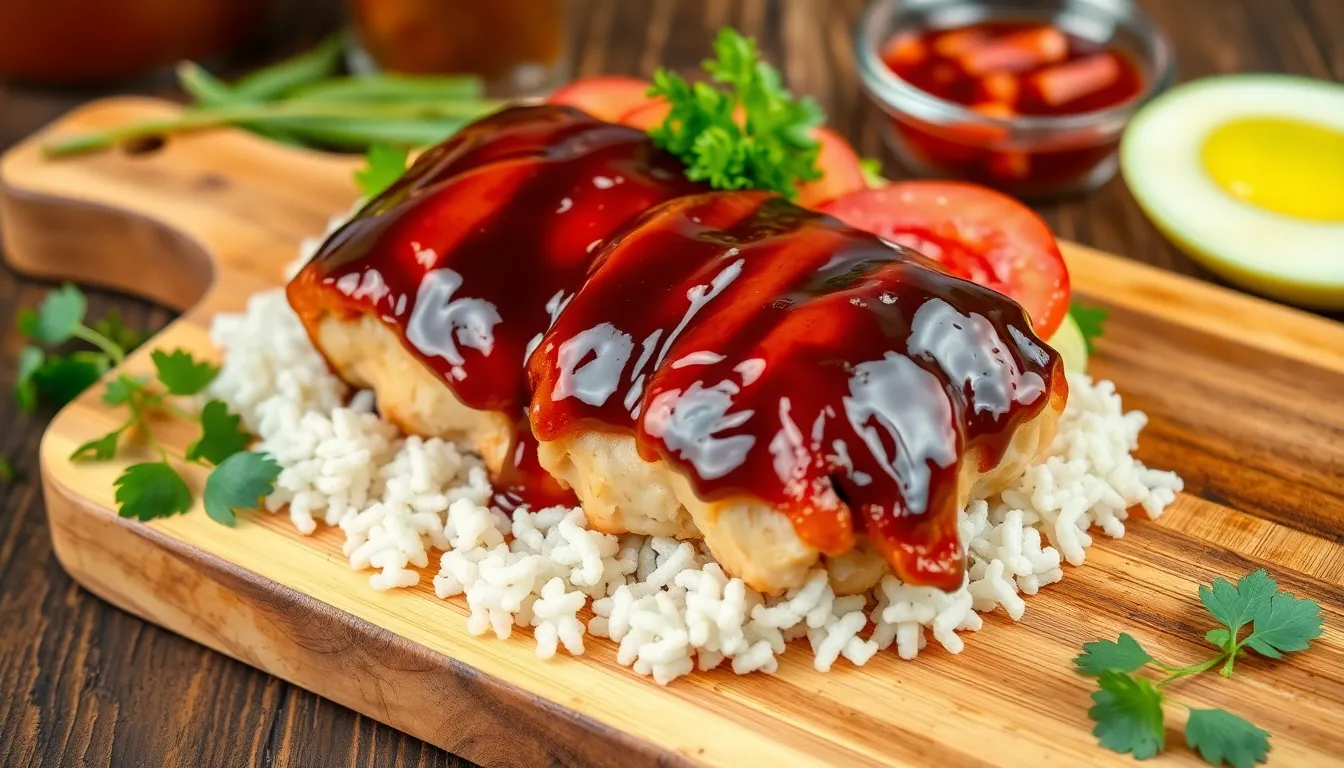
Prepare a teriyaki-style sauce by combining soy sauce, sugar, freshly grated ginger, minced garlic, and optionally mirin in a saucepan. Bring this mixture to a boil before reducing the heat to a simmer until it thickens into a glossy glaze. You can add a cornstarch slurry (cornstarch mixed with water) to achieve your desired sauce consistency. Heat vegetable oil in a skillet and cook thinly sliced or pounded chicken breast or thighs until nicely browned on each side. Pour your homemade teriyaki sauce over the chicken and continue cooking for 3-5 minutes per side until the meat is thoroughly coated and cooked through. Let the chicken rest briefly before slicing it thinly for assembly.
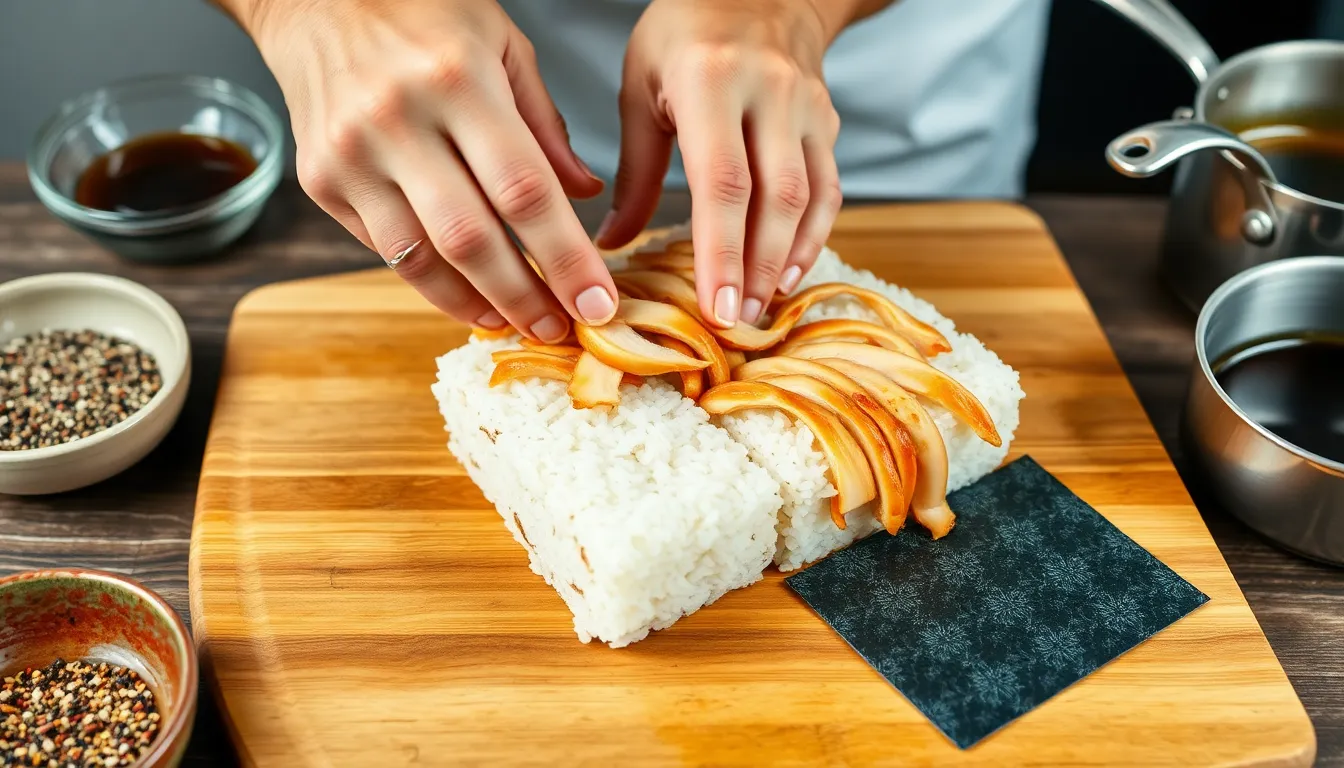
Assembling The Musubi
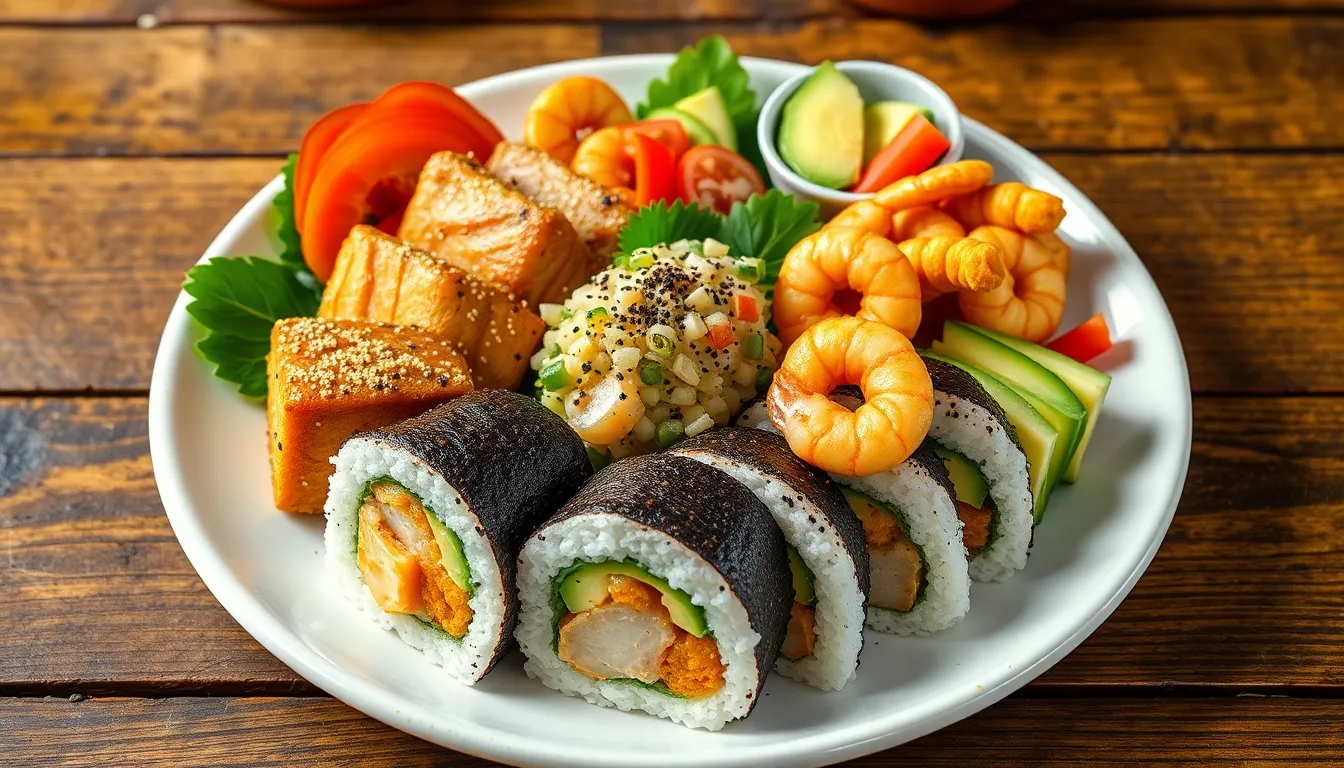
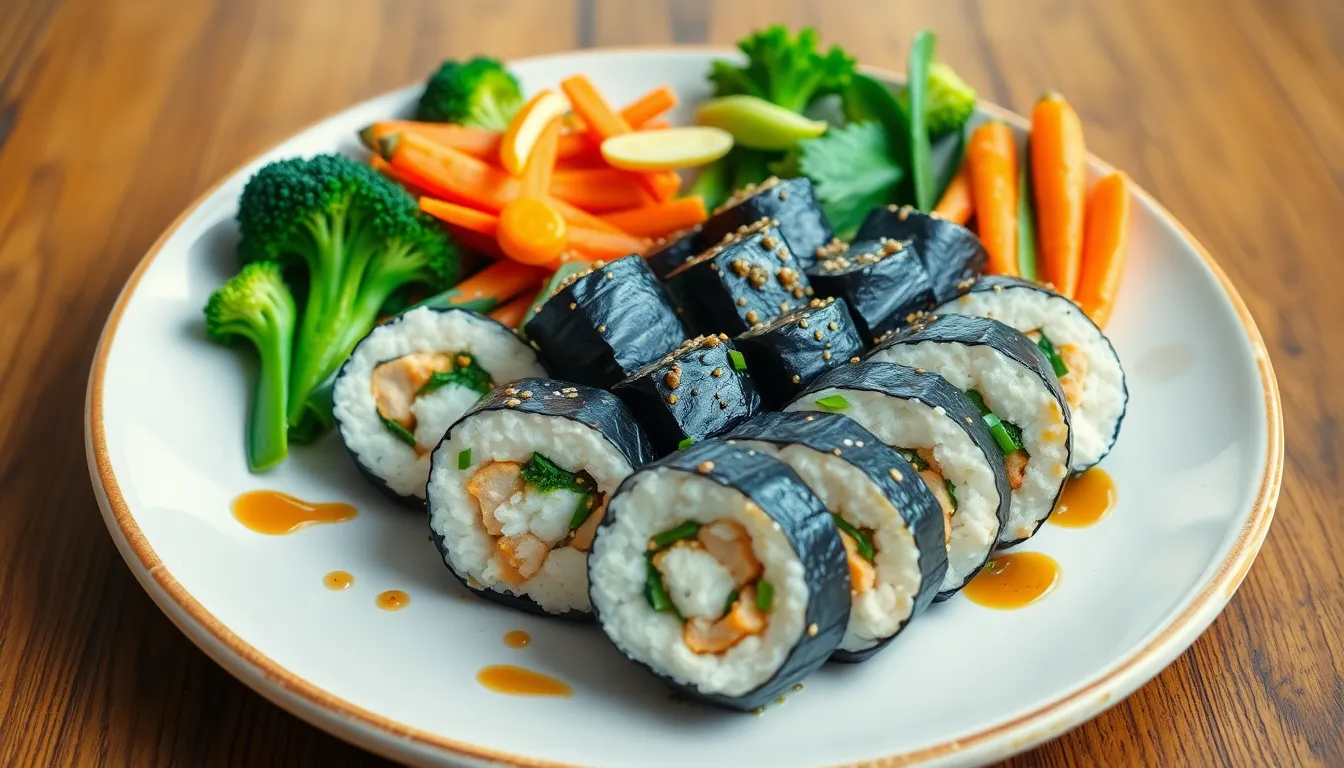
Place a sheet of nori on a cutting board with the shiny side down. Position your musubi mold over about two-thirds of the nori sheet, leaving the remaining third exposed for wrapping. Scoop a layer of warm rice into the mold and spread it evenly to create a solid base. Sprinkle furikake seasoning over the rice for an additional layer of flavor. Arrange your thinly sliced teriyaki chicken on top of the seasoned rice in a single layer. Add another layer of rice over the chicken, then press down firmly with the musubi press to compact all layers into a dense rectangular block. Carefully remove the mold while maintaining pressure with the press. Fold the exposed nori over the rice-chicken stack, using a small amount of water along the edge to seal it securely. For easy serving and storage, wrap completed musubi in plastic wrap until ready to eat. You can serve these portable rice bundles whole or slice them into bite-sized pieces using a sharp, slightly dampened knife.


Variations And Substitutions
Chicken musubi offers endless possibilities for customization while maintaining its essential structure. You can easily adapt this Hawaiian favorite to suit your taste preferences dietary needs or available ingredients.
Protein Options
While this recipe focuses on chicken thighs for their juicy texture try these alternatives:
- Substitute chicken breast for a leaner option though it may be slightly drier
- Use pork tonkatsu for a crispy alternative with Japanese flair
- Try tempura shrimp for a seafood variation
- Include scrambled egg for a vegetarian-friendly protein
- Experiment with fish fillets like salmon or tuna
- Return to traditional roots with Spam for authentic Hawaiian musubi
Rice Variations
The foundation of your musubi can be customized too:
- Brown rice provides a nutty flavor and additional fiber
- Quinoa creates a protein-packed alternative
- Cauliflower rice works perfectly for a low-carb version
- Mixed grains add interesting texture and nutritional variety
Flavor Enhancements
Transform the taste profile of your chicken musubi with these flavor additions:
- Sprinkle furikake between rice layers for an authentic Japanese touch
- Add sliced avocado for creaminess
- Include pickled vegetables for tangy contrast
- Mix in chopped kimchi for a spicy Korean-inspired twist
- Layer thin cucumber slices for refreshing crunch
Dietary Accommodations
Chicken musubi adapts well to various dietary needs:
- Use gluten-free soy sauce or coconut aminos for the marinade
- Substitute plant-based chicken alternatives for a vegetarian version
- Omit sugar in the rice seasoning for a lower-carb option
- Wrap with soy paper instead of nori for those who dislike seaweed
Serving Suggestions
Chicken musubi can be enjoyed in multiple ways:
- Serve hot directly after assembly for a warm meal
- Enjoy cold as a convenient packed lunch
- Provide dipping sauces like chili sauce or soy sauce with wasabi
- Cut into smaller pieces for appetizer portions
Remember that while traditional musubi maintains its rectangular shape you can experiment with different forms including triangular onigiri-style shapes or even circular variations. The versatility of chicken musubi makes it an ideal canvas for culinary creativity while still honoring its Hawaiian-Japanese fusion roots.


Serving Suggestions
Chicken musubi offers versatility when it comes to serving options making it perfect for various occasions. Enjoy these savory rice bundles as a standalone snack or incorporate them into a complete meal with these complementary pairings.
Steamed vegetables make excellent accompaniments to chicken musubi. Try serving with bright broccoli florets snap peas or mini carrots that provide nutritional balance and visual appeal. These vegetables benefit from a light drizzle of sesame oil based vinaigrette which echoes the Asian flavors in your musubi.
Dipping sauces can elevate your chicken musubi experience. While traditional musubi is delicious on its own adding a side of chili sauce delivers welcome heat for those who enjoy spicier flavors. Teriyaki sauce reserved from your chicken preparation also makes an excellent dipping option.
Serve chicken musubi at different temperatures depending on the occasion. Freshly made warm musubi delivers comfort and highlights the aromatic teriyaki chicken while chilled musubi packed for picnics or lunch boxes offers convenience and portability.
Present your musubi whole for a substantial hand-held meal or slice into bite-sized pieces when serving as party appetizers. The smaller portions create elegant presentation options for gatherings and allow guests to sample without committing to a full piece.
Balance your plate by pairing chicken musubi with a simple side salad dressed with rice vinegar and sesame oil. The refreshing crispness of fresh greens complements the savory richness of the teriyaki chicken and sticky rice combination.
Morning brunches benefit from chicken musubi as a protein-packed alternative to traditional breakfast fare. Serve alongside miso soup and fresh fruit for a Japanese-inspired morning meal that satisfies and energizes.
Transform your musubi into bento box meals by arranging them with traditional Japanese pickles edamame and sliced cucumber. This presentation creates a visually appealing portable lunch that stays fresh for hours.


Storage And Make-Ahead Tips
Properly storing chicken musubi ensures you can enjoy this Hawaiian-inspired treat even when prepared in advance. For the best experience keep these essential guidelines in mind:
Room Temperature Storage: Chicken musubi maintains optimal texture and flavor when kept at room temperature for a few hours. Enjoy it the same day for the most authentic experience with perfectly tender rice and crisp nori.
Refrigeration Method: When planning to save musubi for later use wrap each piece tightly in plastic wrap while still warm to trap moisture inside. Place wrapped musubi in an airtight container to prevent the rice from drying out. Properly stored chicken musubi lasts 2-4 days in the refrigerator though the rice will gradually firm up over time.
Freezing Options: While traditional Spam musubi freezes well for up to 3 months chicken musubi freezes with less success due to texture changes in the cooked chicken. If you need to freeze your chicken musubi use airtight packaging and consume within a shorter timeframe for best quality results.
Reheating Instructions: To restore refrigerated chicken musubi to its former glory:
- Remove the plastic wrap completely
- Wrap each piece in a damp paper towel
- Microwave for approximately 45 seconds until heated through
The nori may become slightly chewy after refrigeration and reheating but the flavors remain delicious and intact.
Make-Ahead Assembly Tips: Prepare your teriyaki chicken in advance allowing it to cool slightly before assembly. Layer the chicken on warm cooked rice then wrap firmly with nori strips pressing to ensure everything adheres properly. The tight wrapping technique proves crucial for maintaining moisture and structural integrity especially when making musubi ahead of time.
Remember that freshly made chicken musubi delivers the best taste experience but with these storage techniques you can successfully prepare this portable snack ahead for lunch boxes picnics or quick meals throughout the week.


The Perfect Chicken Musubi: Tips For Success
Creating restaurant-quality chicken musubi at home requires attention to detail and proper technique. These expert tips will help you master this Hawaiian favorite and avoid common pitfalls.
Choose the right chicken cut. Thighs work best for chicken musubi as they remain moist and flavorful during cooking. The natural fat in thighs helps them absorb the teriyaki flavors while staying tender. Cook them in oil over medium heat and add extra marinade to the pan for maximum flavor development.
Perfect your rice texture. Japanese sushi rice provides the ideal sticky consistency needed to hold your musubi together. Rinse the rice thoroughly before cooking to remove excess starch, then allow it to cool slightly before assembly—but not completely, as warm rice forms better.
Master the assembly process. Position a sheet of nori on your cutting board with a musubi mold covering about two-thirds of it. Add a layer of rice, sprinkle with furikake for extra flavor, then place thinly sliced chicken on top. Follow with another rice layer and press firmly using your musubi press.
Let chicken cool before assembly. Allow your teriyaki chicken to rest for 5-10 minutes after cooking. This prevents the rice from becoming mushy while maintaining the structural integrity of your musubi.
Use the right tools. A musubi press creates consistent shapes and compact layers that hold together well. If you don’t have a dedicated press, shape the rice by hand or use a clean, empty spam can with both ends removed as an improvised mold.
Seal nori properly. After wrapping the nori around your rice and chicken block, seal the edge with a small amount of water. This simple step prevents your musubi from unraveling, especially important when packing for lunch or picnics.
Balance flavors with seasonings. Add furikake between rice layers to enhance umami notes. The seasoning creates depth and complements the sweet-savory profile of the teriyaki chicken.
Slice with precision. Use a sharp, slightly wet knife to cut your musubi into portions without crushing the delicate structure. Clean the blade between cuts for professional-looking results.
These techniques ensure your chicken musubi maintains its shape and delivers the perfect balance of sticky rice, savory-sweet chicken, and crisp nori with every bite. Following these guidelines results in a portable, protein-rich meal that showcases the delicious harmony of Hawaiian and Japanese culinary traditions.


Conclusion
Chicken musubi brings together the best of Hawaiian and Japanese culinary traditions in a convenient handheld package. You’ll find the combination of tender teriyaki chicken and sticky rice wrapped in crisp nori irresistible whether enjoyed hot or cold.
With just a few basic ingredients and simple techniques you can create this versatile dish that’s perfect for any occasion from busy weekday lunches to casual gatherings. The beauty of chicken musubi lies in its adaptability – customize it with your preferred proteins rice variations or toppings.
Give this recipe a try and discover why this protein-packed alternative to traditional Spam musubi has become a beloved staple throughout Hawaii and beyond. Your taste buds will thank you for this perfect balance of savory sweet and umami flavors.
Frequently Asked Questions
What is chicken musubi?
Chicken musubi is a Hawaiian-inspired hand-held snack featuring seasoned chicken and sticky rice wrapped in nori seaweed. It’s a protein-packed alternative to traditional Spam musubi, combining savory teriyaki-marinated chicken with rice in a portable, satisfying package. This fusion dish draws inspiration from Japanese onigiri but has been uniquely transformed by Hawaiian culinary influences.
How is chicken musubi different from sushi?
Unlike sushi, chicken musubi uses plain sticky rice rather than vinegar-seasoned rice. It features fully cooked marinated chicken instead of raw fish, making it more accessible for home cooks. Musubi is typically larger and more substantial than sushi pieces, designed as a portable meal rather than a delicate appetizer. The flavors are more robust and influenced by Hawaiian cuisine.
What ingredients do I need to make chicken musubi?
Key ingredients include boneless skinless chicken thighs, short-grain sushi rice, soy sauce, garlic, ginger, brown sugar, sesame oil, rice vinegar, nori sheets, and optional furikake seasoning. For the teriyaki sauce, you’ll need Japanese barbecue sauce, cornstarch, and flour. Most items are readily available at standard grocery stores or Asian markets.
Do I need special equipment to make chicken musubi?
While a musubi mold helps create uniform shapes, it’s not essential. Other helpful tools include a sharp knife, cutting board, non-stick skillet, and rice cooker. The musubi mold is the only specialized item, but it’s relatively inexpensive and widely available. You can also improvise using the cleaned Spam can with both ends removed.
What are the best protein substitutions for chicken musubi?
Popular alternatives include chicken breast (leaner option), pork tonkatsu (crispy and flavorful), tempura shrimp (for seafood lovers), scrambled egg (vegetarian option), or traditional Spam. Each protein brings unique flavors while maintaining the spirit of this Hawaiian-Japanese fusion dish. Tofu can work for a plant-based version.
Can I make chicken musubi ahead of time?
Yes! Chicken musubi can be prepared up to 24 hours in advance and stored at room temperature for up to 4 hours. For longer storage, refrigerate wrapped in plastic (up to 3 days) or freeze for up to 1 month, though texture may change slightly. When making ahead, keep the nori separate until serving time to prevent it from becoming soggy.
How do I achieve the perfect sticky rice for musubi?
Use Japanese short-grain rice and rinse it thoroughly before cooking to remove excess starch. Cook according to package directions, using slightly less water than called for to achieve a firmer texture. Let the rice cool slightly but use while still warm for shaping. Seasoning the rice with a light mixture of rice vinegar, sugar, and salt enhances flavor.
What are some creative ways to serve chicken musubi?
Serve whole for lunches or slice into bite-sized pieces for appetizers. Pair with dipping sauces like spicy mayo or additional teriyaki sauce. Include in bento boxes with pickled vegetables and edamame. For gatherings, create a musubi platter with different fillings. Chicken musubi works well for picnics, beach outings, or quick protein-packed snacks anytime.
How do I properly wrap the nori around musubi?
After forming your rice and chicken layer, place it centered on the nori strip. Fold one side of the nori over the musubi, lightly moisten the other edge with water, then complete the wrap. The moisture helps seal the nori. For best results, wrap just before serving to maintain the nori’s crisp texture, or provide separate nori strips for diners to wrap themselves.
Can I make gluten-free chicken musubi?
Absolutely! Use tamari or gluten-free soy sauce instead of regular soy sauce. Ensure your teriyaki sauce is gluten-free or make your own using gluten-free ingredients. Replace regular flour with rice flour or cornstarch for coating the chicken. The rice and nori components are naturally gluten-free, making this dish easily adaptable for those with gluten sensitivities.