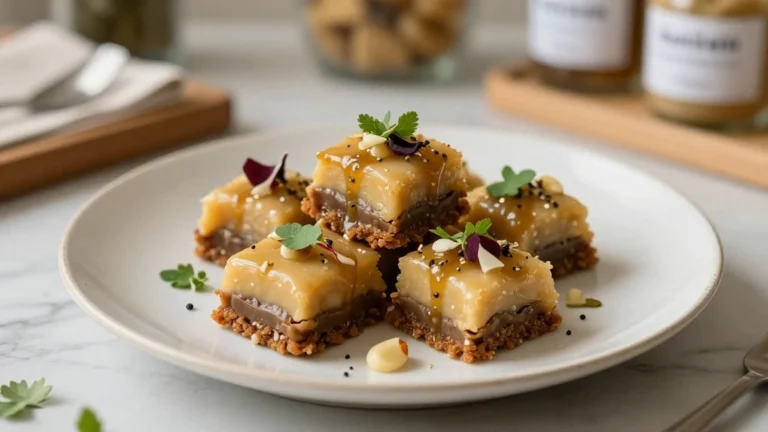
Baking with kids can be a delightful and educational experience that sparks creativity and teaches valuable skills.
Fun Baking Recipes for Kids is designed to engage young minds with simple, colorful, and tasty projects.
These recipes are perfect for rainy afternoons, holiday activities, or any time you want to bring a little joy into the kitchen.
The combination of hands-on fun and delicious results ensures that these baking adventures will become cherished memories.
From decorating cupcakes to crafting homemade pizza, these recipes offer endless possibilities for customization and personalization.
The History and Cultural Significance
• Fun Baking Recipes traces its origins to medieval Europe, where it was originally created by families using simple ingredients to create festive treats together.
• The dish evolved over decades as sugar became more accessible, eventually becoming the beloved version we know today with colorful sprinkles and imaginative toppings.
• In many Western cultures, these activities traditionally appear at children’s birthday parties, symbolizing creativity and joy.
• While many variations exist across different regions, the authentic version maintains a focus on simplicity and fun that sets it apart from elaborate imitations.


Recipe Overview
Nutritional Information


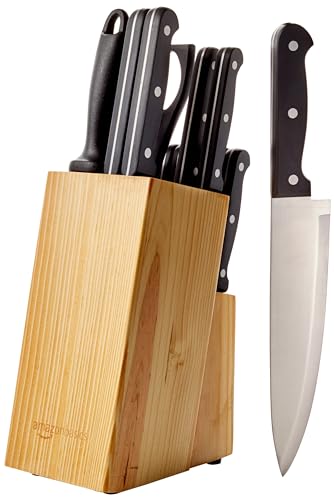
Essential Equipment Guide
Mixing Bowls: Essential for combining ingredients evenly, look for bowls with a non-slip base to prevent spills. Stainless steel or glass is preferred for durability.
Rolling Pin: Important for achieving the right dough thickness, a wooden rolling pin is traditional but silicone options offer easy cleanup. Look for adjustable thickness rings for consistency.
Cookie Cutters: Adds fun shapes to your baking projects, ensuring even sizes for uniform baking. Metal cutters are durable, while plastic ones are safer for kids.
Ingredients
For the Dough
|
|
| Amount | Ingredient | Notes |
|---|---|---|
| 2 cups | all-purpose flour | provides structure |
| 1 teaspoon | baking powder | leavening agent |
| 1/2 cup | sugar | adds sweetness |
| 1/2 cup | butter, softened | adds richness |
| 1 large | egg | binds ingredients together |
| 1 teaspoon | vanilla extract | adds flavor |
For the Toppings
| Amount | Ingredient | Notes |
|---|---|---|
| 1 cup | icing sugar | for decorating |
| 2 tablespoons | milk | for icing consistency |
| variety | food coloring | adds color |
| variety | sprinkles | adds decorative touch |


Preparation Methods
Proper Mixing: Ensure all dry ingredients are sifted together before adding wet ingredients. This prevents clumping and promotes even distribution, leading to a smoother dough.
Rolling Dough: Roll dough on a lightly floured surface to prevent sticking. Aim for even thickness to ensure consistent baking and avoid burnt edges.
Icing Application: Use a small offset spatula or piping bag for precise icing application. This technique allows for creative designs and ensures even coverage.


Step 1: Prepare Ingredients

Gather all ingredients and equipment on a clean work surface.
Ensure butter is softened to room temperature for easy mixing.
Measure flour and sift with baking powder to prevent lumps.
Preheat the oven to 350°F (175°C) to ensure it's ready for baking.


Step 2: Mix the Dough

In a large mixing bowl, cream butter and sugar together until light and fluffy.
Add the egg and vanilla extract, mixing until well combined.
Gradually add the sifted flour mixture, stirring until a dough forms.
Knead the dough gently on a floured surface until smooth.


Step 3: Roll Out the Dough

Divide the dough into two equal portions for easy handling.
Roll each portion on a floured surface to about 1/4 inch thickness.
Use cookie cutters to create desired shapes, pressing firmly to ensure clean edges.
Transfer shapes to a baking sheet lined with parchment paper.
Step 4: Bake the Cookies

Place the baking sheet in the preheated oven.
Bake for 10-12 minutes or until edges are lightly golden.
Remove from oven and let cool on the baking sheet for 5 minutes.
Transfer cookies to a wire rack to cool completely before icing.


Step 5: Prepare the Icing

In a small bowl, combine icing sugar and milk.
Mix until smooth and glossy, adjusting milk for desired consistency.
Divide icing into separate bowls and add food coloring.
Stir to evenly distribute color, ready for decorating.


Step 6: Decorate the Cookies

Use a small spatula or piping bag to apply icing to cookies.
Add sprinkles or other toppings while icing is still wet.
Allow cookies to sit at room temperature to set the icing.
Get creative with designs, trying out patterns and shapes.
Step 7: Store the Cookies

Once icing is completely set, store cookies in an airtight container.
Place parchment paper between layers to prevent sticking.
Store at room temperature for up to a week.
Enjoy as a snack or gift to friends and family.


Critical Timing and Temperature Guide
Baking Cookies: Bake at 350°F for 10-12 minutes. Look for lightly golden edges as an indicator of doneness. Avoid opening the oven door frequently, which can lead to uneven baking.
Icing Setting: Allow icing to set at room temperature for at least 1 hour. Humidity can affect drying time, so ensure cookies are in a cool, dry place.
Storage: Store in an airtight container at room temperature. Avoid refrigeration, which can alter texture and cause icing to become sticky.


Pro Tips for Fun Baking Recipes
• Ingredient Selection: Use high-quality vanilla extract and fresh butter for the best flavor. These ingredients significantly impact the taste and aroma of the cookies.
• Preparation Secret: Chill the dough for 15 minutes before rolling to prevent spreading and make it easier to handle.
• Temperature Management: Ensure all ingredients are at room temperature for even mixing and smoother dough.
• Texture Enhancement: For softer cookies, slightly underbake them and allow them to cool on the baking sheet.
• Flavor Layering: Add a pinch of salt to the icing for a balanced sweetness that enhances the overall flavor.
• Make-Ahead Strategies: Prepare dough in advance and freeze for up to three months. Thaw overnight in the refrigerator before rolling and baking.
• Restaurant-Quality Finishing Touches: Use edible glitter or gold leaf as a finishing touch on the icing for a professional look.
• Equipment Optimization: Use silicone baking mats instead of parchment paper for even heat distribution and easy cleanup.
Troubleshooting Common Issues
• Cookies Spread Too Much: This can occur if the dough is too warm. Chill the dough before baking and ensure the oven temperature is accurate.
• Icing Too Runny: If the icing is too thin, add more icing sugar until the desired consistency is reached. This can happen if too much milk is added initially.
• Uneven Baking: Ensure cookies are of uniform thickness and size. Rotate the baking sheet halfway through cooking if necessary to promote even baking.
• Burnt Edges: Reduce oven temperature slightly or check cookies earlier. This often happens if the cookies are too thin or the oven runs hot.
• Crumbly Dough: If the dough is dry and crumbly, add a teaspoon of milk or water to bind it together. This can occur if there is too much flour or not enough fat.
Variations and Regional Differences
• Italian Biscotti: This version includes almonds and is double-baked for a crunchy texture, often served with coffee.
• French Macarons: Made with almond flour and filled with ganache or buttercream, these delicate cookies are colorful and sophisticated.
• American Chocolate Chip Cookies: A classic variation that includes chocolate chips in the dough, resulting in a chewy and sweet treat.
• German Lebkuchen: A spiced version often made during Christmas, incorporating ginger, cinnamon, and nutmeg.


Food Science Behind the Recipe
• Leavening Agents: Baking powder causes the cookies to rise and become fluffy, as it releases carbon dioxide when heated.
• Maillard Reaction: The golden-brown color and complex flavors develop through the Maillard reaction, where proteins and sugars react during baking.
• Emulsification: Butter and eggs act as emulsifiers, creating a smooth and stable dough that holds together well.
Frequently Asked Questions
What's the most common mistake people make when preparing Fun Baking Recipes for Kids? Overbaking is common. It's important to remove cookies from the oven when edges are just turning golden.
Can I substitute ingredients for dietary restrictions? Yes, gluten-free flour and dairy-free butter can be used, though texture may vary slightly.
How can I make the cookies more festive? Use themed cookie cutters and colored icing for holidays or special occasions.
Is it possible to freeze the cookies? Yes, baked cookies can be frozen for up to three months. Thaw at room temperature before serving.
What if I don't have any cookie cutters? Use a knife to cut shapes or a glass to make round cookies.
How can I ensure the dough doesn't stick? Flour the rolling pin and work surface lightly, and chill dough if necessary.
What's the best way to involve kids in baking? Assign age-appropriate tasks like mixing, rolling dough, or decorating cookies.
Serving and Presentation Guide
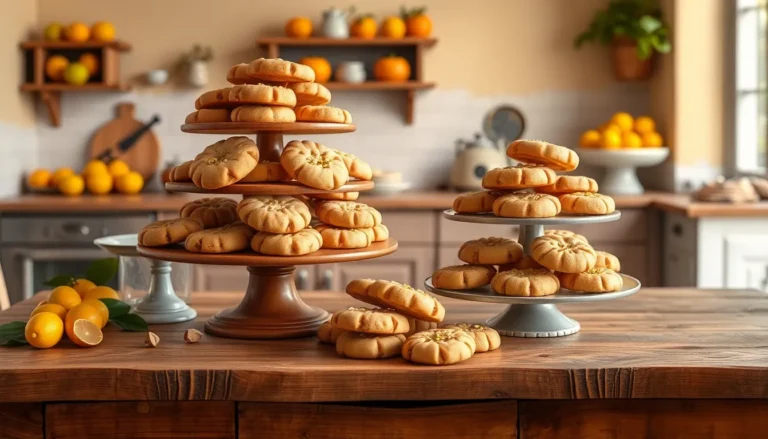
• Traditional Presentation: Serve cookies on a decorative plate or tiered tray for an elegant display.
• Gift Presentation: Package cookies in a decorative box with a ribbon for a charming gift.
• Themed Presentation: Arrange cookies in shapes or colors that match the theme of an event or holiday.
• Interactive Presentation: Set up a decorating station where guests can personalize their cookies with icing and toppings.
Conclusion
Baking with kids is a joyful and rewarding experience that offers both fun and delicious rewards.
These Fun Baking Recipes for Kids are perfect for creating lasting memories and teaching valuable skills.
Encourage creativity and experimentation, and enjoy the tasty results together.